
The software described in this documentation is either no longer supported or is in extended support.
Oracle recommends that you upgrade to a current supported release.
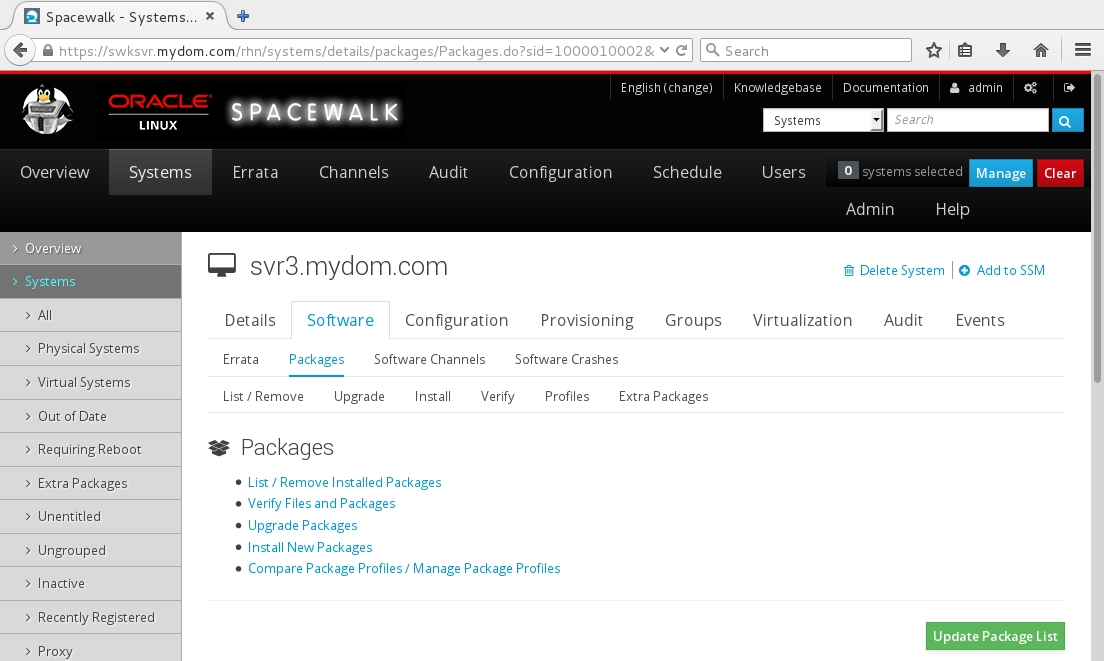
To manage packages for a system:
Go to Systems and click the system name.
Select Software.
On the Packages page, select the tab or link for the package operation that you want to perform:
- Extra Packages
The Extra Packages page displays packages that are installed on a system, but which are not present in any of the subscribed channels.
NoteIf you registered an existing system, such as the Spacewalk server itself, as a client, it is possible that some of the installed packages are not present in any subscribed channel.
If the Spacewalk server is a client of itself, Oracle recommends that you synchronize the Spacewalk Server repository and associate it with the server so that the server receives Spacewalk Server software updates.
If one or more packages should not have been installed on a system:
Select the packages that you want to remove and click Remove Packages.
On the Confirm Package Removal page, change the schedule if required, and click Confirm.
The page updates to include a link to the scheduled action.
If you have not edited the schedule and you have enabled the OSA daemon on the clients, the OSA daemon usually removes the packages immediately.
Select Events and then select the Pending or History tab to view scheduled or completed actions. Click the summary name to display the details and status of the package removals.
- Install
On the Installable Packages page, select the packages that you want to install and click Install Selected Packages.
TipUse the package filter to locate a package.
To see more information about a package, click its name.
The Details page for the package lists any errata that include the package. To find out more information about an erratum, click its name.
The Details page for the erratum lists the CVEs that the erratum fixes. To find out more information about a CVE, click its name.
On the Confirm Package Install page, change the schedule if required, and click Confirm.
The page updates to include a link to the scheduled action.
If you have not edited the schedule and you have enabled the OSA daemon on the clients, the OSA daemon usually installs the packages immediately.
Select Events and then select the Pending or History tab to view scheduled or completed actions. Click the summary name to display the details and status of the package installations.
- List/Remove
On the Removable Packages page, select the packages that you want to remove and click Remove Packages.
On the Confirm Package Removal page, change the schedule if required, and click Confirm.
The page updates to include a link to the scheduled action.
If you have not edited the schedule and you have enabled the OSA daemon on the clients, the OSA daemon usually removes the packages immediately.
Select Events and then select the Pending or History tab to view scheduled or completed actions. Click the summary name to display the details and status of the package removals.
- Profiles
On the Profiles page, you can:
Create a package profile from the set of packages that are currently installed on the system:
Click Create System Profile.
On the Create Stored Profile page, enter a name and description for the profile and then click Create Profile.
Compare the packages installed on this system with a stored package profile for this system or for another system:
In the Compare to Stored Profile section, select the profile name from the pull-down list and click Compare.
Compare the packages installed on this system with those installed on another system:
In the Compare to System section, select the system name from the pull-down list and click Compare.
- Upgrade
On the Upgradable Packages page, select the packages that you want to upgrade and click Upgrade Packages.
On the Confirm Package Upgrade page, change the schedule if required, and click Confirm.
The page updates to include a link to the scheduled action.
If you have not edited the schedule and you have enabled the OSA daemon on the clients, the OSA daemon usually upgrades the packages immediately.
Select Events and then select the Pending or History tab to view scheduled or completed actions. Click the summary name to display the details and status of the package upgrades.
- Verify
On the Verifiable Packages page, select the packages that you want to verify and click Verify Selected Packages.
On the Confirm Package Verification page, change the schedule if required, and click Confirm.
The page updates to include a link to the scheduled action.
If you have not edited the schedule and you have enabled the OSA daemon on the clients, the OSA daemon usually verifies the packages immediately.
Select Events and then select the Pending or History tab to view scheduled or completed actions. Click the summary name to display the details and status of the package verifications.