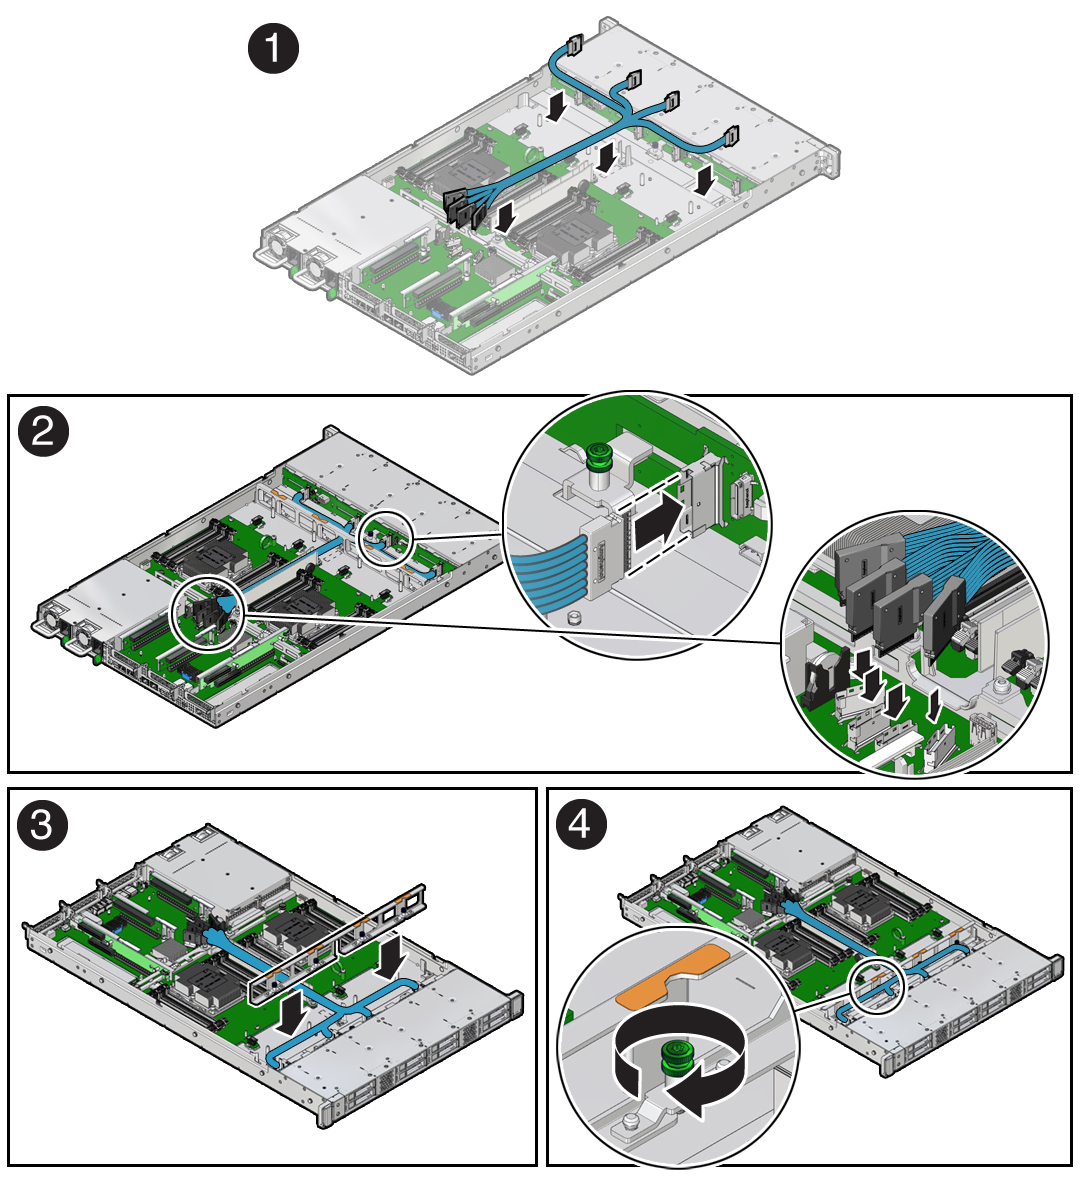
Install the NVMe Cable Assembly
-
Carefully install the NVMe cables through the center cable trough [1].

-
Connect the NVMe cables to the motherboard NVMe connectors [2].
Note - NVMe cable assembly, part number 7115195 is required to connect the motherboard NVMe connectors to the disk backplane.
Note - Each NVMe cable contains a matching label that corresponds to connectors on the motherboard and the disk backplane. For example, the NVMe cable labeled A, plugs into motherboard NVMe A connector and the disk backplane NVMe A connector.Use the following table to ensure proper NVMe cable connections.
Motherboard NVMe ConnectorDisk Backplane ConnectorStorage DrivesANVMe A0, 4BNVMe B1, 5CNVMe C2, 6DNVMe D3, 7 -
Connect the NVMe cables to the disk backplane [2].
To ensure proper connections, see the NVMe cable connections table in Step 2.
-
Install the mid-wall into the server chassis [3, 4].
-
Lower the mid-wall into the chassis.
Ensure that the green captive screws are aligned with the screw holes on the bottom of the chassis.
- Using a Torx T15 screwdriver, tighten the four green captive screws to secure the mid-wall to the server chassis.
-
Lower the mid-wall into the chassis.
-
Install all of the server fan modules.
See Install a Fan Module.
-
Return the server to operation.
- Install the server top cover.
- Return the server to the normal rack position.
-
Reconnect the power cords to the power supplies, and power on the
server.
See Reconnect Data Cables and Power Cords and Power On the Server.
- Verify that the System OK status indicator is lit.