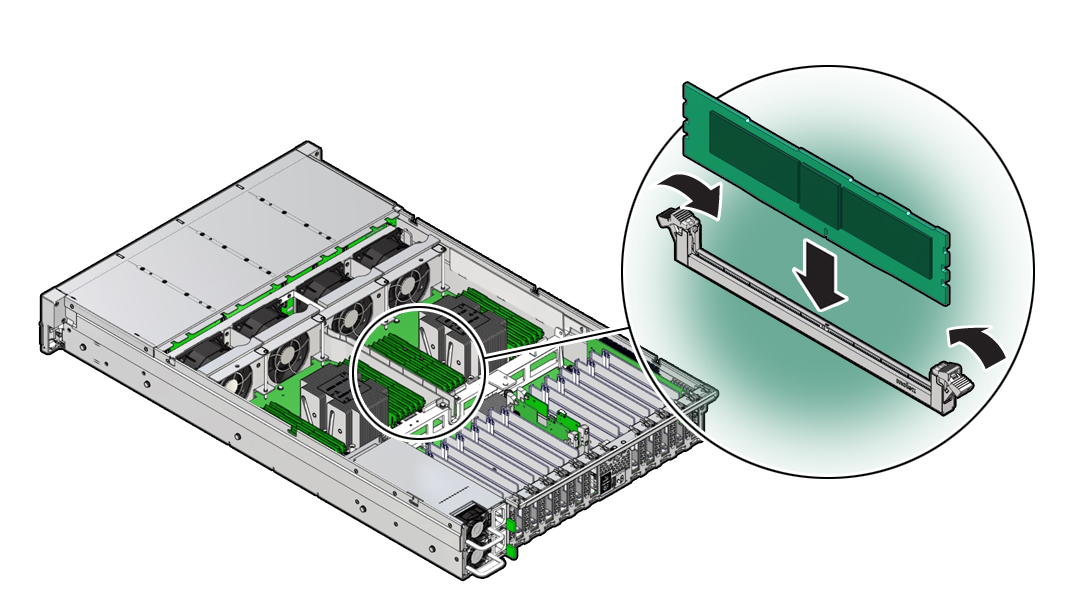
Install a DIMM
- Unpack the replacement DIMM and place it on an antistatic mat.
-
Ensure that the replacement DIMM matches the size, type, and rank of the DIMM
you are replacing.
You must not replace a quad-rank DIMM with a dual-rank DIMM and vice versa, or a DCPMM DIMM with a DDR4 DIMM. Otherwise, server performance might be adversely affected. For DIMM slot population rules, see DIMM Population Rules.
-
Install a DIMM.
- Ensure that the ejector tabs are in the open position.
-
Align the notch in the replacement DIMM with the connector key in the
connector slot.
The notch ensures that the DIMM is oriented correctly.
-
Push the DIMM into the connector slot until the ejector tabs lock the
DIMM in place.
If the DIMM does not easily seat into the connector slot, verify that the notch in the DIMM is aligned with the connector key in the connector slot. If the notch is not aligned, damage to the DIMM might occur.

- Repeat Step 3 until all replacement DIMMs are installed.
-
Return the server to operation:
- Install the air baffle.
- Install the server top cover.
- Return the server to the normal rack position.
- Reconnect the power cords and data cables to the server.
-
Power on the server.
See Power On the Server.
Verify that the power supply AC OK LED is lit.
-
(Optional - DCPMM DIMM only) Verify the status of the DCPMM DIMM(s) and that
it has been accepted by the Exadata software by running the cellcli -e
"list physicaldisk where diskType=PMEM" command from the system
console.
Ensure that the status of the persistent memory (PMEM) replacement disk (identified by either the DIMM slot or serial number) is normal.
Note - In the following example, the first column contains the disk type (in the format of "PMEM_${SOCKET}_${DIMM_SLOT}"), the second column contains the serial number, and the third column contains the status.cellcli -e "list physicaldisk where diskType=PMEM" PMEM_0_1 0x00000b96 normal PMEM_0_3 0x00001189 normal PMEM_0_5 0x00000b6c normal PMEM_0_6 0x000011ab normal PMEM_0_8 0x000009f9 normal PMEM_0_10 0x00000a37 normal PMEM_1_1 0x000009d6 normal PMEM_1_3 0x0000113b normal PMEM_1_5 0x000011bd normal PMEM_1_6 0x0000118f normal PMEM_1_8 0x00000b9e normal PMEM_1_10 0x00000ba3 normal -
(Optional) Use Oracle ILOM to clear server DIMM faults.
DIMM faults are automatically cleared after a new DIMM is installed. If you need to manually clear DIMM faults, refer to the Oracle Integrated Lights Out Manager (ILOM) 4.0 Documentation Library at http://www.oracle.com/goto/ilom/docs.
Note - If you want to move a faulty DIMM to a new DIMM slot or re-seat a DIMM for troubleshooting, you must first manually clear the associated DIMM fault. Otherwise, the DIMM fault might follow the DIMM to the new slot location or reoccur on the current slot location, causing a false DIMM fault condition.