2 Creating and Building a New Portal
This chapter describes how to create a new portal, optionally creating portal pages to immediately populate the new portal.
This chapter includes the following topics:
Permissions:
To perform the tasks in this chapter, you need the application-level permissionCreate Portals. This permission is granted to all authenticated users by default. As a portal creator, you are given Moderator role in the portal. You can create pages in a portal if you are the portal moderator or member with Basic Services: Edit Page Access, Structure and Content permission in the portal.
For more information about permissions, see Section 29.1, "About Roles and Permissions for a Portal."
2.1 About Creating a New Portal
Before you begin to create a new portal, review Planning a Portal with WebCenter Portal and Section 1.3.1, "What Is a Portal?"
WebCenter Portal provides portal templates for creating portals that support different types of endeavors. You can select a portal template when you create a new portal that provides a starting point for your portal, with built-in functionality appropriate for the portal you want to create. You can use an out-of-the-box portal template, or create your own custom portal templates using an existing portal as the basis for the template. For information about portal templates, see Chapter 3, "Working with Portal Templates" and Chapter 58, "Managing All Portal Templates." After creation, portals can be completely customized, including the navigation controls, the color scheme, and the look and feel of any task flow or portlet, all from within the browser.
When you create a portal, you become the default portal moderator, which means that you are assigned the Moderator role. In this role, you have Manage Security and Configuration permission in the portal, which provides full control over the portal presentation and content, as well as administrative responsibilities. When a new portal is created, WebCenter Portal creates default portal roles with default permissions. The portal moderator can assign portal members to these roles and modify the default permissions as required, or create new custom roles. For more information, see Section 7.7, "Administering Security in a Portal."
Note:
As a portal creator, you will always haveManage Security and Configuration permission in the portal. You retain this permission even if your default Moderator role is changed to one with fewer permissions (for example, Participant or Viewer role), or your custom role is modified to alter your permissions.If a tool is enabled in a portal template, then that tool will be enabled in any portal based on that template. When a tool is enabled in a portal in this way at the time it is created, WebCenter Portal handles any necessary configuration with the back-end server at first use, not at portal creation. This is known as "lazy provisioning" and speeds the successful creation of a new portal by deferring the provisioning of tools until they are first used. When you manually enable tools in a portal, WebCenter Portal immediately handles any necessary configuration with the back-end server. For more information, see Section 39.1, "About Tools and Services."
Any portal can be parent to one or more subportals. This allows you to develop a portal hierarchy. For more information, see Chapter 5, "Working with Subportals."
2.2 Creating a New Portal
WARNINGS:
-
If you are using Internet Explorer, turn off Compatibility Mode before trying to use WebCenter Portal to create a new portal. In Internet Explorer, from the Tools menu, select Compatibility View Settings. In the Compatibility View Settings dialog, deselect all the options, and click Close.
-
WebCenter Portal supports only single browser tab or window viewing. It will not function properly if you try to view WebCenter Portal in multiple browser tabs or windows simultaneously.
To create a new portal:
-
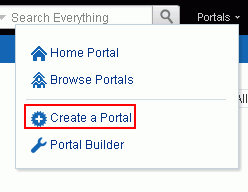
Open the portal creation wizard in any of the following ways:
-
From the Portals menu, select Create a Portal (Figure 2-1).
-
From the Portals menu, select Portal Builder to display the Portals page in Portal Builder. In the left pane, click Create Portal (Figure 2-2).
Figure 2-2 Portals Page in Portal Builder
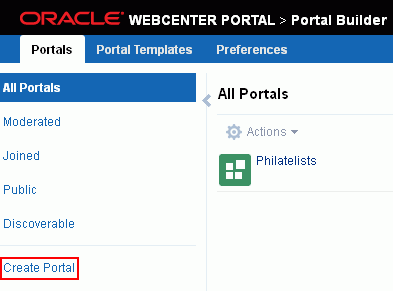
Description of ''Figure 2-2 Portals Page in Portal Builder''
-
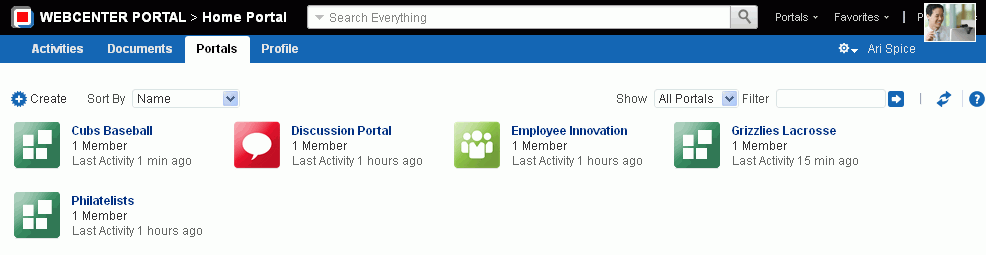
From the Portals menu, select Browse Portals to display the Portals page in the Home portal. In the toolbar, click Create (Figure 2-3).
Figure 2-3 Portals Page (Portal Browser) in Home Portal
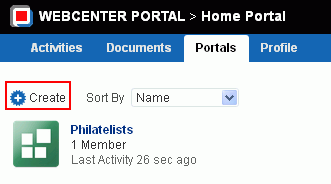
Description of ''Figure 2-3 Portals Page (Portal Browser) in Home Portal ''
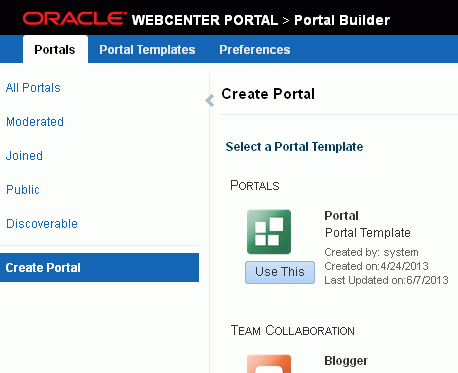
The portal template selection screen displays (Figure 2-4).
-
-
Select a Portal Template. Explore the portal templates available to you to use as the basis for your new portal, then click Use This beneath the template you want to use to display the portal specification screen (Figure 2-5).
Notes:
-
A custom portal template may include preseeded data, such as discussions, documents, lists, member information (including roles), pages, or assets. When you select such a template, the new portal includes all the preseeded data.
-
If the template you select is made private by another user after you select it, but before you have completed creating the portal, the template becomes invalid for your use and an error occurs.
-
-
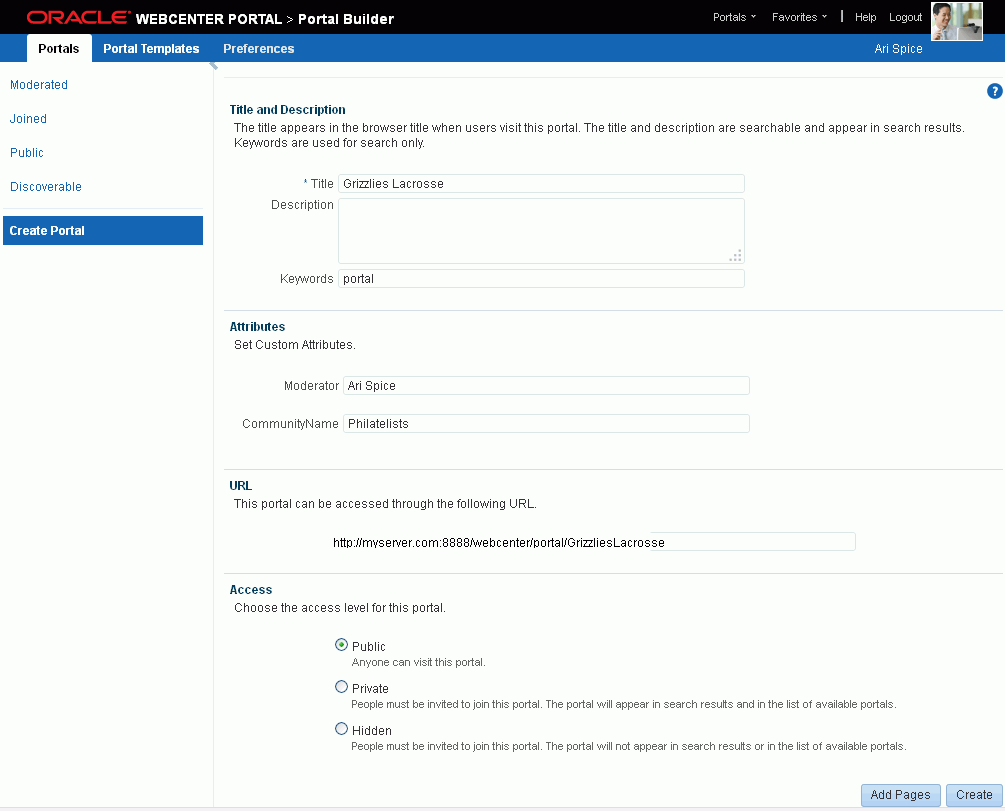
Title and Description. Modify the default portal title if desired and, optionally, enter a description and keywords for the portal. Enter any keywords related to the content of the portal to make it more easily discoverable in search results. Separate keywords with a space or comma.
The title that you enter here is the display name that displays at the top of the portal and other places where portals are available for selection, such as the Portals menu and the Portals page. Portal titles can contain alphanumeric characters, underscores, spaces, multibyte characters, and special characters such as
&and#. The maximum allowable length is 200 characters. The following reserved keywords are not allowed as the full portal name either in upper or lowercase, or a combination of both—admin,builder,group,groups,home,last,page,pages,my portals,my spaces,portal,portals,space,spaces,system,webcenter,webcenter administration,webcenter portal,webcenter portals,webcenter space,webcenter spaces. These reserved words are allowable as part of a longer name (for example,Sales Group).Note:
WebCenter Portal removes any unsupported special characters (such as-) and character spaces in the display name specified here to derive the initial internal name for the portal. For example, the TitleMy Mega-Portalgenerates the internal nameMyMegaPortal. The URL to this portal ishttp://host:port/webcenter/portal/MyMegaPortal. -
Attributes. If shown, enter values for the custom attributes for the portal.
Note:
The Attributes section displays only if the selected portal template has custom attributes defined. Figure 2-5 shows the screen when the portal template has custom attributes defined. -
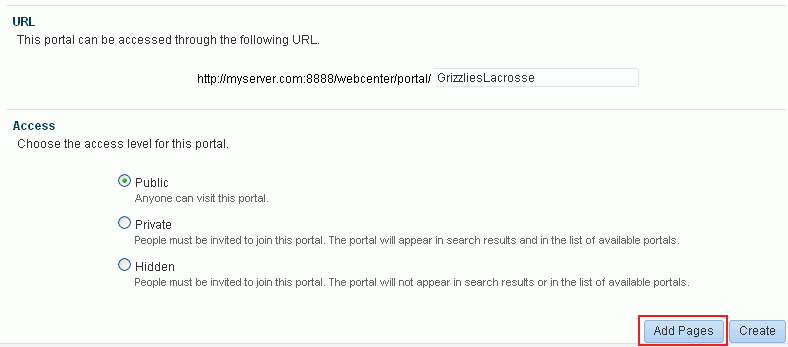
URL. Modify the default URL for the portal if desired. The internal name of the portal is derived from this field.
-
Access. Choose an access level for the portal:
-
Public (default): Anyone can visit the portal, whether they are a registered WebCenter Portal user or not. When this setting is selected, the
Public-Userrole in the portal is automatically granted permissions to view pages, lists, events, links, notes, announcements, discussions, and documents. Public users do not have edit, create, or manage permissions in the portal. -
Private: To access the portal, membership is required (either through invitation or self-registration if enabled). The portal will be shown in the list of available portals on the Portals page and will appear in search results.
-
Hidden: To access the portal, membership is required (through invitation). The portal will not be shown in the list of available portals on the Portals page and will not appear in search results.
Note:
The selected access level overrides the access level specified by the portal template that you selected. For example, if you select a portal template that specifies Public access, then select an access level of Private for the new portal, the portal is private. No public metadata is copied from the portal template, and public users have no access to the portal. Similarly, when you select a portal template that is Private or Hidden, then select Public for the new portal, public users have permissions to access pages and services in the portal. -
-
To create pages for your new portal during portal creation, the wizard provides a shortcut to creating multiple pages and subpages that are immediately available in your portal upon creation. See Section 2.3, "Creating Pages When Creating a New Portal."
-
Click Create.
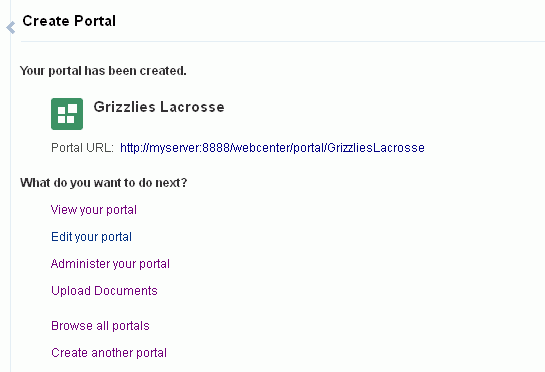
WebCenter Portal reports progress while creating the portal, and notifies you when your portal has been created, providing choices for your next step (Figure 2-6).
-
Click one of the selections under What do you want to do next?
-
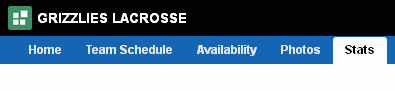
View your portal to display the Home page of the new portal, including immediate navigation to pages you created, as shown in the example in Figure 2-7.
-
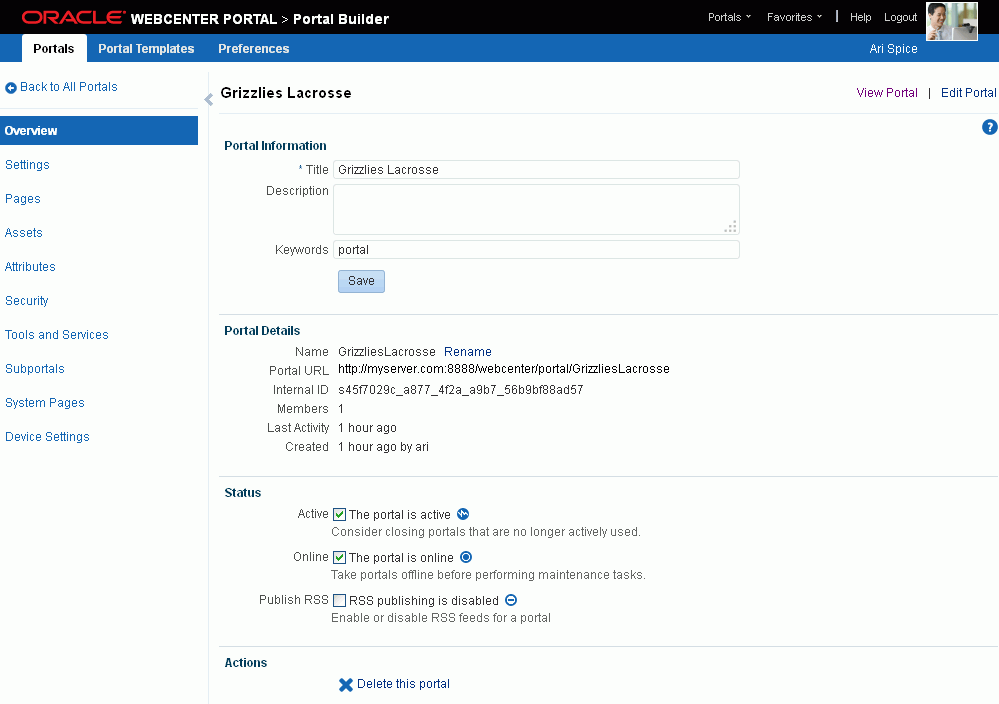
Edit your portal to open the portal in the portal editor (Figure 2-8). For information about portal editing tasks, see Chapter 6, "Editing a Portal."
-
Administer your portal to open the administration settings for the portal (Figure 2-9). For information about portal administration tasks, such as adding members to the portal, see Chapter 7, "Administering a Portal."
-
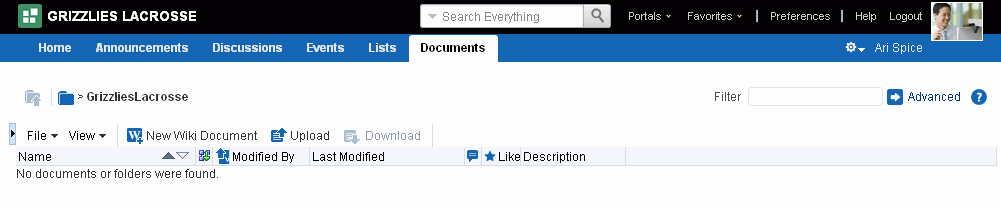
(When the Documents tool is enabled in the selected portal template) Upload Documents to display the Documents page, where you can manage and add documents in the portal. For more information, see the "Creating and Managing Documents" chapter (specifically, the section "Uploading Files") in Using Oracle WebCenter Portal.
-
Browse all portals to open the Portals page (portal browser) in the Home portal (Figure 2-11).
-
Create another portal to create another new portal.
-

As the portal creator, you are automatically granted the Moderator role for this portal, and can begin to populate, customize, and manage the portal as described in the chapters of this guide.
Any portal can be parent to one or more subportals. This allows you to develop a portal hierarchy. For more information, see Chapter 5, "Working with Subportals."
2.3 Creating Pages When Creating a New Portal
You can create pages for a new portal in-place while creating the portal, using special syntax in the portal creation wizard. To create pages for an existing portal, see Section 12.2, "Creating Pages or Subpages in a Portal."
Note:
When you create pages while creating a new portal, as described here, there is no opportunity to select a page style for the pages. If the portal template selected for the portal includes a page style called Default Page Style, then that is the page style used for all pages created in this way. Otherwise, the out-of-the-box Blank page style is applied to the pages (see Table 25-1, "Out-of-the-Box Page Styles"). It is not possible to change a page style for a page after creating the page.To create pages when creating a new portal:
-
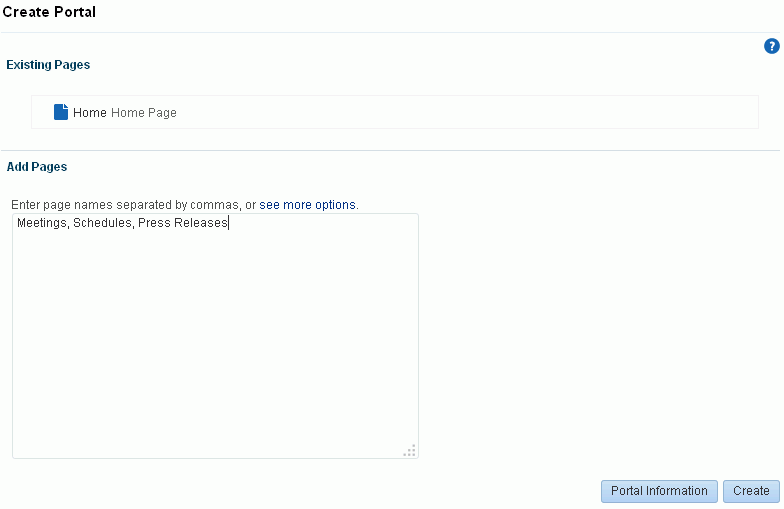
In the portal creation wizard, click Add Pages (Figure 2-12).
Figure 2-12 Creating Pages in Create Portal Wizard
Description of ''Figure 2-12 Creating Pages in Create Portal Wizard''
-
To create a set of top-level pages for the portal, type the page names separated by commas (as shown in Figure 2-13) or type the name of each page on its own line.
Note:
By default, all new portals have a Home page. The portal template you select may also include additional out-of-the-box system pages, which you will see listed under Existing Pages. For a list of all out-of-the-box system pages, see Section 7.10.2, "Working with System Pages in Portal Administration."Figure 2-13 Creating Pages in Create Portal Wizard: Basic Syntax
Description of ''Figure 2-13 Creating Pages in Create Portal Wizard: Basic Syntax''
-
Optionally, click see more options to view syntax and examples to:
-
create a more advanced page hierarchy including subpages
-
add a link in the page navigation to certain system pages
-
rename a page that came from the portal template
Type the syntax according to the on-screen instructions (Figure 2-14).
Figure 2-14 Creating Pages in Create Portal Wizard: Advanced Syntax
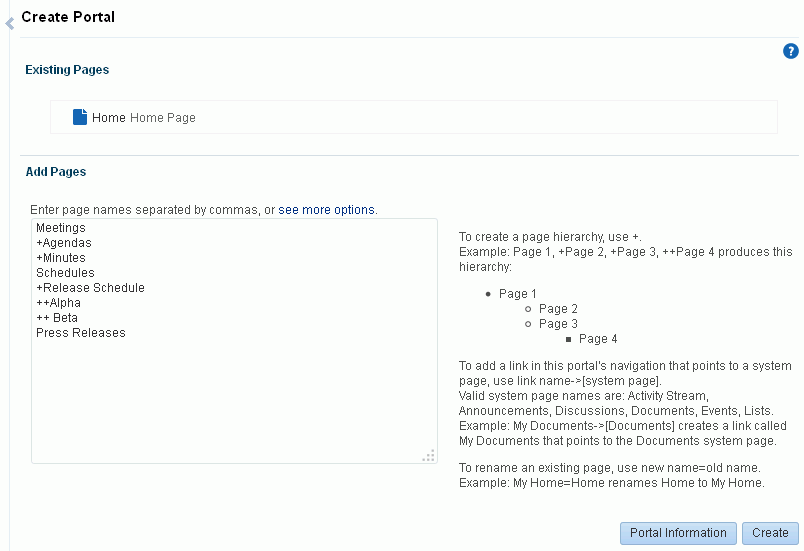
Description of ''Figure 2-14 Creating Pages in Create Portal Wizard: Advanced Syntax''
This example creates the new portal prepopulated with a page navigation as shown in Figure 2-15.
Figure 2-15 Page Navigation in New Portal
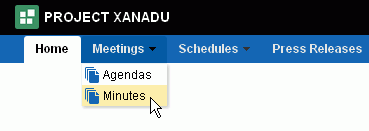
Description of ''Figure 2-15 Page Navigation in New Portal''
-
-
To revise or confirm any information entered for the portal definition, click Portal Information to return to the prior page. From there, you can click Add Pages again without losing your page specification syntax.
2.4 What's Next?
You have created a portal, and you now want to populate it. You may be in a situation where you need to set up a department portal quickly, and have content and links to add, so you can have something to show your managers before the end of the week. You have some ideas about how you want it to look, but what components and instructions do you use to accomplish your vision? Table 2-1 attempts to answer the questions you may be asking, and refers to documentation that provides the information you need.
Table 2-1 Building Out a Portal
| If I want to .... | What do I need to understand and do? | |
|---|---|---|
|
Adding Content |
Populate my portal with content (and understand what kinds of things I can add to my portal) |
Content in a portal is added to pages, which are exposed as the portal navigation items (tabs along the top of the portal, or links in a side navigation pane). The new pages that you create in a portal are independent of the portal template that you selected to create the portal. You can create a new page, and design it however you want it to look. For example, if you want it to be wiki page, you can select the Wiki Page page style in the page creation wizard. If you want to start with a blank page and add several areas to it, you can create regions on a blank page, and add desired components to each region. For information about creating a new page, and choosing a page style that exposes the page the way you want your portal users to see it, see Section 12.2.2, "Creating a Page or Subpage in an Existing Portal." For information about editing a page and adding content to it, see Section 12.4, "Editing a Page." For information about some of the components you can add to a page, see Section 23.1.1, "Built-in Resource Catalogs." |
|
Allow other users to edit a page in my portal and add content, such as links and text |
To allow other users to edit a portal page, you must give those users edit permissions on the page. Each page can be given its own set of permissions, or you can give permissions to edit all pages in the portal, then individually customize permissions for specific pages.
|
|
|
Editing the Layout and Structure of a Page |
Change the background color or image on a page |
See Section 12.4.4, "Providing Page Background Color, Image, and CSS Encoding." |
|
Change the layout of a page |
||
|
Create tabs within a page |
See Section 12.4.6, "Creating Layered Content Regions Using Tabs." |
|
|
Modifying Navigation |
In my portal navigation, create a nested hierarchy |
You can create a two-level hierarchy in your portal navigation in either of the following ways:
|
|
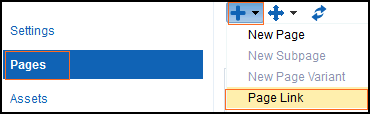
In my portal navigation, add a link to an existing page (including a wiki or blog page) in my portal |
By default, portal pages are automatically added to the portal navigation when they are created (see Section 12.2.2, "Creating a Page or Subpage in an Existing Portal"). Personal pages, system pages, and business role pages are not automatically added to the portal navigation. For information about the different types of pages in WebCenter Portal, see Section 1.3.7, "What Are Pages?" If a portal page is not shown in the portal navigation, it has likely been hidden. To show the page, edit the properties of the page and select the Visibility property. See Section 13.9, "Showing or Hiding a Page in the Portal Navigation." If you want to expose a personal page, system page, or business role page, or add a portal page to a second location in the portal navigation:
See also, Section 13.2, "Adding an Existing Page to the Portal Navigation." |
|
|
In my portal navigation, add a link to an existing page (including a wiki or blog page) in another portal, choosing whether to show or hide the other portal's navigation when viewing the page |
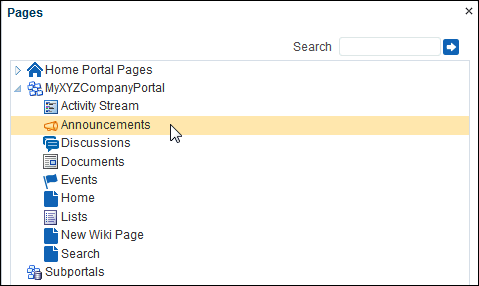
To create a link to a page that exists in the connected content repository, outside of your portal:
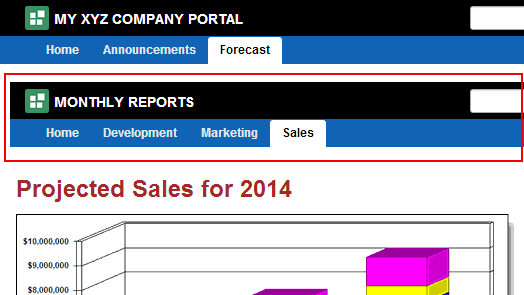
If you enter the URL of the target page as shown in the browser address field, the target page displays within its portal, as shown in this example using top navigation:
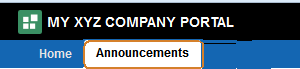
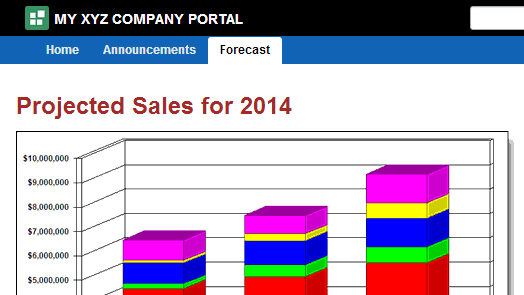
To hide the target portal navigation and show only the target page, edit the target page and copy the value of its Path property (on the Advanced tab of the page properties) into the Path field of the navigation item. When you click the navigation item, the page displays without its enclosing portal, as shown here:
Note: If you add a link to a wiki document rather than a page, you cannot use this method to hide the target portal navigation for the wiki. Instead, add a new page containing the wiki document, as described in the rows below for "Add a new wiki page to my portal (make the entire page a wiki)." Then, edit the page and copy the value of its Path property (on the Advanced tab of the page properties) into the Path field of the navigation item. |
|
|
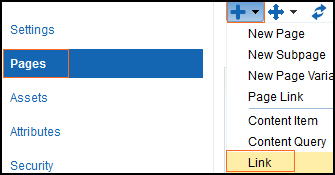
In my portal navigation, add non-page navigation items, such as content item, content query, navigation reference, folder, separator, and so on |
See Section 22.3.3, "Adding Items to a Navigation Model." Note: If you create a Content Item link to a document/wiki, the target will not expose editing controls. |
|
|
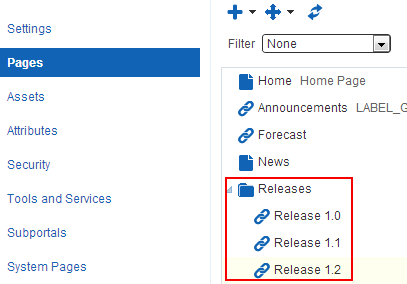
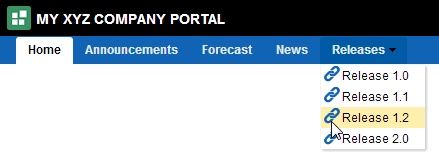
In my portal navigation, create a menu or label, which can be expanded to reveal associated target locations |
In the portal editor or portal administration, click the Add icon, and select Folder. Name the folder, then add beneath it navigation items such as page links, links, or a navigation model that you defined (see Section 22.2, "Creating a Navigation Model"). You can also drag and drop existing navigation items under the folder.
The menu is added to your portal navigation:
See also, Section 22.3.3, "Adding Items to a Navigation Model." |
|
|
In my portal navigation, rearrange pages |
See Section 13.3, "Adjusting Page Order and Hierarchy in the Portal Navigation." |
|
|
In my portal navigation, delete a page (without deleting the page itself) |
To hide a page in the navigation, see Section 13.9, "Showing or Hiding a Page in the Portal Navigation." Note: To delete a page, see "Section 13.5, "Deleting a Page." |
|
|
Change the portal navigation from side to top tabs, or vice versa |
The tabs along the top and side can be changed by simply changing the page template for the portal, overriding the page template established by the portal template that was used to create the portal. See "Section 7.3.2, "Changing the Page Template for a Portal." |
|
|
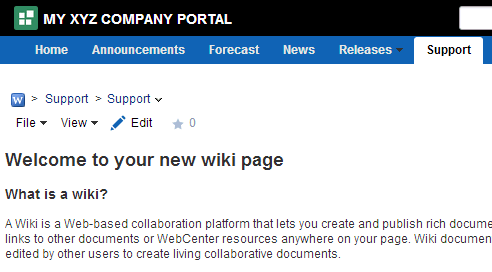
Add a new wiki page to my portal (make the entire page a wiki) |
Either:
Tip: To work with wikis, make sure that the Documents tool is enabled. See Section 39.2, "Enabling and Disabling Tools and Services Available to a Portal." See also, Chapter 37, "Adding a Wiki to a Portal." |
|
|
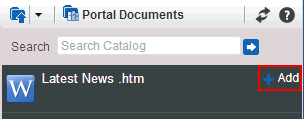
Display an existing document/wiki on a page in my portal |
Edit the page on which you want to add the document. You may wish to add the document to an area on an existing page that includes other components, or to a new blank page to have the document occupy the whole page. Use the resource catalog to add the document to the page:
You can expose the document in a number of ways: as a link, image, preview, editable view (Document Viewer), or non-editable view (Content Presenter). See Section 34.3, "Adding a Selected Folder or File to a Page" and the next two rows in this table. |
|
|
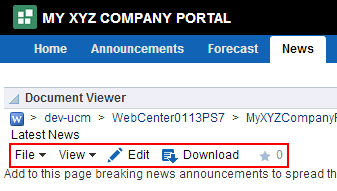
Add an existing document/wiki to a page in my portal, including editing controls |
To allow users to edit the document, add the document in a Document Viewer task flow. See Section 34.3, "Adding a Selected Folder or File to a Page."
You can customize the editing controls that are exposed using the Features Off property of the Document Viewer task flow. See Table 35-7, "Document Viewer Task Flow Parameters". |
|
|
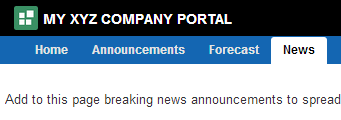
Add an existing document/wiki to a page in my portal, without editing controls |
To hide document editing controls from users, add the document in a Content Presenter task flow. See Section 34.3, "Adding a Selected Folder or File to a Page."
Note: You can expose the page in the portal navigation using a Page Link. Another way to expose a document/wiki in the portal navigation, without editing controls when it is viewed, is to add it as a Content Item to the portal navigation. See Section 22.3.3, "Adding Items to a Navigation Model." |
|
|
Controlling Default Focus |
Move focus to the top of a target document/wiki from the default focus at the bottom (Comments tab), removing all tabbed panes at the bottom. |
In the page editor (Composer), click the Add to the Features Off property: |
|
Sharing a Portal and Portal Activities with Others |
Add users to my portal to establish the portal membership |
See Section 30.3, "Setting Up Membership Options for a Portal." For more information about portal roles and members, see Chapter 30, "Managing Members and Assigning Roles in a Portal." |
|
Invite users to my portal, giving them the option to become members |
See Section 30.3, "Setting Up Membership Options for a Portal." For more information about portal roles and members, see Chapter 30, "Managing Members and Assigning Roles in a Portal." |
|
|
Broadcast messages to all portal members |
Add an Announcements task flow to a page or add the Announcements page in the portal navigation (Page Link). For more information, see Chapter 43, "Adding Announcements to a Portal." Tip: To work with announcements, make sure that the Announcements tool is enabled. See Section 39.2, "Enabling and Disabling Tools and Services Available to a Portal." |
|
|
Provide a discussion forum for portal members to pose questions and discuss answers |
Add a Discussions task flow to a page or add the Discussions page in the portal navigation (Page Link). For more information, see Chapter 46, "Adding Discussion Forums to a Portal." By default, WebCenter Portal creates a single discussion forum for a new portal after discussions is enabled. You can optionally modify the default setting to allocate multiple discussion forums to the portal. See Section 46.3, "Modifying Discussion Forum Settings for a Portal." Tip: To work with discussions, make sure that the Discussions tool is enabled. See Section 39.2, "Enabling and Disabling Tools and Services Available to a Portal." |
|
|
Display an events calendar Display my personal Outlook calendar |
To view portal events on the Events page or task flow, see Section 44.5, "Showing Events on the Events Page in a Portal." To view portal events from other portals, see Section 44.6, "Displaying Multiple Calendars in an Events Task Flow." If you use Microsoft Exchange 2003 or 2007, you can maintain a calendar of your personal events, external to WebCenter Portal events, that you can include on a page in the Home portal. For more information about logging in to your personal calendar, see Section 44.4, "Showing Events on a Page in the Home Portal." Tip: To work with events and calendar, make sure that the Events tool is enabled. See Section 39.2, "Enabling and Disabling Tools and Services Available to a Portal." |
|
|
View the activities of members |
To add an activity stream or recent activities to a portal, see Chapter 41, "Adding Activities to a Portal." |
|
|
Provide surveys for portal members to take |
To create, manage, and analyze polls, see Chapter 52, "Adding Polls to a Portal." |
|
|
Get RSS feeds |
To publish content from WebCenter Portal or view news feeds from external sources on your portal pages in an RSS viewer, or both, see Chapter 54, "Adding RSS Feeds to a Portal." Tip: To enable RSS, see Section 7.2.7, "Enabling or Disabling RSS News Feeds for a Portal." |