This first phase covers the discovery and registration part, meaning how you discover the container of the storage elements you intend to use in your environment.
Depending on the selected storage type and plug-in, you may be required to enter additional information than shown in this example (which uses an ISCSI SAN server) when registering your storage array, as shown in the following table.
Table 6.2 Required Information for Registering Different Storage Types
Information Field Required | Generic iSCSI | Vendor-specific iSCSI | Generic Fibre Channel | Vendor-specific Fibre Channel |
|---|---|---|---|---|
Access host and port | Yes | Yes | No | No |
Access credentials/CHAP | No | Optional | No | No |
Administration information | No | Yes | No | Yes |
Plug-in private data | No | Optional | No | Optional |
To discover a storage array:
Make sure that your storage server exposes raw disks (Fibre Channel SAN volumes, iSCSI targets and LUNs) to the storage network of your server pool.
Select the Storage tab.
Click Discover SAN Server
 to start the Discover SAN
Server wizard.
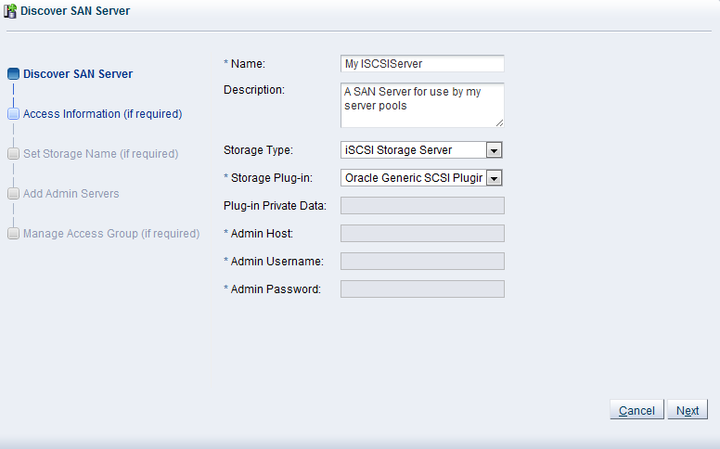
The Discover SAN Server step is displayed in the wizard, where you enter the information necessary for Oracle VM Manager to discover the external storage elements.
Enter the SAN storage information:
Name: The name you wish to use to identify the SAN server.
Description: Optional information you would like to add about this SAN server.
Storage Type: The array is either a fibre channel or an iSCSI storage server.
Storage Plug-in: The storage plug-in corresponding to the type of storage array, which is either generic iSCSI, or a vendor-specific iSCSI or fibre channel plug-in. As Oracle VM Storage Connect plug-in are located on the Oracle VM Servers, this field is only populated if you have already performed Server Discovery. You cannot add storage without taking this step first.
Plugin Private Data: Any vendor-specific Oracle VM Storage Connect plug-in data that may be required. This is not available to generic storage.
NoteWhen registering a vendor-specific storage array, be sure to double-check the information you entered in the plug-in private data field. Once the storage array is registered, this field can no longer be modified. If you need to update the plug-in private data, you must unregister and re-register the storage array.
Admin Host: The host name or IP address of the administration host. This is not available to generic storage.
Admin Username: The admin host username. This is not available to generic storage.
Admin Password: The password for the admin user. This is not available to generic storage.
Click Next.
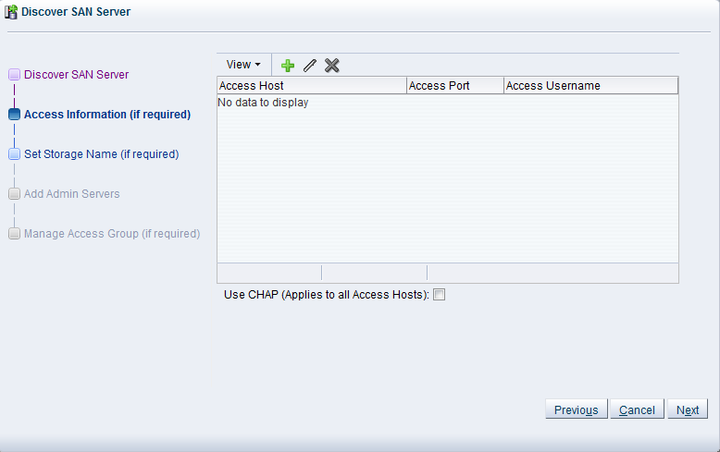
The Access Information step is displayed in the wizard. This is not applicable to Fibre Channel storage arrays.
An access host is the IP address of the network interface that has access to the SAN server and creates a network path to the storage. In this dialog enter one or more access hosts to create network paths to the storage. To add multiple paths (for multipathing), add multiple access hosts. You must have at least one access host to the storage. On some ISCSI servers, only one access host is supported, so your screen may differ from the example in this step. If so, enter the access host IP address, access port and optionally the CHAP authentication details on the screen that you see, and the remaining parts of this step are not required to perform.
If you want to use CHAP authentication to connect to the SAN server, check the Use CHAP check box.
Click Create New Access Host
 to add access hosts for the SAN server.
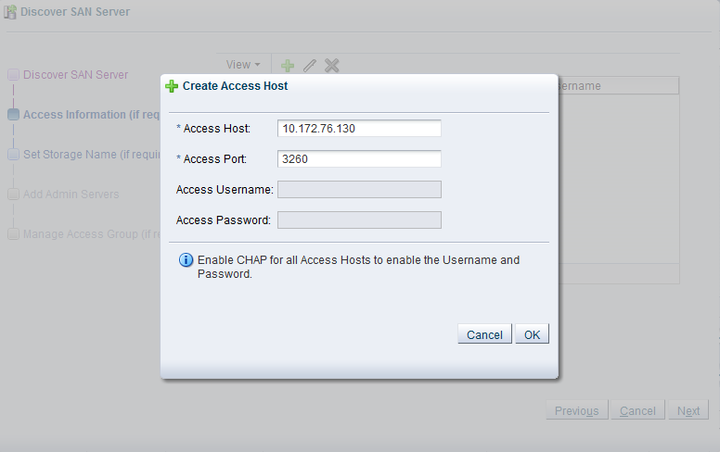
The Create Access Host dialog box is displayed.
Enter the IP address and access port of the host that has access to the SAN server. The default access port for iSCSI is 3260. If you checked CHAP authentication in the previous dialog, enter the username and password to access the storage. Click OK.
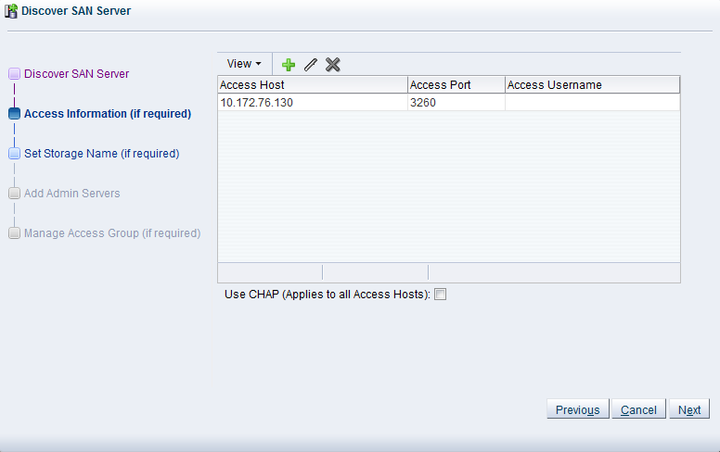
Repeat this step for each access host, for example, you may have access hosts such as 10.172.76.130, 10.172.76.131, 10.172.77.130, and 10.172.77.131 to enable multipathing.
When you have entered all access hosts, click Next.
For most SAN servers the wizard moves straight to the Add Admin Servers step. However, if you have vendor-specific storage hardware with an admin host handling more than one storage array, such as certain HP EVAs and EMC arrays, you must enter the name of the array to be used for the new SAN server. The wizard recognizes this type of storage and displays the Set Storage Name step when applicable. Enter the storage name and click Next.
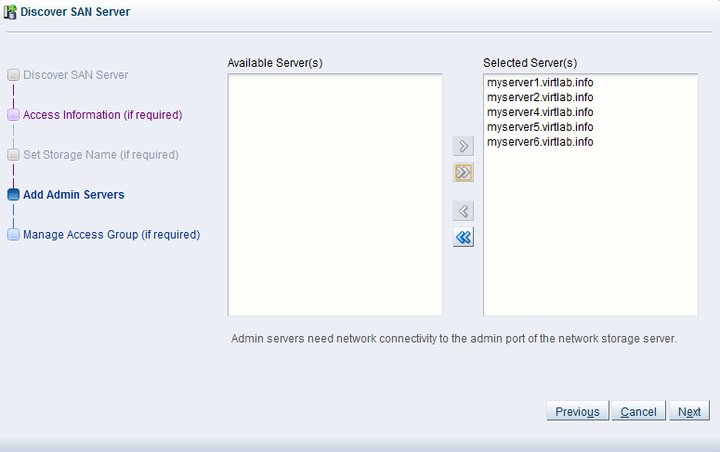
The Add Admin Servers step is displayed in the wizard. If you are working with a non-clustered server pool, you may skip this step.
Use the arrow buttons to move the required Oracle VM Servers from the Available Server(s) box to the Selected Server(s) box. This selects which Oracle VM Servers are to be made available to perform Oracle VM related admin operations on the SAN server. Click Next.
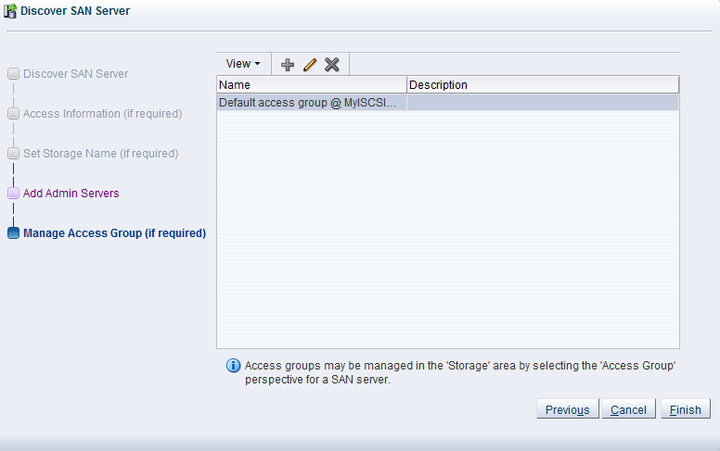
The Manage Access Group step is displayed in the wizard.
This final phase of the wizard offers you the access group configuration functionality. Within an access group you add the storage initiators to Oracle VM Servers to complete the storage configuration.
ImportantYou must add a storage initiator to an access group for each Oracle VM Server that you want to access the SAN server. If you do not add any storage initiators, Oracle VM cannot log in to the storage array and no LUNs can be accessed.
A default access group may be created during the discovery process.
If no access group exists, you can create one from this dialog by clicking Create Access Group
 .
.
If you want to modify an existing access group for use with this SAN server, select it from the list and click Edit Access Group
 .
.
If necessary, you can delete an access group by clicking Delete Access Group

This example uses a generic ISCSI SAN server, so a default access group is created. Select the default access group in the table and click Edit Access Group
 , then select the Storage
Initiators tab in the Edit
Access Group dialog box.
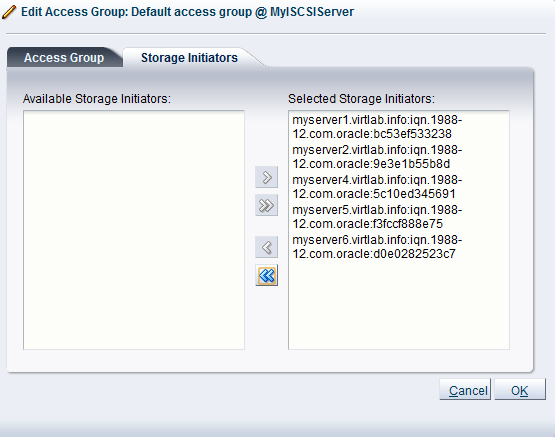
Select and move the Oracle VM Servers into the Selected Storage Initiators box to add storage initiators to each Oracle VM Server. Click OK.
The access group management functionality is also available outside this wizard. To access it, you must go to the Storage tab, select a SAN server in the navigation pane, and change the Perspective field in the management pane to Access Groups, as described in Section 6.6.4, “Access Groups Perspective”. Access group management for an individual Oracle VM Server is also described in Section 3.5.7.1, “View Access Groups for Selected Initiator”.
Click Finish to complete the SAN server discovery operation.
The new storage array appears in the navigation pane, under SAN Servers. Prior to the access group configuration, the Oracle VM Storage Connect plug-in established a link to the storage location. By configuring the access group(s), you grant one or more Oracle VM Servers access to the storage array, so that the storage elements or physical disks offered by the SAN server appear in Oracle VM Manager. Access group configuration and management is described in detail in the next section. The exception to the rule is the fibre channel storage array, which does not use the concept of access groups but offers its LUNs to all Oracle VM Servers connected to the fibre channel storage network.
NoteIf you configured CHAP authentication for your SAN server and CHAP is not properly configured on your SAN storage device, or the authentication credentials that you provide for your Access Groups are incorrect, none of the LUNs or physical disks available on your SAN server are discovered and no error message is returned. You may need to check the logs on your SAN server to evaluate the required action that should be taken.


