
When you add a DMZ Interface on the Network tab, the Default User Group – DMZ is automatically created on the User Groups tab. To define or change the definition of this User Group, select the group and click Edit.
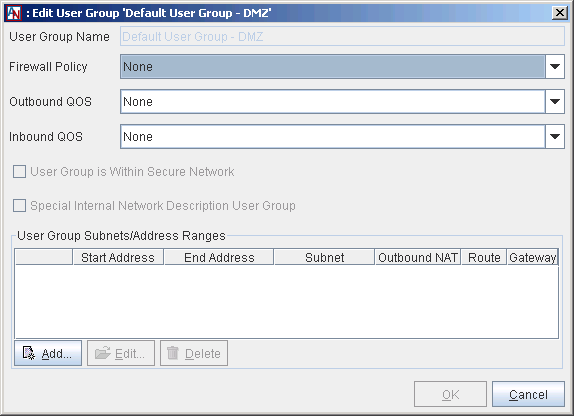
The Edit Default User Group – DMZ screen will be displayed. Fill out the fields as follows:
User Group Name: This name will be Default User Group – DMZ by default and cannot be changed.
Firewall Policy: Choose a Firewall Policy from those that you have defined for your domain from the pull-down menu to enable this policy for all traffic inbound to and outbound from all of the machines within the Default User Group – DMZ.
Outbound QoS: Choose a QoS entry from those that you have defined for your domain from the pull-down menu to enable the entry for all traffic outbound from the machines within the Default User Group – DMZ.
Inbound QoS: Choose a QoS entry from those that you have defined for your domain from the pull-down menu to enable the entry for all traffic inbound to the machines within the Default User Group – DMZ.
User Group is Within Secure Network: This selection will either be selected or deselected based upon your choice in the DMZ Within Secure Network? dialog box that was shown when you enabled the DMZ Interface on the Network tab, and cannot be changed. If this box is selected, all of the members of this User Group will be available to share as local machines with partners across the Corente Services network.
Special Internal Network Description User Group: This option is unavailable.
User Group Subnets/Address Ranges: If you used the Add Address Range dialog box to add the entire DMZ subnet to the Default User Group – DMZ, then this table will be prepopulated with an entry containing the entire DMZ subnet. You can edit any entries by selecting the entry and then selecting the Edit button, delete entries by selecting the entry and then selecting the Delete button, or add address ranges to this table by clicking the Add button.
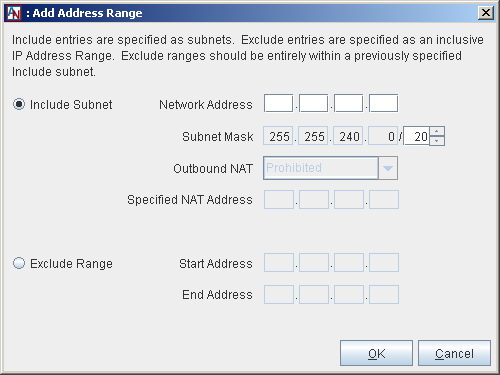
On the Add Address Range screen that is displayed when you select Add, begin by selecting whether you will be Including an entirely new subnet within the Default User Group – DMZ or Excluding an address range from a previously included subnet.
If you are Including a subnet, enter the following:
Network Address: The IP address of the subnet.
Specified NAT Address: This option is unavailable.
Subnet Mask: The network mask for the subnet.
Outbound NAT: This option is unavailable.
If you are Excluding an address range, enter the following:
Start Address: The first IP address in the range.
End Address: The last IP address in the range.
Click OK to add the Include or Exclude to the Default User Group – DMZ definition.
When you are finished defining the Default User Group – DMZ, click OK to save your changes.
If your Default User Group – DMZ is not participating in the secure Corente Services network, you can define subsets of the User Group that are included in the secure network and that can be shared with partners. Add a new User Group containing DMZ addresses, with the User Group is Within Secure Network option selected.
To refine access permissions, you can create additional User Groups that are subsets of the Default User Group – DMZ and you can register applications provided by DMZ servers on the Applications tab of the Location form. These additional User Groups and applications can be used to create tubes that define specific access permissions.