6.8 How to Replace the Keyswitch/Power Button/LED Cable
6.8.1 Before You Begin
Complete this task:
6.8.2 What to Do
-
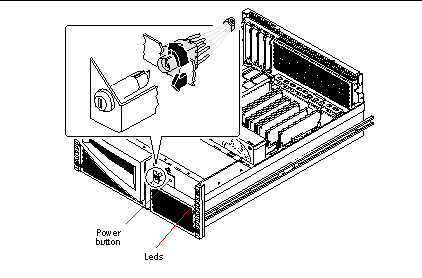
Route the keyswitch and power on-off cables to their positions in the front of the chassis.Attach the keyswitch cable to the keyswitch assembly.
-
Align the post on the keyswitch with the socket in the connector.
-
Gently insert the keyswitch into the connector.
-
Rotate the keyswitch in the connector until the tabs on the keyswitch snap into place.
The long tab on the keyswitch should lock into the corresponding groove on the cable connector when the keyswitch is properly seated in the connector.

-
-
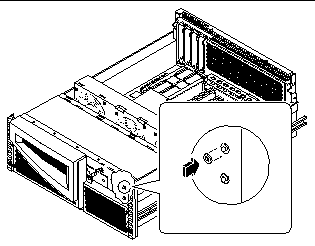
Position the Power button in the chassis.
-
Replace the 3/16ths-inch nut on the front of the Power button.
-
Insert the plastic LED friction-fit collars into their cutouts on the chassis.

-
Insert the LEDs into their friction fit collars on the chassis.
The green LED goes in the top collar. The yellow LED goes in the bottom collar.
-
Connect the keyswitch/power button/LED cable to connector J0500 on the power distribution board.
6.8.3 What Next
To reassemble the system, complete these tasks:
- © 2010, Oracle Corporation and/or its affiliates
