How to Install the Locking Screws
Before You Begin
Install the server in the rack, as described in Installing the Server in a Rack Using the Universal Rack Mounting Kit in Sun Fire X4800 Server Installation Guide.
-
From the rear of the server, insert the screw (1)
through the rack (2) and the rear mounting bracket (3)
so that it protrudes from the mounting bracket just
above the flange on the shelf rail (5).
-
For a round hole (tapped) rack, use either an M6 x 12 or a 10–32 x 7/16 screw.
-
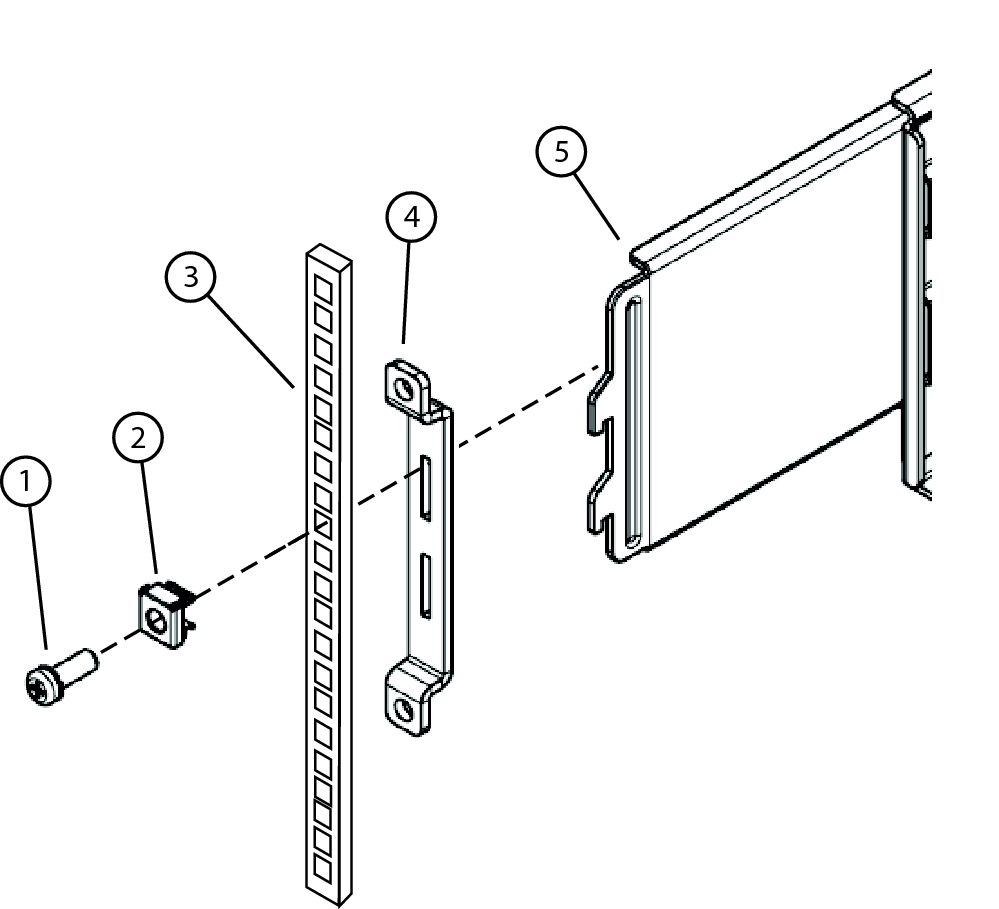
For a square hole (untapped) rack (shown below), use an M6 cage nut (4) and an M6 x 16 screw.
The following figure shows the details for a square-hole (untapped) rack.
Note - The shelf rails must be inserted into the mounting bracket before performing this procedure. They are shown separated in this picture to highlight the alignment. Figure Legend1Screw2Cage nut (used for square hole racks only)3Rack4Rear mounting bracket5Shelf rail
 -
- Repeat Step 1 for the other side.