We created an administrator for Motorprise, Samantha Gresh, who can create new organizations. You can log in as her and explore the process for adding new organizations.
Log into the ATG Control Center using “profileadmin” as your user name and password.
Samantha only has access to certain areas of the ATG Control Center. For example, she cannot view and edit pages and components or scenarios.
Samantha only has access to certain parts of the ATG Control Center.
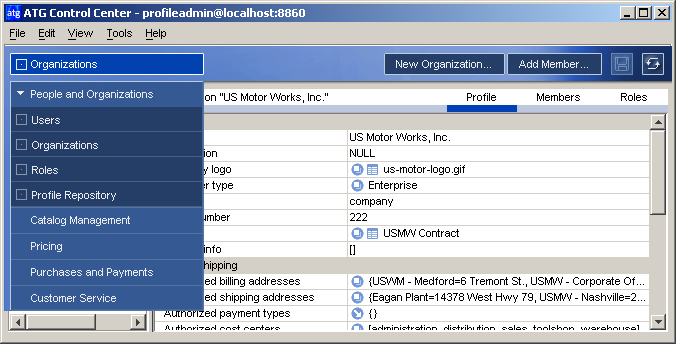
Select People and Organizations > Organizations. The Organizations window appears.
In the left pane of the window, select Customer Organizations from the organization tree on the left.
You must select Customer Organizations because the new organization account will be a top-level organization. It will be the parent organization of any subsequently created suborganizations. If you had selected an existing organization, such as US Motorworks, Inc., then the organization you are creating would be a sub-organization of USMW.
Click the “New Organization” button on the top right of the screen. The New Item dialog box appears, listing the organization attributes.
Specify values for this organization’s profile properties. Properties with an asterisk are required. Other properties are optional.
Enter the following information:
Company name
Customer type (Enterprise, Preferred, or Standard)
Type (Since this is a new account, select Company. The other options are for sub-organizations.)
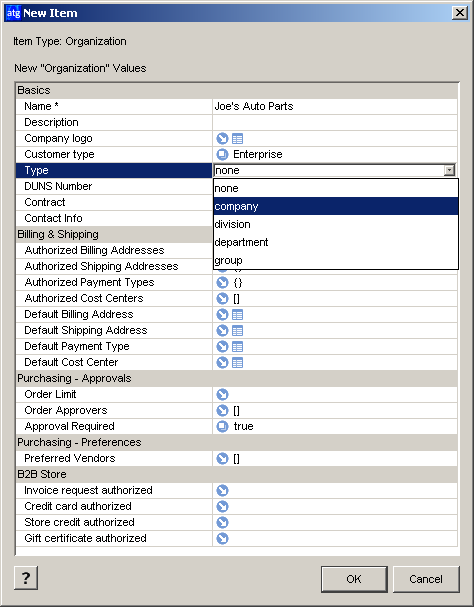
Click OK.
Notice the icons next to the “Company logo” field.
![]() identifies a derived property with an inherited value. Sub-organizations will inherit this property from the parent organization. In this case, the organization you are creating is itself the parent, so it will not inherit this property.
identifies a derived property with an inherited value. Sub-organizations will inherit this property from the parent organization. In this case, the organization you are creating is itself the parent, so it will not inherit this property.
![]() identifies a property that references (links to) another repository item. This field will be filled by a repository item rather than a string you enter.
identifies a property that references (links to) another repository item. This field will be filled by a repository item rather than a string you enter.
Notice the icon next to Customer Type:
![]() identifies a derived property value that has been overridden locally. This property is set specifically for this organization and is not inherited.
identifies a derived property value that has been overridden locally. This property is set specifically for this organization and is not inherited.
When there is no icon on a property field, it means that the property cannot be inherited from a parent organization.
Creating a contract
A contract associates a customer with a catalog and a pricelist.
Select the organization you just created.
Highlight the “Contract” field and click the “...” button.
Click New Item from the dialog that comes up. Fill in the following properties:
Name
Catalog : Click the “...” button, then the List button in the dialog that comes up. Select the Base Catalog, or create a new customer catalog by adding subcatalogs to the new one you create. See the B2B Personalization chapter of this guide for more details.

Pricelist: Click the “...” button, then the List button in the dialog that comes up. Select the Default Price List. See the Creating Price Lists section in the B2B Personalization chapter of this guide for more details.
Click OK.
You can now enter additional information to the organization profile.
Entering Addresses
Select an address field such as “Authorized Billing Addresses” and click the “...” button.
Click the Add button and then the New Item button.
Enter the address information and then click OK.
Enter a name for the new address. This name will be a key in the address table.
Click OK on the address dialog.
Entering Payment Types
In Motorprise, the payment types used are credit cards and invoices. If the new organization uses credit cards, you can enter them. If you enter a credit card, you must also set the organization’s “Credit Card Authorized” field to true. If the company uses only invoices, do not enter any credit cards and set “Invoice Request Authorized” to true and “Credit Card Authorized” to false.
If the company uses cost centers, you can enter those. (Don’t select from the existing cost centers because they belong to other organizations. In the Company Admin section of the Motorprise site only cost centers that apply to that organization will appear.)
If the company uses an approval process, set the “Approval Required” field to true and enter a dollar amount in the “Order Limit” field. An order limit of 0 will make all orders require approval. You will specify the order approvers later after you have created those users and assigned their roles.
