The Link Operating Hours menu is populated with hour sets created on the Hours of Operation page. You can select a previously-created hour set from this menu or go to the Hours of Operations page to create a new hour set. Once created, you can then select the new hour set from the Link Operating Hours menu for the link you choose.
The Operating Hours page allows you to set up custom hour sets that define when your call center, agents, or business is open and closed. An hour set can then be assigned to any Click-to-Call link and made available only during business hours specified in the hour set.
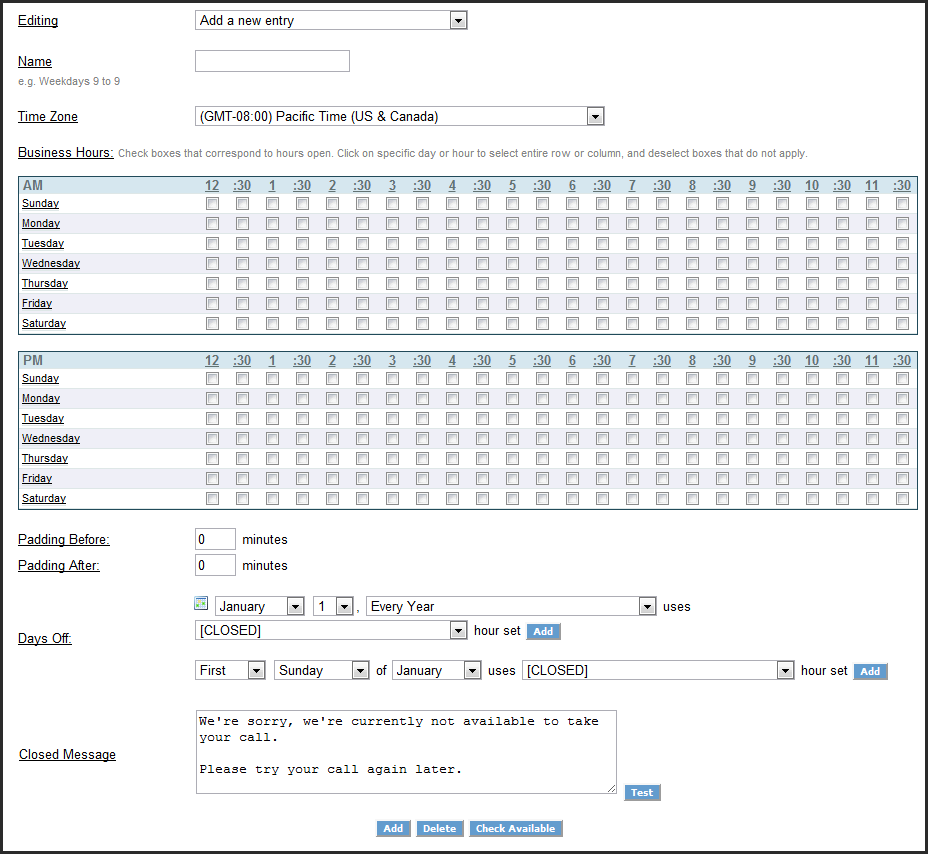
The Hours of Operations page is located in the Setup menu, by clicking Operating Hours. At this point, you can either select a previously-created hour set from the Editing menu or you can create a new hour set.
To use the Operating Hours page:
From the Editing menu, select Add or select any of the previously-created hour sets.
Note: If you select a previously-created set, a graph is displayed showing you how this hour set is configured.
Create or edit the hour set name.
Select a time zone.
Under Business Hours, select or clear the check boxes to identify your hours of operation, both AM and PM.
Add time padding before and after the time periods set under Business Hours. This opens the links for your call center or call agents a little before or after your designated times. Leave the fields at zero if you do not want any padding.
Use the Days Off section to designate holidays for your company. Use the menus to select a specific date, or a week, day, month of the Day Off. Select the Closed hour set or another set that has been previously-created. Click Add to place the Days Off date into the Day Off list.

Selecting an hour set for a specific call link is done under Link Operating Hours in Link Builder. On the Link Customization page for your chosen link, do the following:
Click Advanced Features.
In the Button Visibility section, from the Link Operating Hours menu, select the hour set you want to use for the link.
