Push – Designing a campaign
Note: The Push Campaign Workbook now has an updated interface and is now called the Push Campaign Designer. Campaign Designer is now enabled for all accounts, and it replaces Campaign Workbook for this channel. Unlike the Campaign Designer, there were no major changes made to the Message Designer's interface.
Important: This feature is only available if it is enabled for your account.
In this step, you use the Push Message Designer to create and edit messages and set up campaign options. For a description of the Push Message Designer, see Push Message Designer Overview.
Tasks:
- Creating messages
- Sending the message to the message center
- Selecting the way the app responds on notification opens
- Using Rich Messages
- Adding dynamic content rules to your rich message
- Adding Interactive Notification buttons
- Selecting settings
- Enabling link tracking and external tracking
- Previewing the message
- Using the toolbar buttons
Creating messages
By default, you create one global message for all platforms that the app supports. Optionally, you can create a different message for each platform (iOS, Android, and Windows). If you do not create a platform-specific message, the global message is used for that platform.
To set a title: Type the title in the field provided. The character limit is 2,048 characters. Additionally, you can also include personalization and emojis in your title. Titles are supported for mobile apps on Android and iOS 8.2 or later.
To support titles for Android, mobile apps must integrate with the Responsys Mobile App SDK for 19A (6.40.0) or later. Consult with your mobile app development team if you have questions about whether the app you are using for your campaign supports titles.
The character limits are 2,048 characters, but the primary purpose of the higher limit is to enable marketers to use RPL. The actual number of characters that can be displayed on a device is much lower. If marketers add a long title of 500 characters, all 500 characters will not display on the device. Only a limited number of characters will show (this limit varies by device).
To create a push notification message: Type your message on the canvas.
As you create your message, the right pane shows a Live View of how the message will appear on a device. Note that this preview does not show personalization.
Tip: Use the  toolbar button to personalize the message.
To create a message for a specific platform:
- Click Add platform.
The Select Platform dialog opens.
- Select the platform you want.
Tip: To create one message for all platforms, select the Select all checkbox.
A tab for each selected platform appears in the Message Designer.
- Click the tab you want and create your message on the canvas.
Sending the message to the message center
Important: This feature is only available if it is enabled for your account.
If your app includes one or more message centers, you can send your message to the message center in addition to a push notification. Please contact your app developer to find out whether the app includes message centers. To retrieve message center messages from Oracle Responsys, your app developer also needs to integrate with the Responsys Mobile App SDK. If you want to send your message to a message center directly without sending a push notification, create a Message Center Campaign instead.
Note: When you send your Push notification message to your app's message center as part of your Push campaign, Oracle does not charge for an extra message. Your account is billed for only one Push campaign message, even though the Push campaign message is sent twice (once as a Message Center message and once as a Push notification).
When you choose to send a message to a message center, the message is available for retrieval by the app when the campaign is launched. The message is available for retrieval indefinitely or until the expiration date you specify.
Note: The information shown in the message center depends on the way it is designed. For example, if you specify a message icon, it will be displayed only if the message center supports icons. Please contact your app developer to find out which fields the message center supports.
To send a message to the message center:
- Click
 next to Send to message center.
 - In the Message center dialog, select Yes.
- Enter the message subject.
This field is required. This is the subject that will be shown in the message center.
- In the Destination Message Center list, select the message center to which messages are sent.
The list shows all message centers created by the app developer for the app.
- In Message icon field, type the location of the icon to display for the message.
The icon will be shown only if the message center supports icons.
- Optionally, specify the message expiration date and time.
The message will be available for retrieval by the app until the specified expiry date. If you do not specify an expiry date, the message is available for retrieval indefinitely.
-
Optionally, select the whether or not the push message should also affect the app icon's badge count. Click the App Icon Badge drop-down list and select one of the following actions:
- No Badging: Campaign will not modify the badge count on the mobile app icon.
- Increment Badge on App Icon: Every time this message is sent to the Message Center on the user's device, the badge count on the app icon will increase by 1.
Important: The following options are available only if they are enabled for your account. To enable them, go to My Oracle Support and create a service request (SR) to have the "App Icon Badging for Message Center" feature enabled.
- Specify Badge on App Icon: Every time this message is sent to the Message Center on the user's device, the badge count on the app icon will change by the amount you specify.
When you choose this option, you'll be prompted to enter a Badge Count. You can use either a single value for all recipients (positive integer), or you can personalize the badge count using RPL. For example, you can use RPL to get the personalized badge count of each individual recipient's offers, promotions, coupons, and the like within the mobile app, and then show that value as the badge count on the app icon.

- Clear Badge on App Icon: Every time this message is sent to the Message Center on the user's device, the badge count on the app icon will be cleared.
Important: Before implementing badge counts, apps must implement logic to clear the badge count on the app icon. See the Mobile App Configuration Guide for instructions.
- Click Done.

Selecting the way the app responds on notification opens
You can select one of the following options from the Notification Action list:
- Launch App
Opens the app. You can add Interactive Notification buttons to campaigns that launch an app. - Open URL
Opens the specified URL. You can add Interactive Notification buttons to campaigns that open a URL. - Open Rich Message
Opens a Rich HTML message
Adding Interactive Notification buttons
Important: This feature is available only if it is enabled for your account.
Learn more by watching the video!
You can add Interactive Notification buttons to campaigns that launch an app or open a URL.
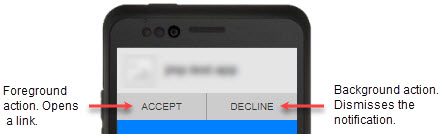
Interactive Notification buttons allow your users to take specific actions, such as Buy now or Add to wish list, and to express preferences, such as Accept or Decline.
A click can either open the specified link (the foreground action), or dismiss the notification (the background action).
Oracle Responsys offers the following Standard Interactive Notification buttons.
Ensure that you use only those Standard Interactive Notification buttons supported by your mobile app. Each button requires that your mobile app uses a Responsys Mobile App SDK version that supports the button.
In the following list, we have noted which SDK versions support the buttons. To find out which version of the SDK your mobile app uses, please contact your mobile app development team.
- Accept OR Decline
Gives the recipient the option to accept or decline a choice described in the notification. A click on Accept opens a link. A click on Decline dismisses the notification. (Available with SDK 6.35 and later.) - Accept OR Decline (Decline Opens URL)
Gives the recipient the option to accept or decline a choice described in the notification. A click on either choice opens a link. (Available with SDK 6.38 and later.) - Add to Cart
Adds the product or offer to the recipient's cart. A click opens a link. (Available with SDK 6.38 and later.) - Add to Cart OR Add to Wishlist
Gives the recipient the option of adding the product or offer to their cart or to their Wishlist. A click on either choice opens a link. (Available with SDK 6.38 and later.) - Add to Cart OR More Like This
Gives the recipient the option of adding the product or offer to their cart, or lets them view more products or offers like the one shown in the notification. A click on either choice opens a link. (Available with SDK 6.38 and later.) - Add to Cart OR Share
Gives the recipient the option of adding the product or offer to their cart, or lets them share the product or offer with friends. A click on either choice opens a link. (Available with SDK 6.38 and later.) - Add to Wishlist
Adds the product or offer to the recipient's Wishlist. A click opens a link. (Available with SDK 6.35 and later.) - Add to Wishlist OR More Like This
Gives the recipient the option of adding the product or offer to the Wishlist, or lets them view more products or offers like the one shown in the notification. A click on either choice opens a link. (Available with SDK 6.38 and later.) - Add to Wishlist OR Share
Gives the recipient the option of adding the product or offer to the Wishlist, or lets them share the product or offer with friends. A click on either choice opens a link. (Available with SDK 6.38 and later.) - Buy Now
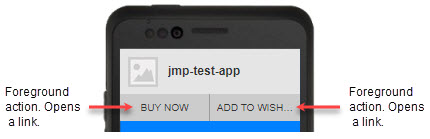
Adds the product or offer to the recipient's cart and starts the checkout flow. A click opens a link. (Available with SDK 6.35 and later.) - Buy Now OR Add to Wishlist
Gives the recipient the option of starting their purchase, or adds the product or offer to the Wishlist. A click on either choice opens a link. (Available with SDK 6.35 and later.) - Buy Now OR More Like This
Gives the recipient the option of starting their purchase, or lets them view more products or offers like the one shown in the notification. A click on either choice opens a link. (Available with SDK 6.38 and later.) - Buy Now OR Share
Gives the recipient the option of starting their purchase, or lets them share the product or offer with friends. A click on either choice opens a link. (Available with SDK 6.38 and later.) - Follow
Allows the recipient to follow this brand (or other category, such as News). A click opens a link. (Available with SDK 6.38 and later.) - Go To Storefront
Allows the recipient to go to the storefront for this brand. A click opens a link. (Available with SDK 6.38 and later.) - Go To Storefront OR Follow
Gives the recipient the option of going to the storefront for this brand or following this brand. A click on either choice opens a link. (Available with SDK 6.38 and later.) - More Like This
Allows the recipient to view more products or offers like the one promoted in the notification. A click opens a link. (Available with SDK 6.38 and later.) - Opt In OR Opt Out
Gives the recipient the option to opt in or opt out of an offer. A click on Yes opens a link. A click on No dismisses the notification. (Available with SDK 6.38 and later.) - Opt In OR Opt Out (Opt Out Opens URL)
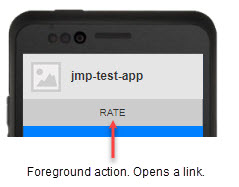
Gives the recipient the option to opt in or opt out of an offer. A click on either choice opens a link. (Available with SDK 6.38 and later.) - Rate
Enables the recipient to rate the brand, product, offer, or the like within the mobile app. A click opens a link. (Available with SDK 6.35 and later.) - Share
Allows the recipient to share the product or offer with their friends. A click opens a link. (Available with SDK 6.38 and later.) - Yes OR No
Gives the recipient the option to indicate Yes or No in response to the notification. A click on Yes opens a link. A click on No dismisses the notification. (Available with SDK 6.35 and later.) - Yes OR No (No Opens URL)
Gives the recipient the option to indicate Yes or No in response to the notification. A click on either choice opens a link. (Available with SDK 6.38 and later.)
In addition, you can work with your app developers to create custom buttons.
To add or change Interactive Notification buttons:
- In the Notification Action, select either Launch App or Open URL.
Interactive Notifications are not available for messages that open a Rich Message.
- Click next to Add push notification buttons and select Yes.
- Select the button you want to add and click Next.
If your app developer created any custom buttons, they will appear in the Custom notification buttons section.
- Where required, specify the URL to open when the button is clicked. (See Specifying a deeplinked URL for more details. Work with your mobile app development team to obtain the correct URLs.)
- Click Done.
Specifying a deeplinked URL
You can specify either a static URL, for example: http://www.mywebstore.com/product1, or a personalized one. You can also specify a custom URL scheme based URL in this field, for example myappscustomscheme://products/product1.
You can personalize the URL using one of the following:
A PET or a supplemental table field
This is the most common method.
For example, the PET includes a field called COURSE_ID and you want recipients enrolled in a specific course can land on the page of that course when they click the link. To do this, you can specify the link using the column as shown in the examples below:
http://www.yourschool.com/courses/${COURSES_PET.COURSE_ID}
myappscustomscheme://course/${COURSES_PET.COURSE_ID}
The above example is useful when sending a message to a segment of users and you want each user to land on a personalized page.
A dynamic variable
This method is useful when the message is triggered from an external system through a Web Services API.
You can define a dynamic variable in a campaign and use that variable to personalize a deep linked URL.
For example, let's assume that you created a dynamic variable LOYALTY_STATUS for the campaign, and want users with different statuses to land on different pages. In this case, you can specify the link using the variable as shown in the examples below:
http://www.durhamdenim.com/products/${LOYALTY_STATUS}
myappscustomscheme://products/${LOYALTY_STATUS}
Regardless of whether you use a column or dynamic variable, you can personalize an entire URL as well. For example, you can include the URL in the field or dynamic variable, then specify the URL as:
${MYURL}
To specify the deeplinked URL:
- Select Open URL from the Notification Action list.
- Type the URL in the URL field.
Using Rich Messages
You can select one of the following for Rich Messages:
- A file from the Content Library or another location on your computer
The file must be smaller than 2K for iOS and 4K for Android. Messages can include Dynamic Content Regions and you can personalize them using standard RPL.
- An external publicly available URL
Note that you can't personalize an external URL.
- HTML content hosted in your own public-facing domain
Hosting your HTML content makes it easier to meet the file size limitation. Note that you can’t personalize hosted HTML messages.
To specify a URL for a Rich Message:
- Select Open Rich Message from the Notification Action list.
- Select Enter Content URL.
- Specify a URL of the content file, select Enter content URL, enter the URL in the URL field, and click Go.
To select the file for a Rich Message:
- Select Display Rich Message from the How do you want the app to respond on notification open? list.
- Select Select or upload content.
- Do one of the following:
Select a file from the Content Library:
- Click Choose from Library
 .
. - Select the file you want and click Select.
Tip: To display the files as tiles, click
 . To display the files as a list, click
  .
. - Optionally, change the character set and upload folder.
- Click Start Upload.
Enter the URL where the content is located:
- Type the URL in Enter content URL.
- Click Go.
Drag files onto the canvas:
- Drag the file from any location on your computer to the canvas.
- Click Start upload.
Upload a file from your computer:
- Click browse for a file.
- Select the file you want and click Open.
- Optionally, change the character set and upload folder.
- Click Start Upload.
- Click Choose from Library
Editing content of a Rich Message
Depending on how the Account Administrator set up your account, the Message Designer shows the Rich Message in one of two modes:
Side by side HTML and visual panels
In this mode, the message is displayed in two side-by-side panels. The left panel displays the HTML source, and the right panel displays the message the way it will appear to your recipients.
Use the HTML panel for editing HTML directly.
You can use the toolbar buttons to edit content.
To add dynamic content rules with the classic user interface:
Note: If your account has the new Rules Editor, learn how to add dynamic content rules with the new Rules Editor.
- In the visual panel, click on a dynamic region candidate.
- Click
 > Create region.
 - Click New Rule and provide a name for the new rule.
- Drag fields to the Conditions area. You can add up to 30 conditions.
- If a field isn't showing in the list, click Add columns
 .
. - To add additional data sources, click Add table.
- To combine multiple conditions and build more complex logic, drag Insert enclosure to the Conditions area.
- If you add multiple conditions, join the filters using a Boolean AND or OR comparison. To switch between AND or OR, click the drop-down list.
- If a field isn't showing in the list, click Add columns
- Configure each condition. To find out more about configuring conditions relating to dates, see Configuring Dynamic Content Rules by Days/Weeks.
- Specify the content to display when the conditions of the rule are met:
- Select Content: Choose a document from the Content Library or from your computer, or create a new one from scratch.
- Script: Execute a script using Responsys Personalization Language.
- Skip Recipient: Skip the recipient from receiving the email.
- Display No Content: Do not display content in the region.
- When you're done, click OK.
To add dynamic content rules with the new user interface:
Note: If your account has the classic Rules Editor, learn how to add dynamic content rules with the new Rules Editor.
Important: The new personalization token user interface simplifies the user experience for marketers.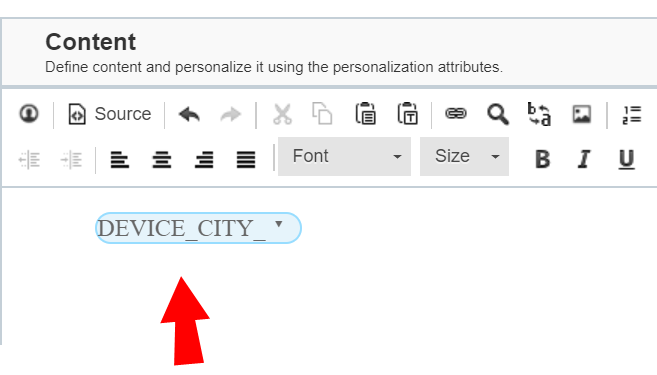
- In the visual panel, click on a dynamic region candidate.
- Click > Create region and give the region a name.
-
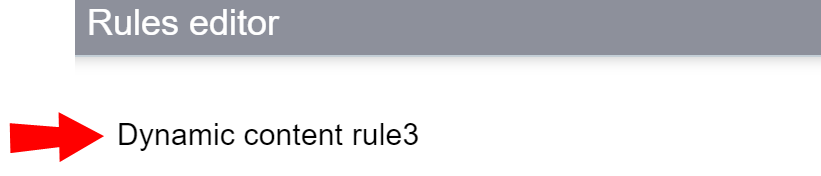
Click New Rule .
The Rules editor dialog opens.
- (Optional) Click on the rule's current name to change it.
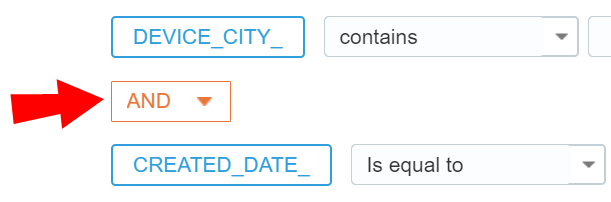
- Drag fields to the Conditions area or double click them.You can also click on '+' that shows up on hover over the column name. You can add up to 30 conditions.
You can use the search functionality to locate specific columns belonging to a data source.
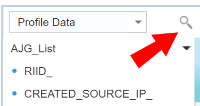
- To see further fields, expand profile extension tables or change the data source type from the drop-down. The drop-down allows you to choose between Device Data, Profile Data, Supplemental Data, Dynamic Variables, and Recent/Selected.
Tip: By default, all the columns belonging to the list and that list's PETs are displayed. If you would like to add a column from a supplemental table or to add a dynamic variable, select Supplemental Data or Dynamic Variable from the drop-down, then click
 .
. - To combine multiple conditions and build more complex logic, add an enclosure by double clicking
 or dragging it to the Conditions area.
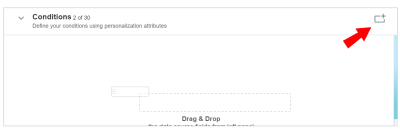
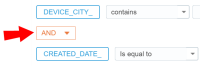
- If you add multiple conditions, join the filters using a Boolean AND or OR comparison. To switch between AND or OR, click the drop-down list.
- Configure each condition. To find out more about configuring conditions relating to dates, see Configuring Dynamic Content Rules by Days/Weeks.
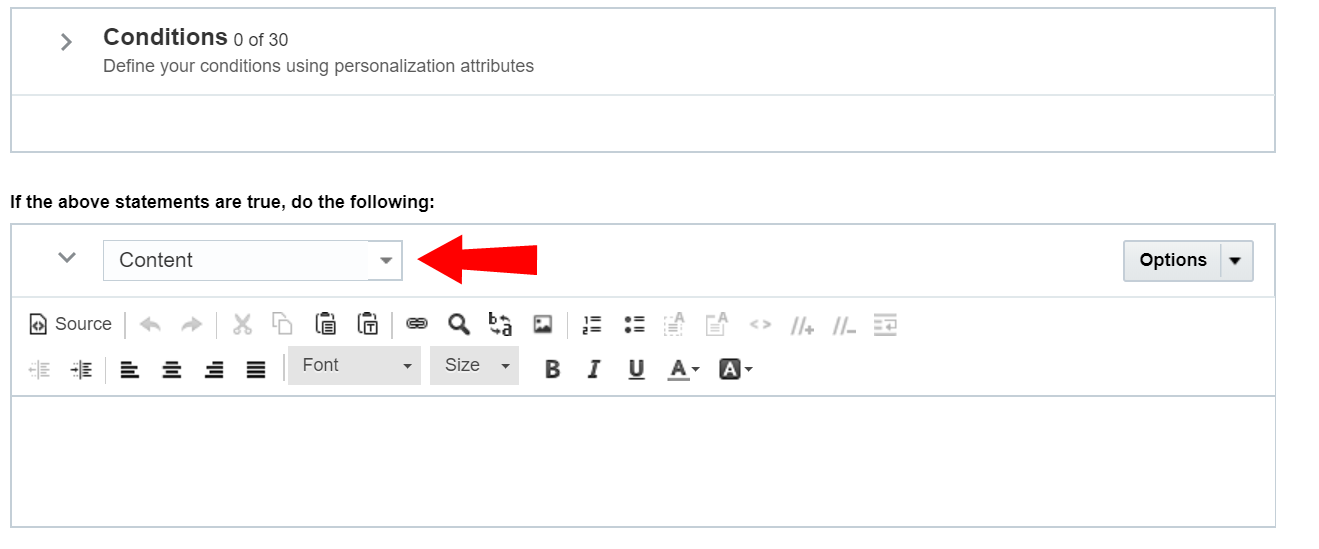
- Specify the content to display when the conditions of the rule are met:
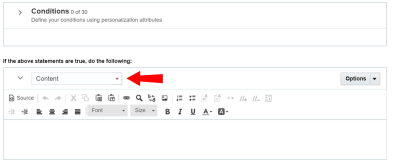
- Content: Create a new document from scratch in the text box, and you can drag and drop columns into this section to create personalization tokens. Alternatively, you have the option of adding a document from your computer or content library instead. To do so, click Options .
- Image: Add an image using an Image URL. Alternatively, click Options to either add an image from the Content Library or, if it is enabled for your account, via Oracle CX Content.
- Script: Execute a script using Responsys Personalization Language.
- Skip Recipient: Skip the recipient from receiving the email.
- Display No Content: Do not display content in the region.
-
When you're done, click OK.


Visual and Source tabs
In this mode, you can edit the HTML message in either the Source tab, which shows the source code, or the Visual tab, which displays the message the way it will appear to your recipients.
To switch between the source and visual views, click the Source or Visual button.
You can use the toolbar buttons to edit content.
Enabling Link Tracking
Link tracking gives you the ability to track recipient clicks for the campaign. For more information, see Understanding Link Tables.
When you set up link tracking, you can either use an existing link table or automatically generate a link table.
Before you begin:
- The Account Administrator must enable automatic link table generation. Learn more about enabling this option.
- For Mobile App campaigns, the campaign must include Rich Message (HTML) content.
- In-app campaigns contain Rich Message content by default.
- For Push campaigns, you must select Notification Action: Open Rich Message.
To enable link tracking in a campaign:
- With the message open in the campaign's Message Designer, click Link Tracking.
For Push campaigns, you must select the option to include Rich Message content in your message. This causes the Link Tracking button to be displayed on the Message Designer page.
- Make sure that the Track links setting is On.
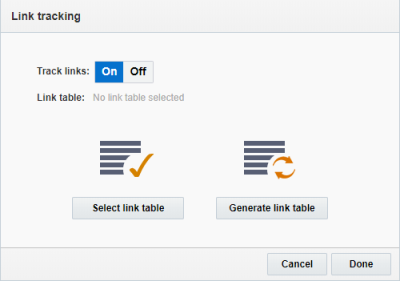
- Choose an option:
- If you want to use an existing Link Table, click Select link table and locate the link table you want to use.
- If you want to generate a new Link Table, click Generate link table. Oracle Responsys generates a link table based on the links in the HTML content.
After you select or generate the link table, you can manage the link table from the campaign Message Designer. You can replace the Link Table, edit the links, or update existing Link Table.
![]()
Enabling External Tracking
External tracking automatically appends tracking parameters to link URLs. You can enable external tracking if you use a third-party web analytics service.
Before you begin:
Before you can enable external tracking, the Account Administrator must define external tracking parameters. Learn more about these account settings.
To enable external tracking
- In the campaign Message Designer, click Link Tracking.
- Select External Tracking.
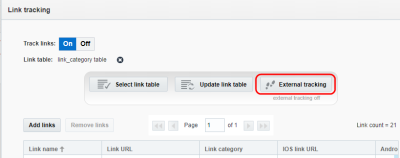
- Click On.
- In the list of available parameters, select the parameters you want to include and select or specify the values for each parameter.
The required parameters are selected by default and cannot be omitted.
- Click Done.
After you enable external tracking, use the External tracking column in the link table to manage the external tracking settings for individual links.
Selecting settings

Click Settings in the Push Message Designer to:
- Select the sound to play when the message is received.
- Include an image for Android and iOS 10 devices, or an audio or video file for iOS 10 devices.
- Select Interruption Level to determine the importance and delivery timing of a Push notification.
- Select Relevance Score to determine the order of your mobile app's notifications in the notification summary.
- Send high priority messages to Android devices.
- Send additional data, for example a flight number or promotional code, that the app can use to update internal fields.
Tip: In Settings, you can personalize the Android image URL, the iOS media URL, the title, and the value in custom key-value pairs. These settings fields accept Responsys Personalization Language (RPL) values. For details, see the RPL guides available from the Guides topic.
Selecting a sound
When the notification arrives, you can have the recipient's device play the recipient's default sound, a custom sound from your mobile app, or no sound. For custom sounds to work, your mobile app developers must include the sound files in the mobile app itself.
To select a sound:
Select the sound from the Sound drop-down list.
- Default—plays the default sound specified by the recipient's device.
- Custom—plays the sound you specify in the sound file name field.
- For iOS, the file name must include the file extension (for example, examplesound.wav, where .wav is the file extension).
- For Android, you only need to enter the file name.
Important: For custom sounds to be available in your mobile apps, work with your mobile app development team to include the custom sound files in the mobile apps.
- None—does not play a sound.
Including images and media
For the iOS version 10 and higher and Android platforms, you can include an image in a Push notification. For the iOS platform, you can also include audio and video files.
Keep in mind the following:
For iOS:
- This feature is supported for iOS 10 and higher
- This feature requires the Responsys Mobile App SDK version 6.32.0 or higher
- The image must be accessible via an
https://URL - Per iOS guidelines, the files must not exceed the following size:
- Images: 10MB
- Audio: 5MB
- Video: 50MB
Note: The maximum file size that can be supported depends on the quality of the user’s data network and can be significantly lower than the iOS guidelines.
- iOS supports the following file formats:
- Image: jpg, jpeg, gif, png
- Audio: mp3, m4a
- Video: mpg, mpeg, m75, m15, mp4
For Android:
- This feature requires the Responsys Mobile App SDK 6.29.0 or later
- The image must be accessible via a URL, either
http://orhttps:// - Images must have a 2:1 aspect ratio
- Scale your images for multiple device form factors
To include an image or other media:
Type the image URL in the iOS media URL , the Android image URL field, or both.
- For the iOS platform, the URL must be
https://. - For the Android platform, the URL can be either
http://orhttps://.
Selecting an Interruption Level
For iOS 15 and above, you can determine how and when mobile app users receive your Push notification by using the Interruption Level setting.
Tip: See the Notifications article in the Apple Human Interface Guidelines to learn more about notification alert behaviors for each interruption level and how to use interruption levels effectively.
To select an Interruption Level:
Select the level from the Interruption Level drop-down list.
- Active (Default): This is the default interruption level where the notification appears on the users screen immediately, makes a sound and lights up. If a user has system notification summary turned on, then the notification will be included in the summary. It will not break through Focus and will not override sound when the user has their phone muted.
- Time Sensitive: This is the interruption level used for notifications that need immediate attention. It acts the same as the Active level notification, except it overrides device notification settings, but it won’t override the users mute switch.
- Passive: This is used for notifications that do not need immediate attention, and does not trigger any sound or light up the screen.
- Critical This is an extremely rare interruption level used for notifications that need urgent attention, such as information about personal health and public safety information. The notification is immediate, lights up the screen and will bypass all device notification settings, including the mute switch.
Important: When allowed, Time Sensitive notifications break through a Focus or scheduled delivery. Therefore make sure the notification is about time sensitive information only, such as events that would happen at the exact moment of the notification or would happen within an hour of the notification (for example, a courier delivery). Apple recommends not using this interruption level for marketing notifications. See the Notifications article in the Apple Human Interface Guidelines for more details and examples.
Be cautious about using the Critical interruption level. Apple must provide your app with an entitlement before you use this level. Using this level without the right entitlement could affect notification delivery.
According to the Notifications article in the Apple Human Interface Guidelines, Critical interruption level is defined as:
Urgent information about personal health and public safety that directly impacts people and demands their immediate attention. Critical notifications are extremely rare and typically come from governmental and public agencies or healthcare apps. You must get an entitlement to use the Critical interruption level
Selecting a Relevance Score
iOS 15 and above can use the relevance score feature to order Push notifications from the same mobile app in the Notification Summary, so that device users see higher priority messages before lower priority messages.
Relevance Score settings only impact the order of messages from your own app. For example, if you send one notification with Relevance Score 1, and another with Relevance Score 0.50, then the one with Relevance Score 1 will appear first in the summary of notifications from your app.
The default Relevance score value is 0.
To select a Relevance Score:
Select the score from the Relevance Score drop-down list.
-
0 (Low Priority)
-
0.25
-
0.50 (Medium Priority)
-
0.75
-
1 (High Priority)
Sending high priority messages to Android devices
Important: We also recommend that your Android mobile apps integrate with the Responsys Mobile App SDK for 20A (6.44.0) or later. This version of the SDK added enhancements for displaying messages on sleeping devices. When your mobile app uses this version of the SDK and you use the High Priority delivery flag as appropriate, you’ll obtain the best results for delivering and displaying messages on devices that employ aggressive power management.
Google attempts to deliver high priority messages immediately, even when a device is sleeping (in doze mode). Setting High Priority for your push notification messages can help deliver messages more reliably and in a more timely manner on devices that implement aggressive power management.
To deliver high priority push messages to Android devices:
In the Android section, locate the Delivery Priority field and select the High Priority check box.
Use the High Priority setting carefully. Android platform restrictions apply when using High Priority for messages. According to Google's Firebase Cloud Messaging (FCM) topic About FCM Messages: Setting the priority of a message:
High priority. FCM attempts to deliver high priority messages immediately, allowing the FCM service to wake a sleeping device when necessary and to run some limited processing (including very limited network access). High priority messages generally should result in user interaction with your app. If FCM detects a pattern in which they don’t, your messages may be de-prioritized.
Sending additional data
Push notifications can be sent with "extra" data to further customize where the recipient is directed or what happens when the notification is engaged upon. This feature can be used for custom behaviors other than deep-linking or rich push, which are already handled automatically.
Important: When designing the mobile app, marketers and mobile app developers must determine how to handle each key–value pair. The developers must code the mobile app to use the key-value data per the design, and marketers must know the values that the mobile app is expecting and how the mobile app will use the data.
To add a key/value pair:
- In the Custom key value section, click Add key value.
- Type the key and the value in corresponding fields. Repeat for each key-value pair that you want to add.
To remove a key/value pair, click x.
Previewing the message
As you are creating the message, the right pane of the Push Message Designer displays your text without personalization.
To preview the message with personalization by platform, click  . If you included images for the Android and/or iOS platforms, select the platform you want to preview. The preview shows the message and all Push notification settings and Message Center message preferences for the campaign.
Note: Currently, if you specified an audio or video media URL for iOS, you cannot preview or play back the media while previewing the notification text.
The preview shows up to 25 records from the selected list, ignoring the platform type of the selected record. This means that the preview shows how the message appears on the specific platform, not on the device of the selected record.
Using the toolbar buttons
Use the toolbar buttons as shown below when creating or editing messages.
| To Do This | Use This Button | Notes |
|---|---|---|
| Insert a personalization field |
|
With this button's classic user interface, when you click the button, the Insert Personalization dialog opens. Learn more about the new user interface.
With this button's new user interface, when you click the button, the personalization panel opens. Learn more about the classic user interface. Important: The new personalization token user interface simplifies the user experience for marketers.
|
| Track link clicks (Rich Push campaigns for which Link Tracking is enabled only) |

|
|
| Remove all content from the canvas |
|
|
| Undo the most recent action |

|
|
| Redo the most recent action |

|
|
| Cut the selection |

|
|
| Copy the selection |

|
|
| Paste the selection |

|
Next steps
- To schedule the campaign, use the campaign workbook.
- To activate the campaign, add it to a program using the Send Push Campaign activity and publish the program. For more information, see Send Push Campaign activity.