Using the SMS Campaign Workbook
Important: This information applies to the SMS campaign workbook. If the Campaign Designer has been rolled out to your account, see Launching an SMS campaign with Campaign Designer.
To see how the new Campaign Designer differs from the old campaign workbook, see SMS Campaign Designer changes. For a breakdown of the new Campaign Designer's visuals, see SMS Campaign Designer visuals overview.
The SMS campaign workbook displays details of the selected campaign and any errors that need correction.
Note: Page headers in the workbooks for all channels have been updated such that, instead of seeing Campaign Workbook at the top of the page, the header will now include the campaign's name and status, as well as links to bring you back to the Manage Campaigns page and the Home page.
To open the campaign workbook:
- On the side navigation bar, click
 Campaigns and select Manage Campaigns.
 - Open the campaign you want to work with.
Tip: To open the workbook in a new tab, use the keyboard shortcut Ctrl + click the campaign link.
Learn more about the sections of the campaign workbook. To monitor all campaign launches or take action on a campaign launch, use the Campaign Monitor.
Reviewing campaign errors
Campaign errors can prevent you from launching your campaign. You can quickly review campaign errors using the campaign workbook. If a section contains errors, the heading displays in red.
To review campaign errors:
- Open the campaign workbook for the SMS campaign you want to work with.
- Click Show errors.
-
Review the errors in the Validation errors dialog.
- Click an error in the list to resolve the error.
Campaign reporting
For active and closed campaigns, you can view the Campaign Analysis dashboard. The Campaign Analysis dashboard helps you analyze the key performance metrics of a selected campaign.
To view the Campaign Analysis dashboard:
- Open the campaign workbook for the SMS campaign you want to work with.
- Click Insight.
Sections of the campaign workbook
This read-only section shows the campaign creation information.
In this section, you can click View relationships  to access the Object Relationship Navigator, which is an interactive feature that enables you to visualize how campaigns are related to different objects (Filters, Profile Lists, etc.) in your account. Learn more about the Object Relationship Navigator.
Use this section to specify the following general campaign characteristics:
Important: If you change a campaign’s name, folder, marketing program, marketing strategy, subject line, or external campaign ID, then historical and new launches for both triggered and standard launches will take these new values in Insight. It does not impact CED behavior as CED retains an unchanged ‘snapshot’ of values.
- Description: any description or notes
- Marketing Strategy and Marketing Program
These values can be used for downstream reporting.The Marketing Strategy and Marketing Program values are defined by the Account Administrator from the Account management page.
Note: If you change a campaign’s marketing strategy or marketing program for a standard launch, Insight will display the new marketing strategy and marketing program values for both historical and new standard launches. This does not impact the CED behavior.
- Folder: the folder in which the campaign is stored
- Access Control: the organizational units can access the campaign. For more information, see Organizational Access and Targeting by Organization--Overview.
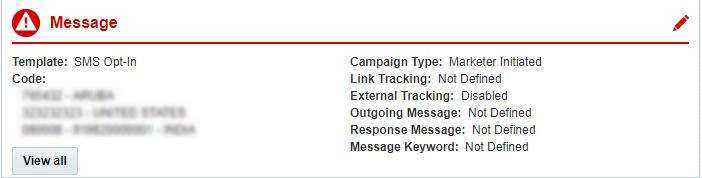
Use this section to edit messages, keywords, and codes, and define link tracking options.
Use this section to add or edit data sources and change the Profile List for the campaign.
Use this section to specify campaign settings.
- Mobile SMS Opt-In
Applies only to Email Acquisition campaigns.
- Email Opt-In
Applies only to Email Acquisition campaigns.
Select whether to opt customers into the email channel.
Email addresses are automatically added to the profile list regardless of whether you opt them in to the email channel. Select this option if want to add the email addresses to the email channel as well as to the profile list. If you do not select this option, email addresses are added to the profile list but are opted out of the email channel. By default, email addresses are opted in to the email channel.
This section is available only for marketer-initated campaigns.
Use this section to configure the audience you'd like to target with your campaign.
To configure your campaign's targeting:
- Click
 Edit.
Edit. - Specify how you would like to target your select profile list. There are four options:
- Everyone in the selected audience
Note: This selection is only available if you have Audience enabled for your account.
- Everyone in the selected filter
- Everyone associated with a supplemental table or view
- Everyone in the list
Important: Use this option with caution because selecting it means your target audience won't be narrowed for your campaign.
- Everyone in the selected audience
- Click Save.
This section is available only for marketer-initated campaigns.
Use this section to test the campaign by sending it to your Proof List.
To send a proof test:
- Click Edit.
- In the Proof launch options dialog, select the proof list from the Proof List drop-down list, then click Save.
- Click Proof launch.
If your campaign includes keywords, you must activate the keywords so that subscribers can send you SMS responses. When keywords are activated, MO messages received with any of these keywords are processed and responded to with the response message defined in the SMS campaign. You only need to activate keywords once.
To activate keywords:
- Click Activate.
After you activate the keywords, you can click Deactivate the keywords.
For marketer-initated campaigns, use this section to define a launch schedule and launch the campaign. Optionally, you can select throttling settings and send notifications for skipped, sent, and launch failures. Throttling controls the rate at which outbound messages are sent.
Note: This section is available only for marketer-initated campaigns.
To launch a campaign:
- Click Schedule Launch in the Launch options section to open the Launch dialog.
- In the Message Send section, select one of the following options:
- Immediate: launches the campaign immediately after you confirm the launch information.
- Once: launches the campaign once on a specific date at a specific time.
- Recurring: launches the campaign at a specific interval (hourly, daily, weekly, or monthly). Within each interval, you can select options to precisely fit your requirements, for example, every three hours, every Wednesday, or on a specific day of each month. In addition, you can select the start and end dates for the campaign, or let the campaign run indefinitely.
- In the Throttling settings section, specify the maximum number of SMS messages to be sent per minute. If you do not specify throttling settings for the launch, the throttle settings of the campaign is used.
Note: The throttle rate is controlled by your account administrator. Messages will not be sent any faster than this setting. Learn more about these account settings.
- In the Notifications section, specify the email addresses to receive sends progress notifications
for skipped and sent messages and failure notifications.
Send progress notification(s) to: enter the email addresses (separated by commas) to receive progress notifications, then select the type of notifications you want to send. You can send notifications for either skipped messages, sent messages, or both.
For skipped messages, notifications are sent when the specified percentage of messages is skipped. For sent messages, you can send the notification after the specified percentage of messages is sent, or when the launch is complete.
Send failure notifications to: enter the email addresses (separated by commas) to receive email notifications if the launch fails for any reason.
The notification contains information that identifies the campaign and program, and a pointer to the error.
Send skipped launch notifications to: enter the email addresses (separated by commas) to receive email notifications if a scheduled launch is skipped for any reason.
The notification contains information that identifies the campaign and program, and a pointer to the error.
- Click Next and review the launch settings. click Schedule when you're finished.