Add and Remove Intelligent Item Recommendations from your Website
To display intelligent item recommendations to shoppers, you must add the Recommended Items SMT content type to your website. For each Recommended Items content area you add to your website, you can select the recommendation scenario it should use, how many items it should show, and what it should show if no recommendations are available.
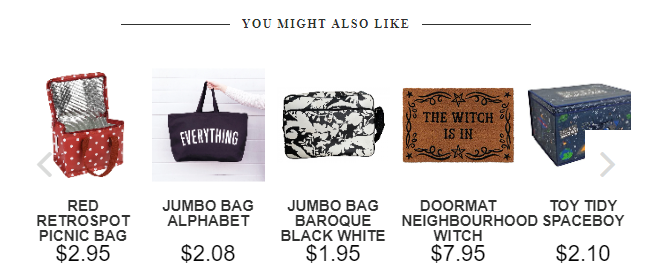
When they have been published to the website, each content area shows the name and image of each recommended item. The item price, item rating, and quick Add to Cart button are also shown if they are configured for the website. Clicking on an item takes the shopper to the item's product detail page (PDP) for more information and purchasing options.
For more information about Site Management Tools and content types, see Site Management Tools Overview.
To add intelligent item recommendations to your website:
-
In your website, go to the page where you want to add intelligent item recommendations.
If you're adding an Item-specific recommendation, you must go to a product detail page.
-
Log in to SMT.
For more information, see Users and Roles in Site Management Tools.
-
In Edit mode, click Add on the Site Management toolbar.
-
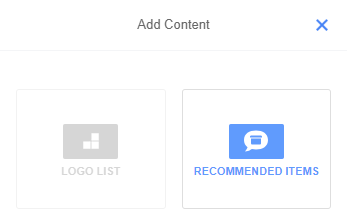
Drag the Recommended Items content type to the page.
 Note:
Note:If you don't see this content type, check that the extension has been installed and is active. Click Settings on the Site Management toolbar to access the Content Manager. Drag the content type from the Inactive Content Types list to the Active Content Type list.
The location you drop the content type in depends on the type of recommendations you want to add. If you want to add recommendations based on:
-
Shoppers who bought this also bought or alternative items, drop the content type in the page type area on a product detail page.
-
For all other options, that is, order or cart items, recently viewed items, shopper purchase history, or buy again you can place the content type in multiple areas on the page.
-
If you drag it to an area marked All Pages, then the content displays on any page that contains that area.
-
If you drag it to page type area, then the content displays on any page of that type.
-
If you drag it to an area marked as This Page, then the content displays only on the page that you add it to.
-
For more information about the scopes of different SMT areas, see Area and Scope.
-
-
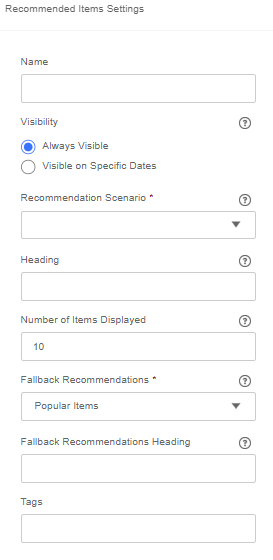
In the Name field, enter a name for the content type you're adding. This is an internal identifier for the content type. It's not displayed to the user anywhere on the website, but it's used to identify the content type in NetSuite and in SMT.
-
Choose when you want the intelligent item recommendations to be visible from the Visibility options.
For more information about visibility options, see View Site as of a Specific Date in Site Management Tools.
-
From the Recommendation Scenario list, choose the recommendation scenario you want to add to the content area.
-
In the Heading field, enter the name for the heading displayed above the intelligent item recommendations. For example, you can display them as 'You might like these items' or 'Customers who bought this also bought...'
-
In the Number of Items Displayed field, enter the number of recommended items you would like to display. A maximum of 20 items can be displayed.
Note:If not enough intelligent item recommendations are available, the number of items displayed may be less than the value you enter in this field.
-
If a shopper with no transaction history visits the website, for example, a brand new shopper or a guest shopper, the extension can't calculate shopper context recommendations. Similarly, if an item has never been purchased before, the extension can't calculate item context recommendations. From the options in the Fallback Recommendations list, select what shoppers should see when no intelligent recommendations are available. The options are:
-
Hide Recommendations - hides the intelligent items recommendation area
-
Popular items - displays the bestselling items in the website catalog
-
New items - display the items most recently added to the website catalog
-
-
In the Fallback Heading field, enter the name for the heading displayed above the fallback items, for example, 'Bestsellers.'
-
In the Tags field, set keywords to help filter your content in the Review Changes list.
For more information about content tags, see Content Tags and Filter Tools.
To remove intelligent item recommendations (published content):
-
While logged in to SMT on your website, go to the page that contains the Intelligent item recommendations you want to remove.
-
In Edit mode, click on the Recommended Items content area you want to remove.
This highlights the Intelligent item recommendations and displays the content controls.
-
Click Remove.
-
Click OK.
To discard intelligent item recommendations (unpublished content):
-
While logged in to SMT on your website, select the Review & Publish Changes list from the Site Management toolbar.
-
Select the Recommended Items content in the list.
-
Click Discard.
-
Click OK.