Creating a Custom Invoice Approval Workflow
This section shows you how to edit or add conditions, actions, transitions, and other components of the Invoice Approval Workflow. Most customization happens within the workflow states. To learn more about the states, Invoice Approval Workflow States. For more information about workflow customization, see Editing a Workflow. For more options on customization, see Disabling Exception Criteria.
When you change the workflow components or reorder the sequence of actions, take note of any dependent conditions or triggers that might affect the process flow.
After creating your custom workflow, disable the original Invoice Approval Workflow if it's still running. To do this, set the release status to Not Running. When the original workflow is already disabled, you can run your custom workflow by setting its release status to Released. For instructions on running a workflow, see Running the Invoice Approval Workflow.
Modifying a condition
You can edit or add a condition for a workflow, group, action, and transition. On the workflow or state page, click the Edit link next to the component you want to customize. The specific component page contains the Condition section where you can edit or add a condition.
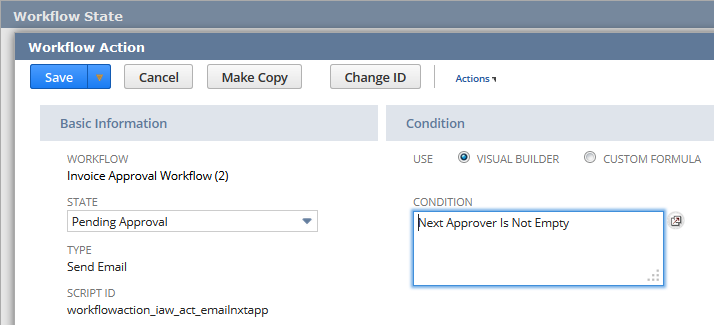
In the Condition section, you can use the Visual Builder or enter your own formula. To edit or add using the Visual Builder, click the Visual Builder icon located beside the Condition field. To use the formula, select the Custom Formula radio button. In the Formula field, enter a new formula or edit the existing one. For more information about adding and editing conditions, see Working with Conditions.
Reordering an action
Actions are listed within the state where they're executed. On the Workflow State page, drag and drop the action before or after another one.
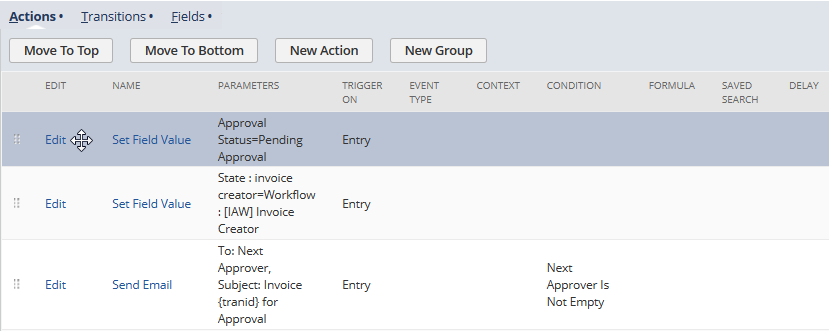
You can also reorder actions by editing the specific Action page. On the Workflow State page, click the Edit link for the action you want to reorder. On the Workflow Action page, in the Insert Before field, select the action that should run after the one to be transferred. For more information, see Reordering Actions.
On the Workflow State page, you can also add a new action to the state. Click the New Action button to start creating an action. For more information about workflow actions, see Working with Actions.
Changing an exception message
You can set up or change an existing exception message within the workflow state where its action runs.
To change an exception message:
-
On the Workflow State page, click the Edit link for the NAW Create Exception Record WS action.
-
On the Workflow Action page, in the Parameters section, enter the new message in the Value column for the exception field.

-
Click Save.