User Interface
NSPOS pages have key areas for handling transactions, signing on and monitoring network connectivity, and for entering information and performing searches.
Journal Window
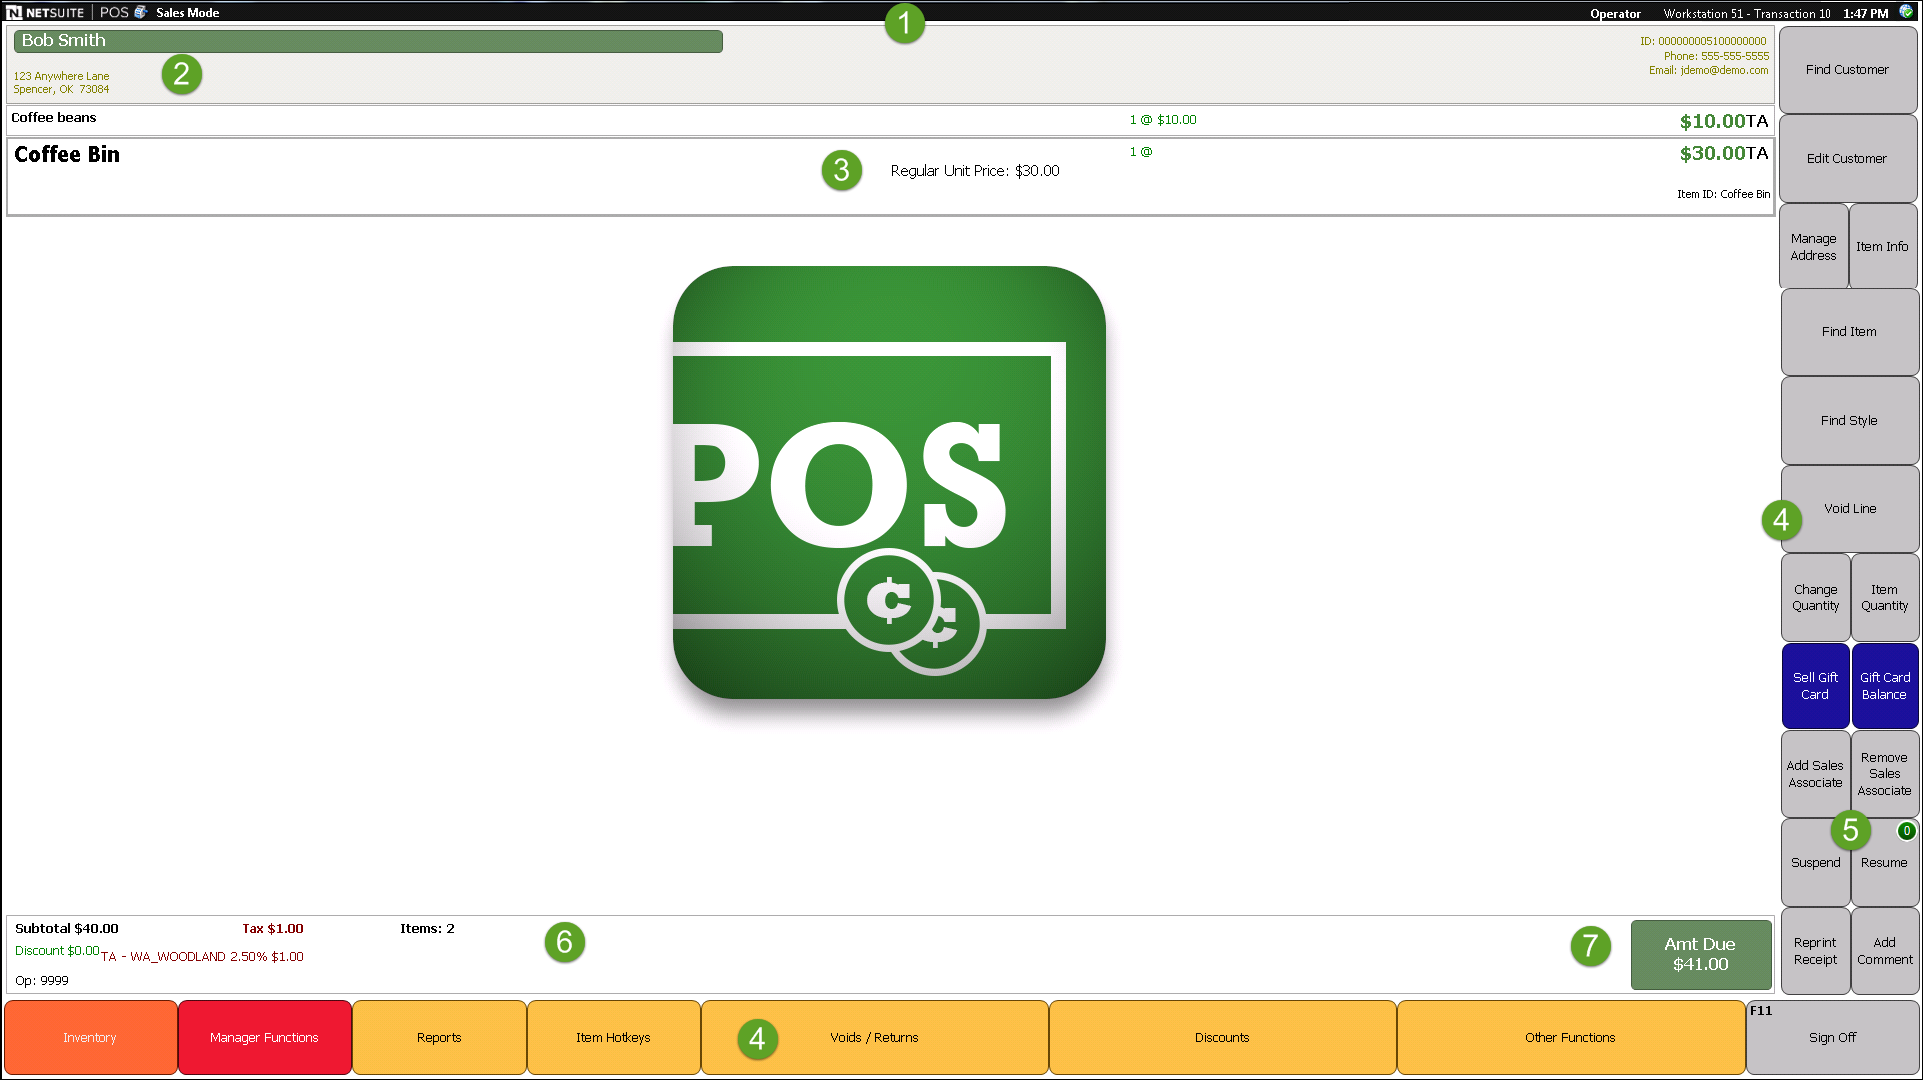
The Journal displays all information about the current transaction. It is your main workspace. Items added to a transaction list as separate lines in sequential order, with the first item at the top and the current item at the bottom. The transaction summary in the lower section lists details about the total transaction, including the tax rate, subtotal and amount due.
This image shows a typical transaction in progress. Your layout may vary.
-
Status Bar - Shows details about the current session, including your sign-on name or type, workstation ID, number of transactions for the day, and whether your register is connected to the server. You can also view the current operating or register mode in the upper left corner. See Status Bar for more information.
-
Customer Information - Displays the selected customer's name, phone number and address. Double-click or tap the customer to display their recent sales and returns history.
-
Transaction Activity - Shows the last item scanned, the quantity, price, any discounts or promotions applied, the tax category, POS ID (usually the UPC), and the Item ID. The Item ID lists the item name and the stock keeping unit (SKU).
-
Main Button Bar (bottom) and Side Button Bar (right) - Tap a button on the Main Bar to display its options or menu sub-pages in the Side Bar. Tap a Side Bar option to perform the task.
Buttons may open windows for entering information, finding things such as customers or items, or for choosing from lists. NSPOS is highly flexible, so your manager or system administrator may define buttons to perform functions not covered in this guide.
-
Pending Operation - Shown as a green circle with a number, this is the count of tasks pending for that button. Tap the button to see the list. The example shown here is the number of on hold or suspended sales transactions ready to resume.
-
Transaction Summary - Displays summary details about transaction, including the subtotal, discounts and taxes, ID of the person ringing up the transaction and the number of items purchased. Details update as each item is added and when payments take place.
-
Amt Due - Shows the total payment due. Tap to select a payment type and complete the transaction. If making a return, this displays a Change button with the money to be returned to the customer shown in brackets.
-
Journal Logo - Either the current NSPOS logo set as the default or your logo configured for use with NSPOS. See Configure the Journal Logo.
Journal Modes
The Journal display changes as you progress through a transaction.
-
As you work, the current line is in Summary mode, displaying basic information about the item, coupon, customer, payment or other entry. Only the most recent entry appears in Summary mode.
-
When you add items or payments to the transaction, previous lines in the Journal switch to Compact mode to save space. Compact mode displays only the most important information about the entry. Tap a line shown in Compact mode to display it in Summary mode.
-
Page mode appears when you double-click or tap an entry. This comprehensive mode displays all available information about the entry, including sales history for customers or product details for items. Single-click or tap an entry in Page mode to return to Summary mode.
Some actions only apply to the selected line, which always displays in Summary mode. For example, to void an item, tap that item's line. The line displays in Summary mode, indicating it's selected. Then tap the Void Line button.
A red security shield icon ![]() appears on a button if you, the signed-on user, do not have sufficient permission to perform a task. The task can still be accessed if a manager or someone with similar privileges is available to enter their credentials and allow the override. The security level on any button can be changed by your system administrator.
appears on a button if you, the signed-on user, do not have sufficient permission to perform a task. The task can still be accessed if a manager or someone with similar privileges is available to enter their credentials and allow the override. The security level on any button can be changed by your system administrator.
If you can't find a button or its function, look it up by pressing Ctrl+F12. This opens the Function List window where you can search for the function by name or click/tap into function categories. You can also click/tap the Mode icon ![]() in the Status Bar to access the list.
in the Status Bar to access the list.
Status Bar
Located above the Journal, the Status Bar displays information about your NSPOS register status and provides options for signing on or off, clocking in or out, and exiting the application. You can also monitor the register's network connectivity.

-
Menu - Use this to toggle the on-screen Keyboard, display the Function List, display the system Message Window (system administrator only) or to exit NSPOS.
-
Mode Display - Shows the current register mode. For example, Closed Mode or Sales Mode.
-
Operator Name - Depending on your setup, this displays the name or ID of the signed-on user or the signed-on user type. You can tap the Operator Name to sign on or off and clock in or out.
-
Workstation ID - Shows the workstation or register ID.
-
Transaction Number - Displays the day's transaction count. In addition to sales transactions, this number includes control transactions such as the count of users that have signed on and the number of canceled transactions.
-
Time - Displays the time at your location.
-
System Notifications - Indicates there are messages and alerts waiting to be read. Blue icons are system information and red icons are errors or similar problems. Tap to view the messages.
-
Sever Status - Shows the status of the NetSuite server connection. If the register is not connected to the internet through the server, item and customer searches may be limited and certain payment types may be unavailable. A green check mark indicates the workstation is connected and fully ready to make transactions. A red icon indicates connectivity issues.
Normal State Icons - Workstation Health
An icon at the top left provides the Normal State status that monitors functioning and synchronization activities between the NSPOS register and NetSuite ERP.
Tapping the Normal State icon displays a list of NSPOS components and their status. For more information, see Normal State Monitoring in NSPOS.
|
Icon |
Description |

|
Green (OK) - All components are functioning normally. |

|
Amber (Alert/warning) - Minor errors are occurring in one or more components, but the cashier can continue using the register. Assistance from NSPOS Customer Support is advised. |

|
Red (Error) - Major errors are occurring in one or more components. The administrator must contact NSPOS Customer Support. |
Tapping the Normal State icon displays a list of NSPOS components and their status.
Forms
NSPOS includes pop-up forms for searching, selecting and entering information. For example, you look up items and find or add customers using forms.
Forms can include optional and required fields, as well as fields that are display only. NSPOS alerts you when a required field is incomplete or contains an invalid entry.
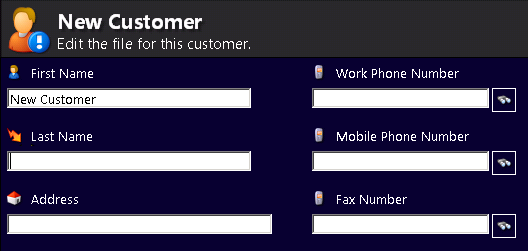
Forms display icons that guide you through completing the form. Some provide helpful hints on the information to be entered, while others perform tasks or identify required fields.
|
Icon |
Description |
|
|
Tap the Browse icon to search for information or valid entries. These searches open a separate window. |
|
|
Located directly on the form, enter text in Search fields to find items, customers, or other information based on the type of form. Search results display automatically after entering three characters. Searches are not case sensitive, and match any part of a word. For example, use Find Item search for a specific item.
|
|
|
Required fields display an arrow. These fields must contain a valid entry and cannot be left blank. |
|
|
Use Text fields for entering notes, comments or other information. |
|
|
Tap Done to save your changes or tap Cancel to go back. Sometimes, when a window has options for multiple choices, your actions do not take effect until you tap the Done button. |
|
|
Similar to Done and Cancel, tap the green check mark to enter a value or the red X to cancel. |
|
|
Show and Hide the on-screen keyboard. Use this for entering search criteria and text when you do not have an attached keyboard. |
|
|
Scroll bars visible along the bottom or side of the window indicate that the form includes more options or fields. Scroll to view the entire form. |