Standards and Guidelines
These topics provide general information about setting up and maintaining NetSuite Point of Sale (NSPOS).
Token Based Authentication and the Integration User
Each NetSuite account for NSPOS has an integration user that handles the synchronization connection between NetSuite ERP and the replication server. The integration user is configured during your initial implementation.
We support Token Based Authentication (TBA) for the integration user account. A TBA setup doesn't require you to enter a token when you log into NetSuite ERP or NSPOS. However, the Token Based Authentication box must be checked on the Enable Features page.
See Ensure Token Based Authentication is enabled in NetSuite ERP.
Payment Card Industry (PCI) Software Security Framework (SSF)
NSPOS is a PCI SSF validated application See Appendix: PCI SSF Information for NSPOS for an overview of NSPOS and PCI SSF requirements.
In addition to PCI-SSF certification, NSPOS 2020.1.X underwent certification under the Payment Application Data Security Standard (PA-DSS). See PA-DSS 3.2 Implementation Guide - NSPOS 2020.1 to view a PDF of the compliance standard.
When Not To Perform Large Updates of Item or Customer Data
You should not perform large item and customer updates during your business hours, such as when transactions are occurring on your registers. A large update is considered to be any import over 60,000 records.
NSPOS integrates with NetSuite ERP to provide Enterprise Resource Planning (ERP) tools for managing your items, customers and other aspects of your business. You can update items and customers in NetSuite manually or through CSV imports. See CSV Imports Overview.
Updates done in or imported to NetSuite periodically download to your POS registers to keep information current. NSPOS performs synchronization uploads to NetSuite of sales and other transactions that occur at the register. This is distributed to other registers in your store through the replication server.
Updates of over 60,000 records can slow sync across the network. If mass updates are needed during business hours, you should limit each update to 60,000 records or less.
When updating items, prices, or other data using a CSV import, always select to Run Server SuiteScript and Trigger Workflows. This option triggers the processes needed for proper synchronization between NetSuite and NSPOS. See Run Server SuiteScript and Trigger Workflows.
Planning an Efficient Opening for New Stores and Registers
When opening one or more new stores, it is important to consider the time needed to prepare the registers with current information from your NetSuite ERP setup. This consideration also applies to registers that were previously active but have been turned off for a long time.
When a register is staged, all information fully loaded and up to date. After staging, registers receive only the information needed to keep them current. When a register is turned off, NetSuite holds all new transactions, price changes and customer information for download to the register later.
If a register is turned off for an extended period and then turned back on, the size of the update can be large and take a while to download. This might delay a register from being ready when you need it.
Excessive download times can delay registers from being ready to accept sales transactions and can affect overall server performance. This delay can be critical in the event of a new store opening.
To ensure your new registers are ready for business, you should do the following:
-
Stage registers 24-48 hours before first use. If no major ERP updates will occur after staging, this time can be longer without a significant impact on performance.
-
If a store rollout requires new item and customer information, if possible, be sure to add or import the information to NetSuite ERP before staging new registers. Then the new information will be included during the staging process.
-
To reduce the impact to existing registers, large item and customer changes in NetSuite ERP should be performed in small increments. A good guideline is limiting changes to 60,000 records or less per day, performed outside of business hours.
If you are not certain how to limit the number of records or if this guideline does not fit your rollout schedule, please contact NSPOS Customer Support for assistance.
-
For registers that have been turned off for a long time, restaging a register can be the fastest method for bringing it up to date. Staging is generally quicker than waiting for large downloads to complete.
The File Cabinet in NetSuite ERP
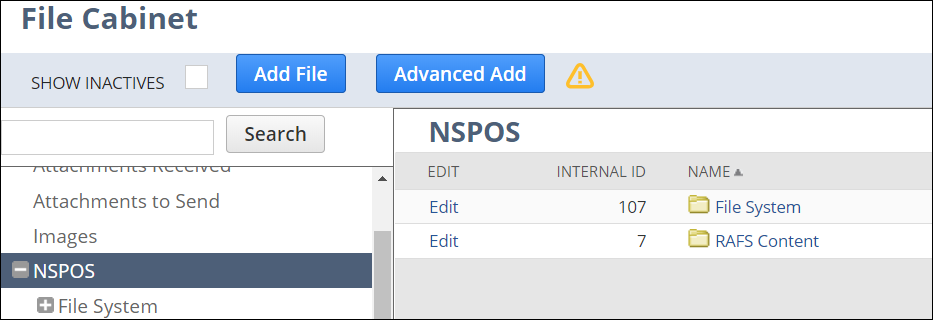
NSPOS uses the NetSuite ERP File Cabinet > File System folder to manage many system-wide configurations. An example of File Cabinet configuration is the template that determines the look of your printed receipts. Customers with advanced knowledge about the application can make some File Cabinet customizations themselves by signing into NetSuite and going to Documents > Files > File Cabinet > NSPOS.
Making File Cabinet changes directly in NetSuite is fast and the updates replicate across all registers not running in backward compatibility mode. NetSuite performs a check for file changes one time each hour. Save a local copy of the file before making changes. The local copy is your backup in the event you want to reverse an update. Then upload only the final version. Keep the backup copy until you're sure the change works as expected.
Due to the complexities and risks associated with making File Cabinet modifications, we do not describe specific customization steps in this guide.
Changes can affect performance. Moving or modifying files in the File Cabinet can seriously affect NSPOS performance or cause it to cease functioning completely. If you're not sure about making a change, please contact NSPOS Customer Support first.
Ensure limited access. You should only let your administrator or other necessary staff access the File Dabinet. Not restricting access could enable others to inadvertently or maliciously interrupt NSPOS operations, including causing a complete denial of service at the point of sale.
Do not make changes before an upgrade. You shouldn't changes files in the File Cabinet soon before or during an upgrade to a new release. Any modifications you make during that time might be lost.
Changes are not applied for backward compatibility. File Cabinet updates don't replicate to registers running in backward compatibility mode. Registers get the changes only when their major Staged From Version matches the major Replication Server Version. See Backward Compatibility for NSPOS Upgrades.
Restrictions for File Cabinet access
Access to your account's file cabinet restricted to users included in the NSPOS File System Access Group. This group is comprised of Administrators and others with a 'full permissions' role. Administrators can grant or remove access for individual users by adjusting their NetSuite ERP role.
This procedure displays the results of a saved search that is refreshed one time every 24 hours. If you change a user's Role to add or remove administrator privileges, and want to verify the change, clicking Save forces the search to update.
To review who has access to the File Cabinet:
-
Log in to NetSuite ERP as an administrator.
-
Go to Commerce > Marketing > Groups.
-
Click Edit for NSPOS File System Access.
-
Review the list.
-
If your task is complete, click Cancel.
-
If you want to update the search to include changes made today, click Save and then click Edit to view the refreshed list.
Administrator Role for File Cabinet
An administrator role is generally required to access the File Cabinet in NetSuite ERP. Use this next procedure to add or remove administrator role privileges for a user.
To adjust a user's Role:
-
Log in to NetSuite ERP as an administrator.
-
Go to Lists > Employees > Employees.
-
Locate the user by their Name or other criteria.
-
Click Edit.
-
Click the Access subtab.
-
Under Roles, select the desired Role.
-
Click Save.