Create a Layaway
To create a layaway:
-
Click Extended Transactions in the Register Sale screen.
Figure 11-1 Extended Transaction Menu Buttons

-
Click Layaway.
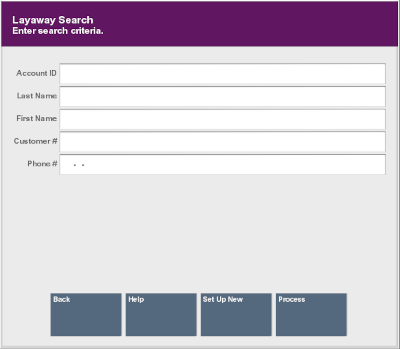
Figure 11-2 Layaway Search

-
Enter criteria to search for an existing layaway.
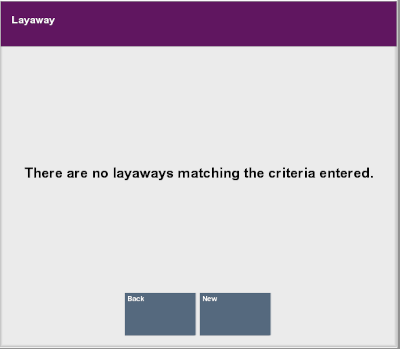
Xstore Point of Service will open a prompt listing open layaways for the customer, or an indication that there are no open layaways.
Figure 11-3 No Matching Layaways

-
Choose the correct option:
-
Click Set Up New if the customer has open layaways.
Note:
If the customer has an existing layaway account and Xstore Point of Service is configured for a Single layaway account, a new layaway cannot be created.
-
Click New if there are no layaways associated with the customer, or no customer has been associated with the transaction.
-
If no customer is associated with the transaction, perform a Associate a Customer with a Transaction and associated a customer with the transaction.
-
-
-
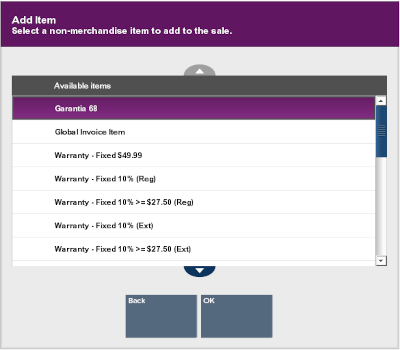
Add items to the transaction:
Figure 11-4 Sell Non-Merch Items

Note:
If an item cannot be added to a layaway, the system prompts with a message or reason the item is ineligible.
While Xstore Point of Service is in layaway mode, all items entered are entered as layaway items. The View Port only shows items and information for the current layaway transaction while in layaway mode.
Note:
If adding an item would exceed the total amount or item quantity permitted in a layaway, Xstore Point of Service displays a warning message. Click OK to confirm the message, then either complete the layaway or remove items to add additional items.
-
After entering all the items, do one of the following:
-
Click Exit Layaway to exit layaway mode and perform additional transaction processing.
-
Click Complete Transaction or Add Tenders to tender the transaction. See Processing Tenders.
Xstore Point of Service prompts for a deposit amount.
Figure 11-5 Deposit Amount Prompt

-
-
If necessary, change the layaway deposit amount.
-
Press Enter.
-
If the entered deposit amount is less than the minimum deposit amount, Xstore Point of Service opens a warning prompt. Click OK and return to Step 7 to enter a larger deposit.
-
If you changed the deposit amount was changed in Step 7, Xstore Point of Service prompts whether to continue with a deposit amount other than the default.
-
Click Yes to continue the transaction.
-
Click No to return to Step 7 and enter a new amount.
-
-
-
If Xstore Point of Service prompts for the number of days in the payment period:
-
Enter the number of days in the payment period.
-
Press Enter.
Note:
Xstore Point of Service displays a confirmation prompt if the entered number exceeds to maximum payment period. Click OK and enter a new payment period.
Figure 11-6 Layaway Payment Periods

-
-
If Xstore Point of Service prompts for the number of payment periods:
-
Enter the number of payment periods.
-
Press Enter.
Note:
Xstore Point of Service displays a confirmation prompt if the entered number exceeds the maximum number of payment periods. Click OK and enter a new payment period.
-
-
Select an option to continue the transaction:
-
Click Exit Layaway to continue adding non-layaway items to the transaction.
-
Click Complete Transaction to proceed to tendering.
-