


|

|
|
|
|
Creating and Managing Promotional Campaigns
This topic contains step-by-step information for defining a new campaign or modifying existing campaigns within the BEA E-Business Control Center. For conceptual descriptions of a campaign or for discussions of the business applications of campaigns, see Roadmap for Creating Promotional Campaigns.
This topic includes the following sections:
Creating a New Promotional Campaign
To create a new promotional campaign, follow these steps:
Figure 10-1 Campaign Editor Window

Specifying General Campaign Information
In the General pane (Figure 10-2), enter a description, campaign sponsor, and optionally, a goal description.
Figure 10-2 General Campaign Information Pane
Adding Scenarios to the Campaign Because campaigns are groups of scenarios that are associated with a business goal, scenarios are at the very heart of your campaign. In scenarios, you will specify one or more actions to take place on your Web site when certain conditions are met. To add scenarios to the campaign: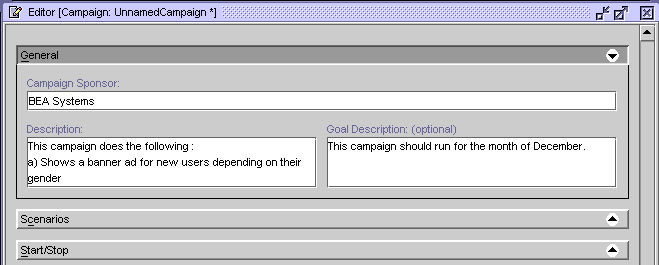
Note: For a description of each scenario template, see Using Scenario Templates.
If you would rather create a scenario by copying an existing scenario, click an existing scenario name in the Scenarios list to select it and then click Duplicate. A copy of the scenario, along with its actions, appears in the Scenarios list. You can then click Edit to modify the scenario as appropriate.
Figure 10-3 Scenarios Pane
To start with a blank scenario, select Default. Figure 10-4 Scenario Properties Window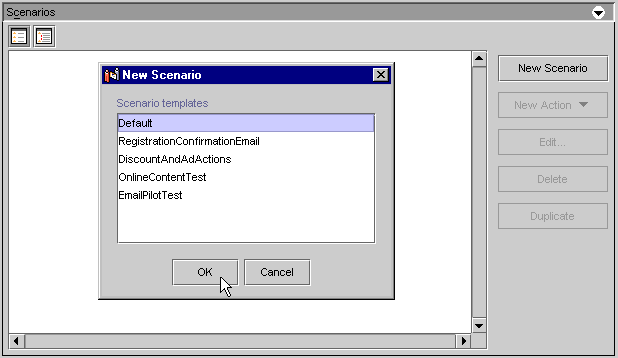
Note: For an explanation of why you might want to select customer segments at the scenario level and how this is different from selecting segments at the scenario action level, see Customer Segments in Scenario Actions. To select customer segments, you must have previously created them. For information on creating customer segments, see "Using Customer Segments to Target High-Value Markets." If you selected customer segments, these appear in addition to the scenario name in the Scenarios list.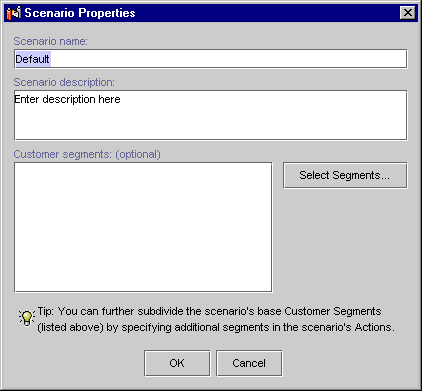
Adding Actions to Your Scenarios
Now that you have defined your scenario, you must add actions to it. There are three types of actions you can add to a scenario:
Duplicating Actions
Here is a tip to use after you have created other actions. Instead of creating a brand new action, you can save editing time by duplicating an existing action that has similar settings to the action you want to create. To do this, select the action you want to duplicate, and click the Duplicate button. A duplicate action is added to the scenario. You can double-click the new action to edit it.
Ad Actions
When you specify an ad action, you are defining criteria that will be used to select an appropriate ad for your online customer from a number of ads that are stored in your organization's content management system. Be sure that you have already developed these ads and that the ads exist within your content management system. For more information, see Authoring Ads or "Describing Ads in Your Content Management System" in "Displaying Ads."
To add ad actions to your scenario, follow these steps:
Figure 10-5 New Ad Action Window
You must add at least one condition, or you will not be able to save the scenario action. For an explanation of the possible conditions, see "Listing of the Available Conditions" in "Building Conditions and Queries in the BEA E-Business Control Center." Tip: You can use conditions in ways that always evaluate to true. For example, you can select the It Is after a Given Date condition and then specify the date as January 1, 1970. For example, if you selected the Date Is condition, you must specify a value for the hyperlinked [date] text in "the date is [date]" condition statement, shown in the Action portion of the New Ad Action window. To specify values for bracketed hyperlinked text, just click the text. Depending upon the condition and the hyperlink, a window or a dialog box opens. Table 10-1 provides a consolidated listing of the conditions and indicates where to look if you need detailed instructions for any of the corresponding windows/dialog boxes. Note: Table 10-1 shows all the conditions that may be used within the E-Business Control Center. Therefore, not all conditions shown here may apply to the action you are creating. The Any/All link acts as a toggle. Clicking on Any will change it to All, and visa versa. If you have not set up connection settings to the server for searching your ad database, or if you have not signed in to this area of the server yet, the Connection Setup window appears. If you have already set up a server connection, select the name of the connection in the Display Name field, and enter your user name and password. If you have not set up a connection to the server yet, see "Connecting to the Server" in the "Introduction to the BEA E-Business Control Center" for information. To select placeholders, you must have previously created them. For information on creating placeholders, see "Creating Ad Placeholder Files" in "Displaying Ads." Figure 10-6 Select Placeholders Window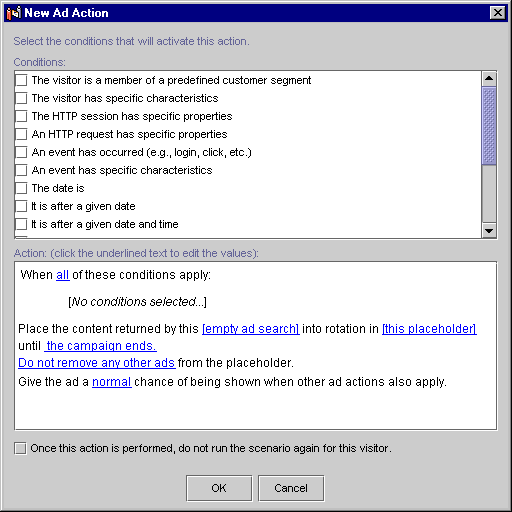
Verify that you are selecting the appropriate placeholder by viewing the text shown in the Placeholder Description text area. You can click the new link to edit the placeholder(s) used. Figure 10-7 Select Duration Dialog Box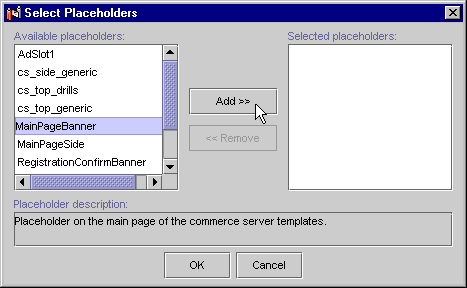
For example, if a promotion within your campaign ends prior to the end of the campaign, this feature helps ensure that promotional ads don't appear after the promotion ends. The date and time you set is in relation to universal time (UTC). For more information, see "Important Note About Dates and Times" in "Building Conditions and Queries in the BEA E-Business Control Center." Figure 10-8 Placement Options Dialog Box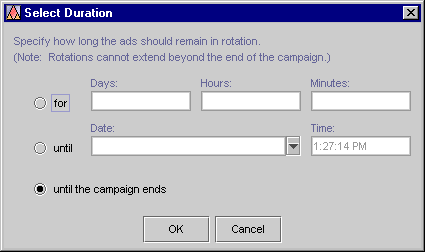
The display priority value appears in place of the Normal hyperlink in the Action portion of the New Ad Action window. For more information on ad display priorities, see Authoring Ads.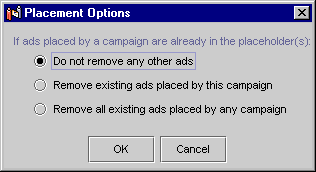
You may add different types of scenario actions to your scenario. For example, you may now want to add a discount or e-mail action to the same scenario where you just added the ad action. You may also choose to add another ad action to the same scenario. (Whether you do so or not depends upon whether you want to target the same segments that are specified in this scenario.)
The Flexibility of Campaign Queries in Placeholders
In the E-Business Control Center, a business analyst can create a scenario action that places a query in a specific ad placeholder when an event or some other state triggers the scenario.
WebLogic Portal uses a table to keep track of which scenario-specific queries in a placeholder apply to which customer IDs. For example, if Pat Gomes triggers a scenario to place a query in the top-banner placeholder, WebLogic Portal stores the Pat Gomes/top-banner-placeholder/scenario-query association in a table in its data repository.
Once a scenario places a query in a placeholder for a specific user, WebLogic Portal keeps the query in the placeholder until any of the following occurs:
Scenarios can contain multiple actions that place queries in one or more placeholders under different conditions. For example, when Pat Gomes logs in, scenario1 can place queryA in the top-banner placeholder. When Pat Gomes adds a drill to the shopping cart, scenario1 can place queryB in the top-banner placeholder. However, when a scenario engages a scenario action, it can place only one query in a placeholder for a given customer, and the query remains in the placeholder until the scenario replaces it. For example, when Pat Gomes adds a drill to the shopping cart, scenario1 replaces its queryA with queryB.
Because of the dynamic nature of campaign queries, some actions might leave a query stranded in a placeholder for a specific user, even across multiple sessions on the Web site.
For example:
Clearing Campaign Queries from Ad Placeholders
In general, for clearing ad placeholders, we recommend that for each scenario that includes an ad-placeholder action, you include an additional scenario action that displays queries for generic ads in the same ad placeholder when a user logs in.
However, there may be cases where you want to clear out all campaign queries from a placeholder to make sure the query being put in a placeholder has no competition from other campaign queries.
Figure 10-9 shows how an ad placeholder can contain multiple queries that compete with each other.
Figure 10-9 Queries in an Ad Placeholder
Assuming all queries have the same priority (see "Determining Which Query is Run in "Displaying Ads"), all queries in this placeholder have an equal chance of being run, giving you less certainty about which ad will appear. Note: If the default queries are set to be suppressed if campaign queries are present, they will not be used if a campaign query is put in the placeholder. See "Suppressing Default Queries when Campaign Queries Exist" in "Displaying Ads. If your organizational policies allow it, you can set an ad action to remove other campaign queries from a placeholder when the action is run, thereby ensuring that the query placed by the action is run in the placeholder (assuming the default queries are suppressed, as explained in the previous note). To remove other campaign queries when an action is run: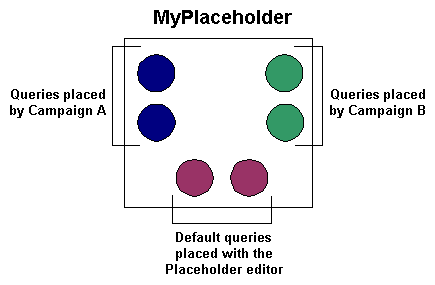
If you need to create a scenario or ad action, see Adding Scenarios to the Campaign and Adding Actions to Your Scenarios.
Figure 10-10 Removing Other Campaign Queries
The Placement Options dialog box appears, as shown in Figure 10-11. Figure 10-11 Placement Options Window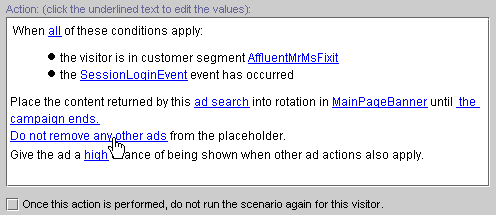

Default queries always remain in the placeholder unless you delete them in the placeholder editor in the E-Business Control Center. Even though they remain in placeholders, they do not necessarily run. Default queries will not run when a campaign query is present, if you have defined the default queries accordingly.
Note: There is an option in the E-Business Control Center that, among other things, lets you clear all ads (all campaign queries) put in placeholders by campaign actions (Tools
E-mail Actions
As part of specifying an e-mail action—an action that automatically sends an e-mail to a visitor when the action is triggered—you will need to reference a previously developed e-mail message. Be sure that you have already developed some e-mail messages, as explained in Authoring E-mails.
When you specify e-mail actions, remember that e-mails will only be sent to those customers who visit your Web site, meet the conditions you specify for the action, and have not chosen to opt out of receiving e-mails.
To add e-mail actions to your scenario, follow these steps:
Figure 10-12 New E-mail Action Window
You must add at least one condition, or you will not be able to save the scenario action. For an explanation of the possible conditions, see "Listing of the Available Conditions" in "Building Conditions and Queries in the BEA E-Business Control Center." Tip: You can use conditions in ways that always evaluate to true. For example, you can select the It Is after a Given Date condition and then specify the date as January 1, 1970. For example, if you selected The Date Is condition, you must specify a value for the hyperlinked [date] text in "the date is [date]" condition statement, shown in the Action portion of the New E-mail Action window. To specify values for bracketed hyperlinked text, just click the text. Depending on the condition and the hyperlink, a window or a dialog box opens. Table 10-1 provides a consolidated listing of the conditions and indicates where to look if you need detailed instructions for any of the corresponding windows/dialog boxes. Figure 10-13 Enter E-mail Information Dialog Box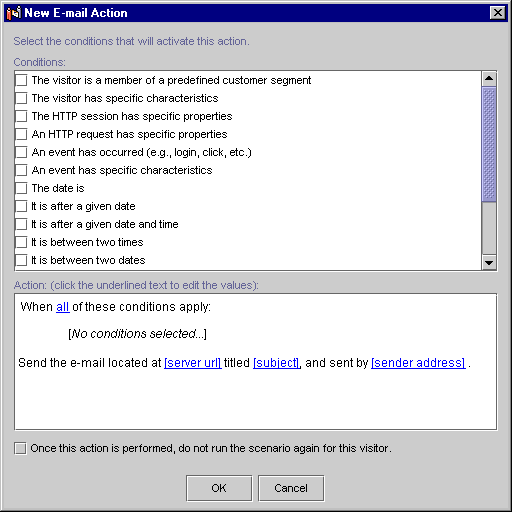
A valid server URL is the location of the file relative to your application directory. For example, if your file is found at PORTAL_HOME\applications\wlcsApp\wlcs\campaigns\emails\ Note: If the e-mail files are stored in a specific directory structure on the server, you will be able to use the Browse button to locate the e-mail messages you want. This directory structure is: Note: If you have not yet set up connection settings to the server for retrieving or previewing e-mail messages stored on the server, the Connection Setup window appears. If you have already set up a server connection, select the name of the connection in the Display Name field, and enter your user name and password. If you have not set up a connection to the server yet, see "Connecting to the Server" in the "Introduction to the BEA E-Business Control Center" for information. Figure 10-14 The Select E-mail Content Window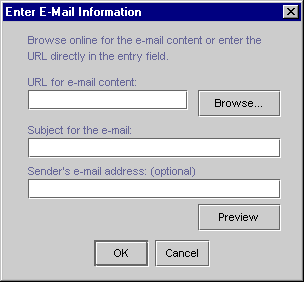
email.jsp on your sever, where wlcsApp is your enterprise application folder, the valid URL would be the path below that application directory to the e-mail JSP file. For example, /wlcs/campaigns/emails/email.jsp.
PORTAL_HOME\applications\<app_name>\campaigns\emails
where <app_name> is your enterprise application directory.
The Select E-Mail Content window closes, and the URL of the e-mail appears in the Enter E-Mail Information window. Note: To preview the e-mail, click Preview. (You need a server connection to preview e-mail. See the previous Note.) When prompted to enter a user ID, the name you enter will be used to show a personalized version of the e-mail, and is inserted where the customer's real user ID would typically appear.) Click OK. A preview of the e-mail will be displayed in your Web browser. For example, if you wanted a given customer to receive only one e-mail, regardless of how many times that customer entered the site or matched the relevant conditions, you would select this option.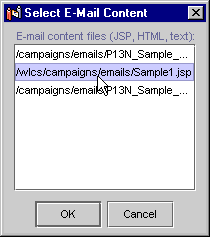
You may add different types actions to your scenario. For example, you may now want to add an ad or discount action to the same scenario where you just added the e-mail action. You may also choose to add another e-mail action to the same scenario. (Whether you do so or not depends upon whether you want to target the same segments that are specified in this scenario.)
Discount Actions
If you use WebLogic Portal, the E-Business Control Center includes an option for specifying discounts as a scenario action.
As part of specifying a discount action, you will need to select from a list of predefined discounts. Be sure that you have already defined some discounts, as explained in "Defining a New Discount with the Discount Terms Wizard" or "Defining a New Discount with the Discount Editor" in "Defining Stand-Alone or Campaign Discounts."
To add discount actions to your scenario:
Figure 10-15 New Discount Action Window
You must add at least one condition, or you will not be able to save the scenario action. For an explanation of the possible conditions, see "Listing of the Available Conditions" in "Building Conditions and Queries in the BEA E-Business Control Center." Tip: You can use conditions in ways that always evaluate to true. For example, you can select the It Is after a Given Date condition and then specify the date as January 1, 1970. For example, if you selected The Date Is condition, you must specify a value for the hyperlinked [date] text in "the date is [date]" condition statement, shown in the Action portion of the New Discount Action window. To specify values for bracketed hyperlinked text, just click the text. Depending on the condition and the hyperlink, a window or a dialog box opens. Table 10-1 provides a consolidated listing of the conditions and indicates where to look if you need detailed instructions for any of the corresponding windows/dialog boxes. Figure 10-16 Select Discount Window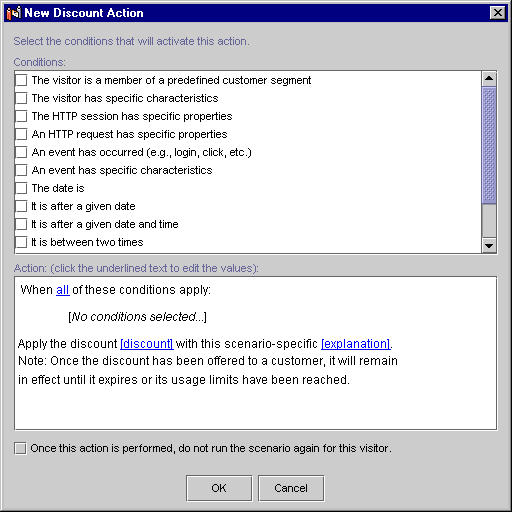
Verify that you are selecting the appropriate discount by viewing the text shown in the Description text area. The discount explanation may be displayed to customers receiving the discount, if your technical staff chooses to use it. For more information about discount explanations, see "Uses of Discounts" in "Defining Stand-Alone or Campaign Discounts." For example, if you want your customers to receive the discount only when they register, regardless of how many times they have entered the site or matched the relevant conditions, you would select this option.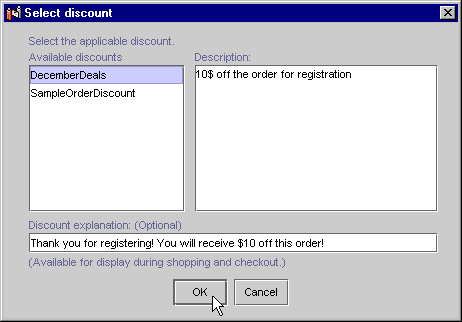
You may add different types of scenario actions to your scenario. For example, since a customer only sees the results of a discount action in the shopping cart, you may also want to create an e-mail or ad action that notifies the customer about the discount in a place other than the shopping cart.
Entering the Campaign Duration and End Criteria
In the Start/Stop pane (Figure 10-17), enter a start date, start time, stop date, and stop time for your promotional campaign in the fields provided.
The dates and times you set are in relation to universal time (UTC). For more information, see "Important Note About Dates and Times" in "Building Conditions and Queries in the BEA E-Business Control Center."
Figure 10-17 Campaign Duration and End Criteria Pane
If your promotional campaign will contain scenarios with ad actions, you may now want to specify end criteria (goals). For more instructions on how to specify campaign end criteria, see Specifying Campaign End Criteria. For more information about ad actions, see Designing Campaign Scenario Actions. Specifying Campaign End Criteria If you plan on using ad actions in your scenarios and want to end your campaign when certain ad-related goals are reached, you may want to supply some campaign end criteria. If the campaign end criteria are met, the campaign will be terminated even if the date on which this occurs is prior to the stop date you specified. Note: To improve performance, your business engineer may create a cache that limits the number of times a campaign checks with the database to determine whether it has achieved its goal. By default, a campaign updates the cache every 5 minutes. If the cache contains stale data, then it may be possible for a campaign to exceed its goal. For more technical information about this performance-related topic, refer to "Campaign Service Properties" in the Deployment Guide documentation. You can specify campaign end criteria based on the number of impressions (views) associated with the ad, the number of ad clickthroughs, or a combination of both. To specify campaign end criteria: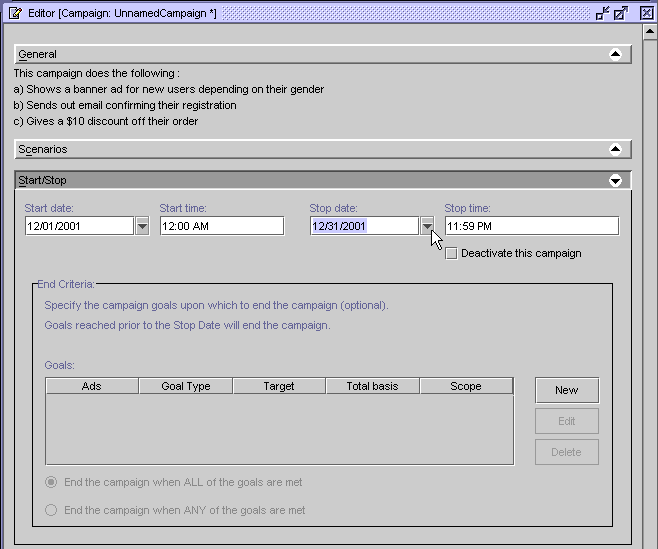
Figure 10-18 Goal Detail Window
Note: The ad identifier is usually the relative path to an ad file in your ad database. In the Tour Campaign 1 in the wlcsApp sample application, for example, the following ad identifier used is: Ads/wlcscm_ads/tourBannerFixup.jpg. However, the details of exactly what constitutes an ad identifier may vary from one content management system to another. Be sure to check with your business engineer for details. Figure 10-19 The Get Ad IDs Window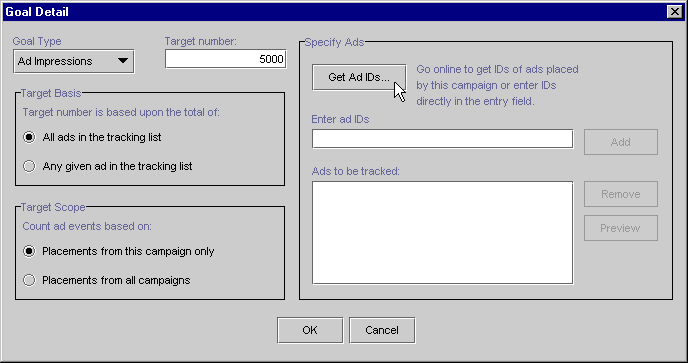
You can only perform ad searches in this window based on searches that are already defined in the scenario you selected. This ensures that you base your campaign end criteria on ads that are sure to be used by the scenario. Note: If you have not set up connection settings to the server for searching your ad database, the Connection Setup window appears. If you have already set up a server connection, select the name of the connection in the Display Name field, and enter your user name and password. If you have not set up a connection to the server yet, see "Connecting to the Server" in the "Introduction to the BEA E-Business Control Center" for information. Note: If you want to remove an ad identifier from the list, select it and click Remove. Choosing to count the ads across multiple campaigns means that if a visitor in another campaign views/clicks the ad, the impression/clickthrough would still be counted as an increment in this campaign toward meeting the goal. Figure 10-20 Goals List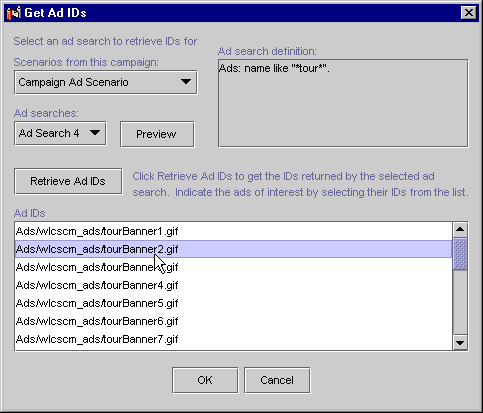
Note: To modify a goal, select it and click Edit. To remove a goal from the Goal list, select it and click Delete.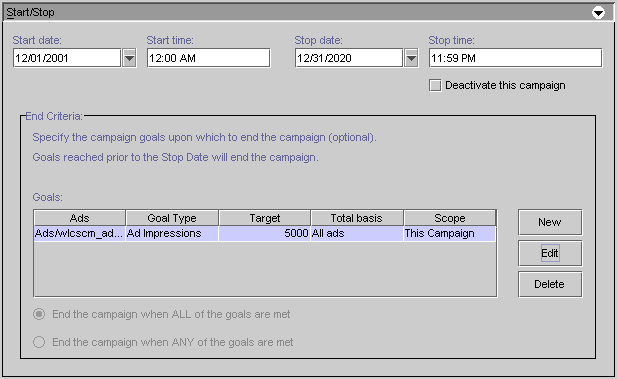
Locating Existing Campaigns
If you have defined many campaigns, you may find the need to locate specific campaigns or campaigns containing specific data.
The E-Business Control Center has a campaign search feature that lets you locate campaigns by keyword within campaign, campaign sponsor, activation status (active or deactivated campaigns), start and stop date ranges, and customer segments used.
To use the campaign search tool:
Figure 10-21 Campaign Search Window
Note: The Search function only works to locate campaigns. It does not allow you to search for other objects, such as customer segments or discounts. Use the following guidelines to help you search: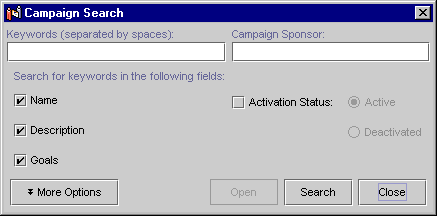
An active campaign does not necessarily mean the campaign is running. Campaigns only run between the start/stop times you specified and when the appropriate conditions are met. Therefore, searching for an active campaign may not necessarily mean you are searching for a campaign that is running.
When you click the More Options button, the following regions appear, as shown in Figure 10-22:
If you specify customer segments as part of the search criteria, the search function will locate only campaigns that have those segments specified at the scenario level. If a campaign has the segments specified at the action level instead, the campaign will not be retrieved as a match. For more information about the differences between specifying customer segments at the scenario and scenario action levels, see Customer Segments in Scenario Actions.
Figure 10-22 Expanded Campaign Search Window
Figure 10-23 Campaign Search Results
In the search results area, you can sort the columns by clicking the column names. You can also open a campaign in the search results by selecting it and clicking Open.
Modifying Existing Campaigns
The E-Business Control Center lets you to view and modify existing campaigns. After you modify an active campaign, you also have the opportunity to reset aspects of the campaign, such as removing previously placed ads, clearing counts of ad impressions and clickthroughs, resetting scenarios that are set up to run once per visitor, and clearing pending e-mails.
To modify a campaign:
For more information, see "Opening Files" in the "Introduction to the BEA E-Business Control Center."
Tip: If there is a long list of campaign names, you might want to use the name filter or the search function to locate the campaign you want to modify. For more information about these options, see Locating Existing Campaigns.
After you modify your campaign, you may want to reset certain aspects of the campaign, such as ads and pending e-mails. For more information, see Debugging Campaigns.
Warning: Be certain that the modifications you make are in line with your e-business strategy and that you entered the modifications correctly in the E-Business Control Center.
Deactivating and Reactivating Campaigns
Once campaigns are saved, they are considered active. (In other words, after the entire application is synchronized, the campaign will be ready to run between the start/stop times you specified and when the appropriate conditions are met.)
If for some reason you want to disqualify an active campaign from running or stop a running campaign prior to the specified stop date (or before end goals are reached, if your campaign contains them):
In the Explorer window, the icon next to the deactivated campaign becomes a lighter color, indicating that it is deactivated.
Note: The application must be synchronized to the server for the live campaign to become deactivated. For the procedures on synchronizing, see "Synchronizing Application Data" in the Deployment Guide.
If at any time you want to reactivate a campaign, deselect the Deactivate This Campaign option, click OK at the prompt, and save the campaign.
After you synchronize the application to the server, the campaign becomes active. A campaign that is reactivated is once again ready to run between the start/stop times you specified and when the appropriate conditions are met.
Deleting Existing Campaigns
When you delete a campaign in the E-Business Control Center, the campaign is removed from the server when you synchronize your application.
Warning: As with any deletion you make, be absolutely certain that you select the correct campaign and that you are sure you want to delete it. Deleted campaigns cannot be retrieved.
To delete an existing campaign, follow these steps:
Tip: If there is a long list of campaign names, you might want to use the name filter or the search function to locate the campaign you want to delete. For more information about these options, see Locating Existing Campaigns.
Debugging Campaigns
While testing the campaigns you have created, it is helpful to reset the campaigns so they behave as if they have been deployed for the first time.
The E-Business Control Center has an option, designed primarily for debugging, that lets you:
To reset campaign states:
Figure 10-24 The Reset Campaign States Dialog Box
Even Campaigns that have ended can be considered active and appear in the list. Only when the Deactivate This Campaign option is selected in the Start/Stop pane of a campaign does it not appear in the Active Campaigns list. If you have not set up connection settings to the server, the Synchronization Setup window appears. If you have already set up a server connection, select the name of the connection in the Display Name field, and enter your user name and password. If you have not set up a connection to the server yet, see "Connecting to the Server" in the "Introduction to the BEA E-Business Control Center" for information. Click Connect. If you have already set up connections, but you have not yet logged in to the server for the current E-Business Control Center session, you must log on in the Logon window that appears.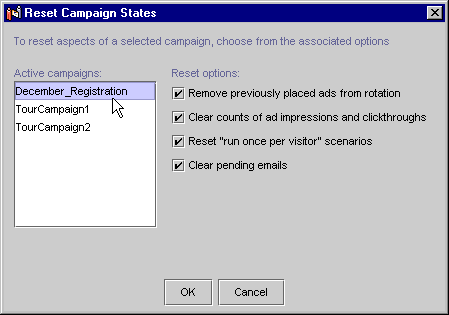
You can also set the E-Business Control Center to automatically display the Reset Campaign States window after you synchronize. To do this, choose Tools
Reactivating Campaigns That Have Ended Because of Goals Being Met
If a campaign that has ended because its goals were met prior to the end date of the campaign (see Specifying Campaign End Criteria), you can reactivate that campaign by resetting the ad impressions or clickthroughs that caused it to reach its goals and end.
For more information, see Debugging Campaigns.
If you have made changes to the campaign, you can select the "Update only modified files in the application" option instead.

|

|

|
|
|
|
Copyright © 2001 BEA Systems, Inc. All rights reserved.
|