Each promotion can have any number of Closeness Qualifiers. Consider again the “free shipping for orders over $2500” promotion. One Closeness Qualifier may display when an order equals $2400 and users have a bike of brand X in their cart. This upsell message might say “Spend another $100 to qualify for free shipping. Check out our brand X windbreakers” assuming that brand X windbreakers all cost $100 or more. Another Closeness Qualifier for the same promotion might be targeted to users with orders worth $2000. This Closeness Qualifier may say “Shipping costs for the products in your shopping cart is w. Spend another $500 and shipping is free.”
When you create a Closeness Qualifier, you describe the circumstances under which it applies by creating a PMDL rule. Creating this rule is similar to creating a promotion discount rule. You can also specify a media item, such as a graphic that entices users to purchase some product in order to receive a promotion. Such products are designated in the Upsell Action, which is associated to the Closeness Qualifier. Each Closeness Qualifier also has a priority.
Because a user could qualify for more than one Closeness Qualifiers for a given promotion, each Closeness Qualifier is given a priority setting. For a given promotion, the ATG platform evaluates the highest priority Closeness Qualifier to see if it is appropriate for the user and progresses through the list of Closeness Qualifiers until it finds one that is. When one is found, the Closeness Qualifier is assigned to the user.
In general, users can receive one Closeness Qualifier per promotion at a given time. Since a promotion is likely to have multiple Closeness Qualifiers, assigning priorities ensures that users who qualify for two Closeness Qualifiers obtain the correct one. For example, if you have two Closeness Qualifiers, you would prioritize them as orders that are at least $100 (priority 1), and orders that are at least $50 (priority 2). That way, a user with an order of $100, who qualifies for both Closeness Qualifiers, will only be provided with the one closest to his or her total.
At times, you may want a user to be eligible for more than one Closeness Qualifier for a promotion. As demonstrated above, some Closeness Qualifiers may be based on certain products in a user’s shopping cart. You may have two Closeness Qualifiers, each of which aims to upsell a specific brand when a product of that brand is in the user’s shopping cart. If both brands are represented by products in the user’s shopping cart, why shouldn’t the user see both Closeness Qualifiers?
You can give multiple Closeness Qualifiers in a given promotion the same priority number so that a user is able to receive both of them. When the ATG platform finds one Closeness Qualifier that is fitting for a user, it first evaluates all other Closeness Qualifiers with the same priority before ending the operation. A user is granted all Closeness Qualifiers with the same priority that apply to him or her. Other Closeness Qualifiers on that promotion with lower priority are skipped.
Create a Closeness Qualifier as follows:
In the Catalog Management > Catalog Elements task area, display items of type Closeness Qualifier.
Select File > New Item to open the New Item dialog box.
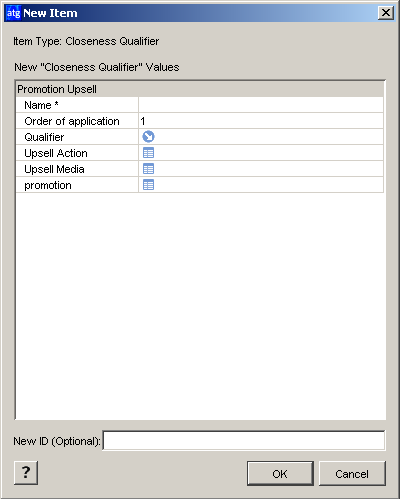
In the Name field, provide a name to the Closeness Qualifier that uniquely identifies it.
In the Order of application field, specify a priority for the Closeness Qualifier that determines when, in the context of all Closeness Qualifiers for that promotion, this Closeness Qualifier should be executed. The highest priority is 1.
Click in the Qualifier field and then click the “…” button beside it. The Qualifier dialog box displays.
In the Condition field, specify the rule that controls the circumstances under which the ATG platform provides the Closeness Qualifier to the user. Create the rule in the same way you created the discount rule as described in Creating a Discount Rule. Once you are finished, click OK.
If you want to specify a list of products as an Upsell Action, you can do so after you create the Closeness Qualifier. (See Associating an Upsell Action to a Closeness Qualifier for instructions.) Skip the Upsell Action property for now.
Click beside the Upsell Media field, and then click the “…” button. The Upsell Media dialog box displays.
Locate the media item created by a page developer for this Closeness Qualifier. A media item could be a graphic or string of text that alerts a user to their proximity to the promotion. You can find a media item in two ways:
Search by
repositoryItemtype in the Selective Listing tab using the List button.Navigate to the media item in the folder hierarchy provided in the Folder Listing.
Once you have selected the media item, click OK.
Click beside the Promotion field, and then click the “…” button. The Promotion dialog box displays.
Locate the promotion that the Closeness Qualifier was designed for. You can find a promotion in one of two ways:
Search by
repositoryItemtype in the Selective Listing tab using the List button.Navigate to the promotion in the folder hierarchy provided in the Folder Listing.
Once you have selected the promotion, click OK.
