This section provides an overview for creating commerce assets. The chapters that follow this one describe how to create and manage each type of asset Merchandising supports, including catalog folders, catalogs, categories, products, SKUs, promotions, coupons, store locations, store text, pricing, media folders, and media items.
To create a new asset:
In a Commerce Assets project, use the Browse panel to navigate to the asset that will be the new asset’s parent. For example, to create a new product, navigate to the category where you want to create the product.
See Using the Navigation Pane for more information.
Click the Create button in the toolbar and select the type of asset you want to create.
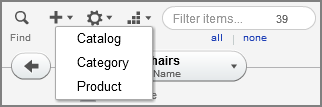
The list of asset types of you see depends on the following:
The permissions associated with your user profile. Talk to your administrator if you have questions about your permissions.
Where you are in the catalog hierarchy in the left-hand Navigation pane.
For example, in the Browse panel, at the top level of a catalog, you can create a catalog or a category. If you drill down one more level, into a category, you can create a catalog, category, or product. See Browse Panel for more information.
Fill in the property fields in the Details pane. Required fields are marked with a star icon. See Working with Asset Properties to learn how to use the different types of Merchandising property editors.
Click Create.
The new asset appears in the navigation pane. Depending on how your administrator configured Merchandising, a tile for the asset may also appear in the asset tray.
