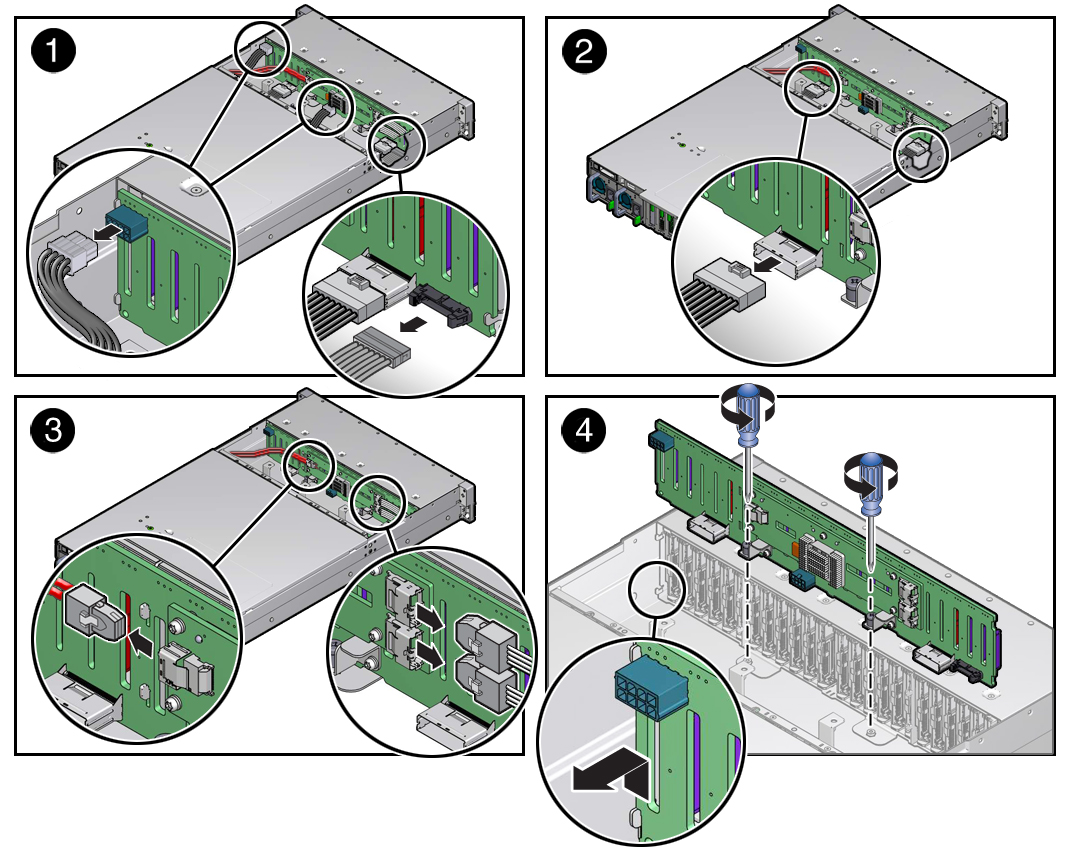
Remove the Twenty Four-Drive Backplane
-
Prepare the server for service.
- Power off the server and disconnect the power cords from the power supplies.
-
Attach an antistatic wrist strap to your wrist, and then to a metal
area on the chassis.
See Prevent ESD Damage.
- Extend the server into the service position.
-
Remove the fan cover.
Remove the two side screws that secure the fan cover, then remove the fan cover by pulling it towards the rear of the server.
-
If necessary, remove the fan modules from the server.
See Remove a Fan Module.
- Pull each drive and filler half way out of the drive backplane.
-
Disconnect the cables from the drive backplane.

- Disconnect the two power cables and the auxiliary signal cable from the drive backplane (panel 1).
- Disconnect the two NVMe cables.
- Disconnect the three SAS cables from the SAS expander.
- Using a No. 2 Phillips screwdriver, loosen the two green captive screws that secure the drive backplane to the chassis.
- Lift the drive backplane and attached SAS expander, over the 12 hooks that secure it, then lift the assembly up and out of the chassis.
- Place the drive backplane on an antistatic mat.
- Install a drive backplane or continue the service procedure that required access.