
You can install the Corente Services Gateway into any supported virtualization environment. This document provides an example of how to deploy the Corente Services Gateway in an Oracle VM environment to illustrate the process. However, it is beyond the scope of this document to explain how to install Corente Services Gateways into each supported environment. You should refer to the appropriate documentation for your virtualization platform for detailed information.
In general, when installing Corente Services Gateways into a virtualization environment, you should provision virtual machines with the following minimum resources:
1 GB of memory (1024 MB)
40 GB of disk space for the virtual disk. However, Oracle recommends that you allocate 100 GB of disk space to provide future capacity.
The following steps describe how to install the Corente Services Gateway software in an Oracle VM environment:
Log into Oracle VM Manager.
Select the Repositories tab.
Import the Corente Services Gateway
.isofile.Select the Servers and VMs tab.
Expand Server Pools and then select the server pool where you want to deploy the virtual machine.
Right-click the server pool and then select Create Virtual Machine.
The Create Virtual Machine wizard displays.
Select Create a new VM and then click Next.
On the Create Virtual Machine window enter a name for the virtual machine and specify the following settings:
Operating System: Select Red Hat Enterprise Linux 6.
Memory: Allocate at least 1 GB (1024 MB).
Domain Type: You should select Xen HVM PV Drivers for optimal performance.
Leave all other settings on the Create Virtual Machine window as default or specify other settings as appropriate and then click Next.
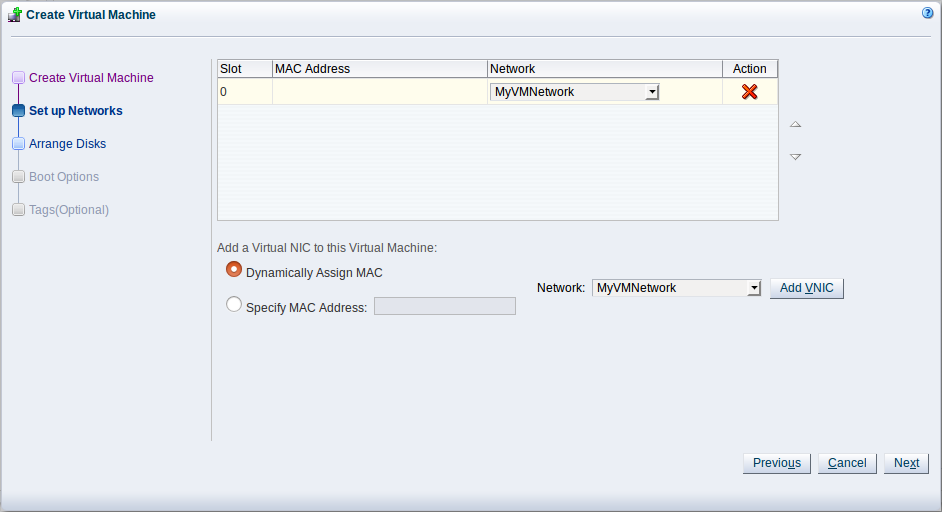
On the Set up Networks window, add a virtual network interface card (VNIC) as appropriate and then click Next.
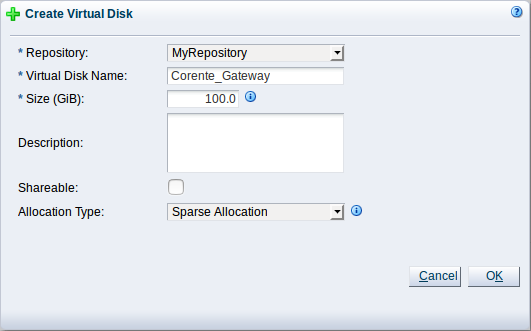
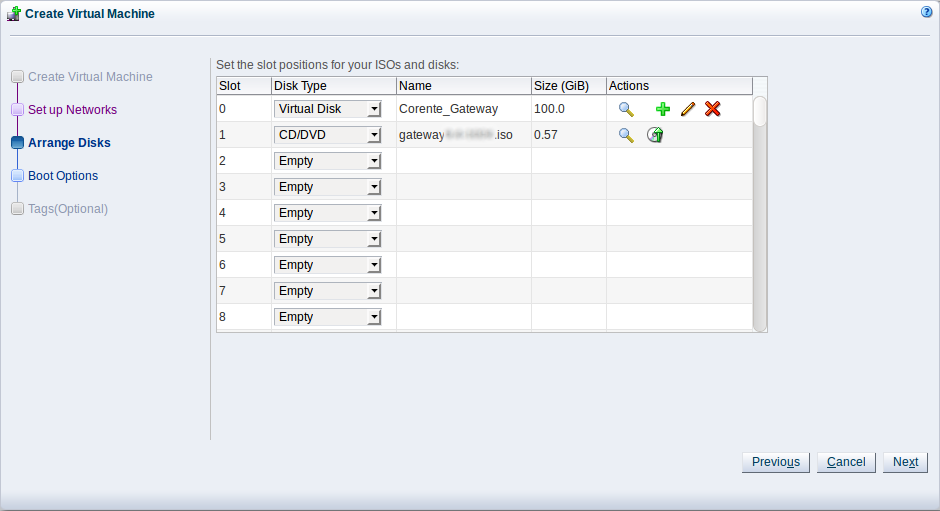
On the Arrange Disks window, add a virtual disk to slot 0.
To install Corente Services Gateway the virtual disk must be at least 40 GB. However, Oracle recommends you create a virtual disk with 100 GB to provide future capacity.
On the Arrange Disks window, attach the Corente Services Gateway
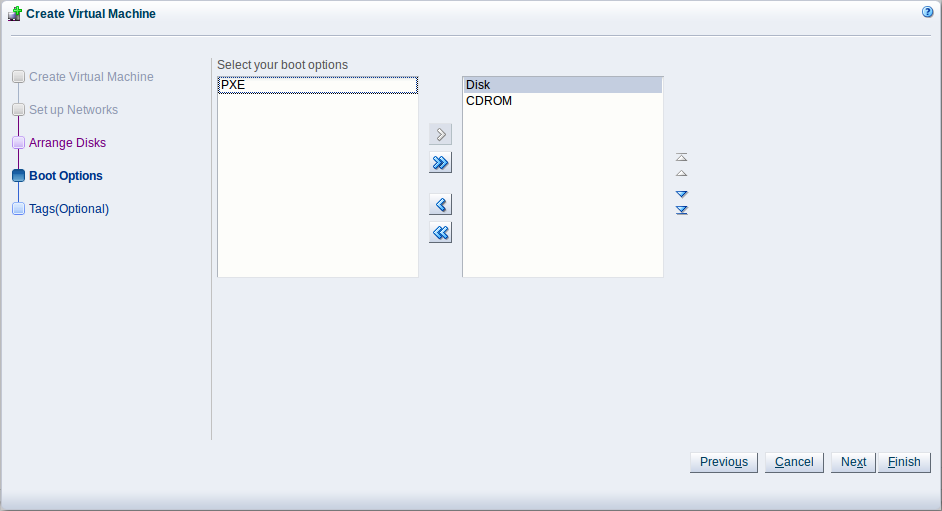
.isofile to slot 1 and then click Next.On the Boot Options window, set Disk as the first boot option and CDROM as the second boot option.
Do one of the following:
Click Finish if you do not plan to add tags to the virtual machine.
Click Next, add the appropriate tags to the virtual machine on the Tags window, and then click Finish.
Start the virtual machine.
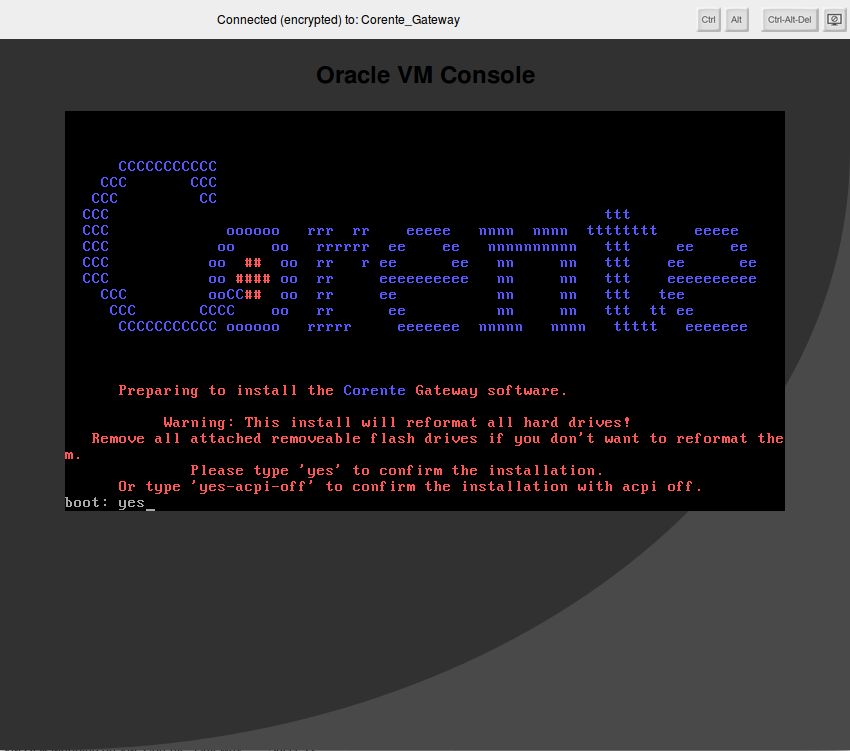
Enter yes to install the Corente software.
Install packages for Corente software. When prompted, select Reboot to complete the installation. Leave console connection open and it will reconnect after the software reboots. Then download config screen.
Launch the virtual machine console when the virtual machine status is Running.
The virtual machine console opens in a new window and displays the Corente Services Gateway installation screen.
Enter
yesat the boot: prompt to begin the installation process.When the Corente Services Gateway installation is complete, reboot the system. Leave the virtual machine console open while the system reboots. The console automatically reconnects when the virtual machine starts.

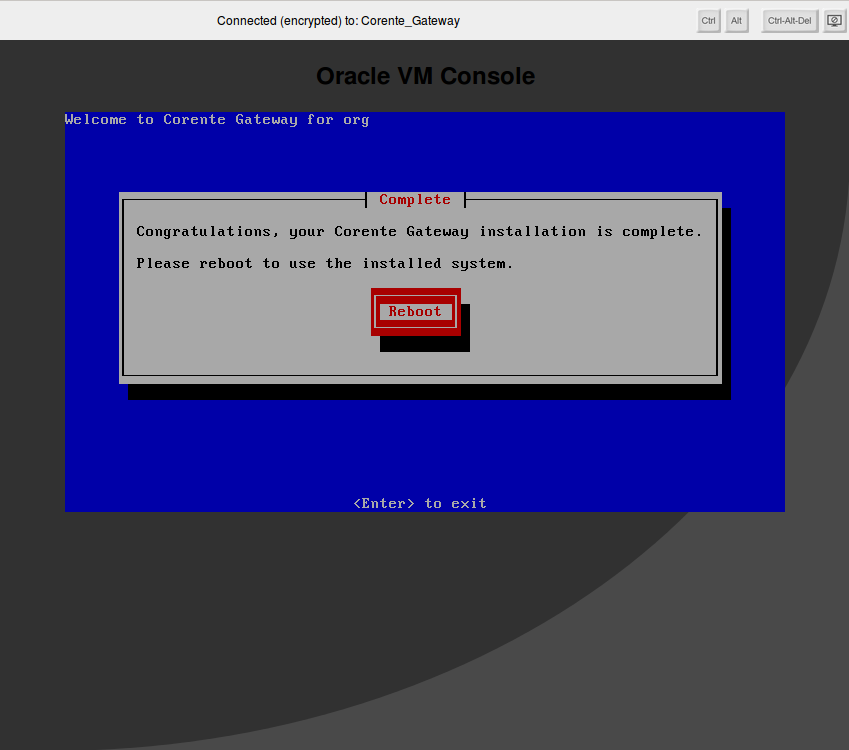
After the system reboots, proceed to Section 4.4, “Installing the Corente Services Gateway Configuration”.