The Get Data synchronization that created the activity sheet also populates the activity sheet with the:
- Scheduling data (activities along with assignments and spread data) from the P6 projects mapped to the current shell in the Integration tab.
- Role and resource rates data from the Master Rate Sheet for the mapped projects.
Note: Subsequent updates of CBS Code, Role Rate, and Resource Rate in P6 will not trigger the update of the CBS Code (in the Activity Sheet) and Role Rate and Resource Rate (in the Master Rate Sheet) in Unifier. This is to prevent data in Unifier to be overridden by updates in P6.
Go to the shell (User mode) > Activity Manager module > Activity Sheet node to open the Activity Sheets log which lists the activity sheets. You can also double-click to open the activity sheet.
Each activity sheet has a gear menu (![]() ) that can be used to:
) that can be used to:
- Open
To open the Activity Sheet from the log. Alternatively, you can highlight a row, right-click, and use the Open option.
- Copy
Also available by using right-click on the activity sheet. To create a new activity sheet by copying all of the activities, schedules, associated WBS, and assignments (in future). The default name of the Activity Sheet will be 'Copy of <Activity Sheet Name>'. This gear menu (
 ) option will not be seen if you select multiple activity sheets or for the System Activity Sheet.
 - Permissions
To assign Edit, View, and Modify permissions to other users for the selected activity sheets. The functionality supported is same as assigning permissions to non Workflow BPs.
When you open an activity sheet, the Activity Sheet log window opens.
The Activity Sheet log window contains the full log. By default, the left grid displays the current schedule for the first project (displayed in the Project field) as a flat and alphabetically organized list of the project activities and attributes.
The Activity Sheet log window right-hand pane displays the following tabs:
- General
- Assignments
- Audit Log
You can use the toolbar options in the Activity Sheet log window to:
- Assign a rate sheet to the project
- View, create, edit, and manage log views
- Filter by project
- Switch between schedule types (current or baseline) of the project
The following explains each toolbar option:
Actions | The Actions drop-down list has the following options:
|
|---|---|
View | The View option enables you to switch between default and custom log views. The View drop-down list has the following options:
|
Refresh | When a different rate sheet is assigned to roles and resources or when recost is performed, values in the sheet are not automatically updated. Click Refresh to display updated data in the fields. |
Edit View | Select or Hide columns, apply filters, group and sort by available fields. Save custom views.
|
Search | To search for related items in the database. You can filter the data based on cost type and rate type. |
Find on Page | To filter results displayed on the screen. In any column, begin typing in the field below the header to trigger results. |
Below the toolbar options, the following options are available:
Project | Enable you to select a project and display the project activities on the Activity Sheet log window., and the tabs on the right-hand pane are dynamically updated with the corresponding items |
|---|---|
Switch to Baseline Project | A P6 project can be a current schedule project or a baseline schedule project. This is a toggle key that provides access to the current or baseline project types. |
To view the Activity Spread for an activity sheet:
- Select an activity in the Activity Sheet log window.
- Click the gear menu () and select View Activity Spread to open the Activity Spread window.
- Select your options from the following fields to display the results on the Activity Spread window.
- Type
- Frequency
- Cost Type
- Rate Type
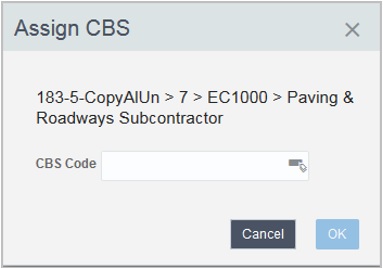
To assign CBS to an activity sheet:
- Select an activity in the Activity Sheet log window.
- Click the gear menu () and select Assign CBS to open the Assign CBS window (cost code picker).
- Click the drop-down arrow to select the CBS Code from the list.
- Click the select icon (next to the drop-down arrow) to open the CBS Picker log window.
- Click to select one or multiple CBS codes from the list and click Select to return to the Assign CBS window.
- Click to select the Apply to all Assignments in the Activity. This enables you to apply the cost code to only the activity or all assignments of the activity.
- Click OK.
The Activity Sheet log window has the following columns, in the default layout:
- Activity ID
- Activity Name
- Activity Status
- Activity Type
- Activity % Complete
- Actual Start
- Actual Finish
- Actual Duration
- Actual Total Cost
- At Completion Duration
- At Completion Total Cost
- Planned Start
- Planned Finish
- Planned Duration
- Planned Total Cost
- Start
- Finish
- Remaining Early Finish
- Remaining Early Start
- Remaining Duration
- WBS Code
- WBS Name
- WBS Path
- Remaining Total Cost
- Primary Constraint
- Secondary Constraint
Note: Use can change the default by creating and managing custom views in the View drop-down list.
The Activity Sheet log window displays the activity sheet properties on the right-hand pane within the following tabs:
- General
- Assignments
- Audit Log
Tip: Click the expand icon, in the right pane, to better view the tab details.
The following explains each tab in details. Each tab provides information corresponding to activity attributes, assignments, and events respectively:
The General tab displays the attributes for the selected activity in groups:
- WBS Attributes
- Activity Attributes (General)
- Activity Attributes (Schedule)
- Activity Attributes (Units)
- Activity Attributes (Cost)
- Activity Attributes (Earned Value)
See Attributes for details.
The Assignments tab displays the resources and roles assigned to the activity selected in the main grid. The layout displays the following columns:
- Resource Name
- Role Name
- Rate Source
- CBS Code
- Planned Units
- Actual Units
- Remaining Units
- At Completion Units
- Price per Unit
- Planned Cost
- Actual Cost
- Remaining Cost
- At Completion Cost
Assign Price/Unit
To override the price or unit. The Planning and Actuals will be fetched from corresponding Rate Sheet or Overridden Price/Unit from override action. Whenever a different Rate is assigned to a Resource, system will display the following alert message: Perform Recost to see updated costs.
The gear menu (![]() ) in the Assignments tab are:
) in the Assignments tab are:
- View Spread
- Assign CBS
- Assign Rate Source
Select View Spread to view the spread of costs or units for a role or resource assignment in a separate pop-up window.
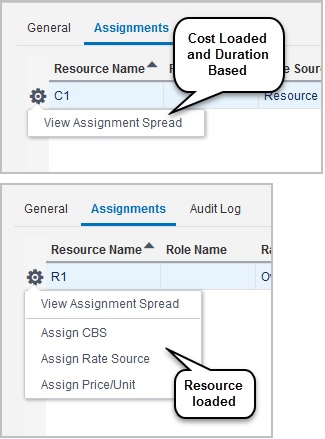
The gear menu (![]() ) in the Assignments tab vary depending on the project type. There is only one option for Cost-loaded and Schedule-based projects:
) in the Assignments tab vary depending on the project type. There is only one option for Cost-loaded and Schedule-based projects:
- View Assignment Spread
The following options are available for the Resource-loaded projects:
- View Assignment Spread
- Assign CBS
- Assign Rate Source
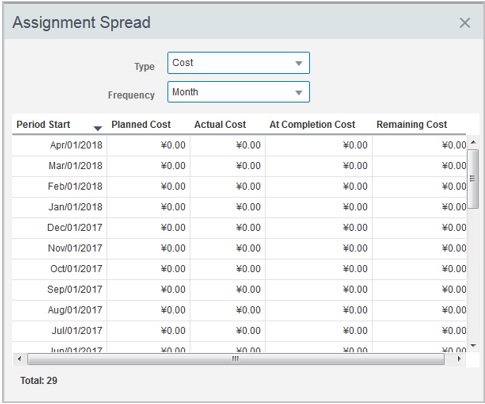
In the Type list, select Cost or Units. Column headings change accordingly.
In the Frequency list, change the granularity level of the spread to Week, Month, or Year.
In the Assignment Spread dialog, view values in the following columns:
- Period Start
- Planned Cost (or Units)
- Actual Cost (or Units)
- At Completion Cost (or Units)
- Remaining Cost (or Units)
Use this option to assign a CBS code to a resource and/or role. Select Assign CBS and select a code in the CBS field, and then click OK.
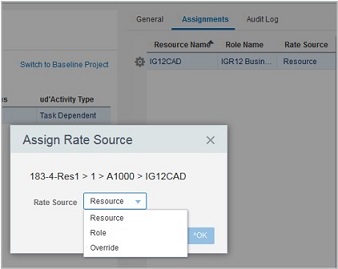
Select Assign Rate Source to assign a rate source to an assignment.
The Rate Source drop-down list has the following options:
- Resource (default)
- Role
- Override
Select an option.
Unifier updates the rates for price/unit of each assignment after retrieving them from the corresponding source fields in the rate sheets as follows:
- If the rate source is Resource, the data is fetched from the Resource Rate Sheet.
- If the rate source is Role, the data is fetched from the Role Rate Sheet.
- If the rate source is Override, the Price/Unit data is not refreshed.
In this case, you must manually specify the value. To do so, click Rate Source and follow the prompts. The Assign Rate Source is only applicable for Resource-loaded projects.
- Select Override and click OK.
- The gear menu () displays an additional option for Override. Click the gear menu () and select Assign Price/Unit.
- Modify the existing rate and click OK.
When finished, click OK.
Unifier rolls up the assignment values to calculate values at the activity level.
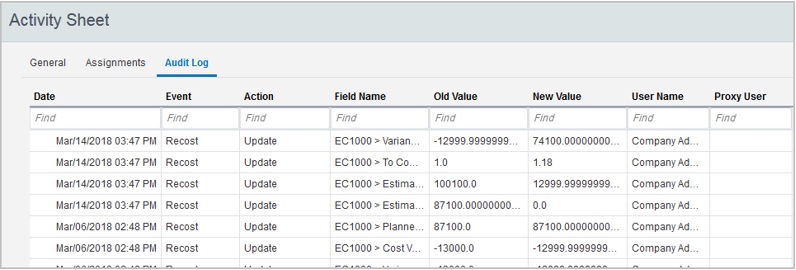
The Audit Log tab displays the audit details at the activity level in the following columns:
- Date
- Event
- Action
- Field Name
- Old Value
- New Value
- User Name
- Proxy User