Sending a Proof Test
Important: This information applies to the Email Campaign Workbook. If the Campaign Designer has been rolled out to your account, see Launching an Email campaign with the Campaign Designer.
To see how the new Campaign Designer differs from the old campaign workbook, see Email Campaign Designer changes. For a breakdown of the new Campaign Designer's visuals, see Email Campaign Designer visuals overview.
You can test your email campaign by sending proof launch. When you proof the campaign, the individuals in the proof list will receive copies of the campaign. Additional emails with reporting information regarding failures and launch completion are sent as well.
You can use the debugging options to validate that your personalization rules are working as designed. Debugging is used only during Proof Launch and Preview, eliminating the chance that test content is accidentally sent to actual customers.
Before you begin:
Before you can send a proof launch, you must resolve all errors on the email campaign. You can view any errors from the campaign workbook by clicking Show errors. Learn more about the campaign workbook.
To send a proof test:
- On the side navigation bar, click Campaigns and select Manage Campaigns.
- Open the campaign you want to work with. The campaign workbook opens.
- In the Proof settings section, click Edit
 and review your proof settings:
- Enable debug mode: Prints your RPL debug code at the end of the email. Learn more about debugging email message code.
- Output data sources: Displays all data fields and their associated values that were used to personalize the email at the end of the email.
- When you are ready, click Proof launch from the campaign workbook. This opens the launch configuration options dialog.
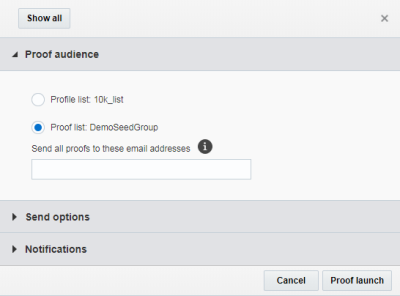
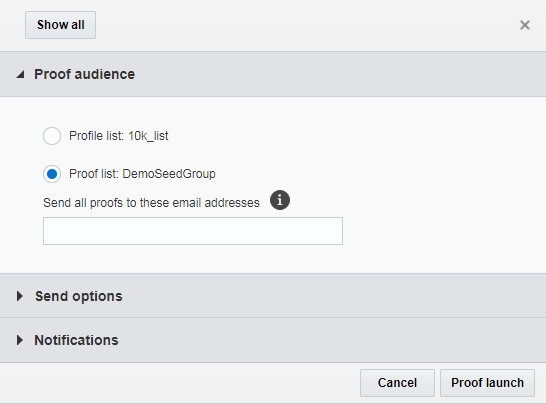
- Use the proof launch dialog to configure the proof audience, send options,
and notifications:
- Proof audience: You can select your contacts, Profile List, or a Proof List to send the proof launch email campaign message to. Alternatively, you can also choose to send proof emails to specific email addresses. Separate multiple addresses with a comma (,).
- Send options: Depending on the email campaign, select the format for your proof launch (HTML, text, multipart). You may send up to 100 messages to specific email addresses.
- Notifications: Configure the email addresses that should received progress and failure notifications. For processed messages, you can send the notification after the specified number of messages is sent, or when the launch is complete.
For sent messages, you can send the notification after the specified percentage of messages is sent, or when the launch is complete. For skipped messages, you can send the notification when a specific percentage of messages is skipped.
Failure notifications contain information that identifies the campaign and program, and a pointer to the error in the Campaign Dashboard.
- After you finish your configuration, click Proof launch.
After you finish, the proof launch configuration is saved and you can use it to launch another proof. You can view the progress of the launch from the campaign workbook. After the launch completes, you can view the Live Report and monitor your campaign.
Failure reasons might include the following:
- No Response from any of Number mail transfer agents (MTAs)
- No Response from any of Number MTAs (and SMTP Server Busy on Failover)
- SMTP Error
- SMTP Error (and SMTP Server Busy on Failover)
- SMTP Server Busy