Digital Receipts
NSPOS 2020.1.X brings a new option to provide your shoppers with a digital receipt sent to them using email. Now your sales associates can provide a receipt using any of these configured options:
|
|
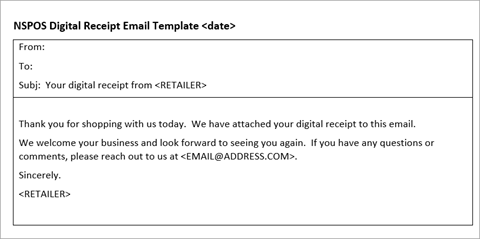
Digital receipts are sent to the shopper's email address as a PDF attachment. The process uses NetSuite's PDF template functionality for the receipt layout. This functionality means you can customize your digital receipts with your logo and business information. Options are also available to use a default template for most locations, but special templates for others.

If your shopper is saved as a customer in NSPOS, and the sales associate adds them to the transaction, their email address is pre-filled. If the shopper is a guest, or if a saved customer wants to use a different address, the sales associate enters it in a prompt from the register.
The application uses the employee email address you choose as the digital receipt sender's email address. The address is pulled from the senders employee record in NetSuite.
You should decide which address to use before beginning the setup. A new employee can be set up for this purpose. Go to Lists > Employees > Employees.
Sales Associate Receipt Procedure
Cashiers, sales associates and others who process transactions in NSPOS should follow these steps when providing shoppers with receipts.
To print or email a receipt:
-
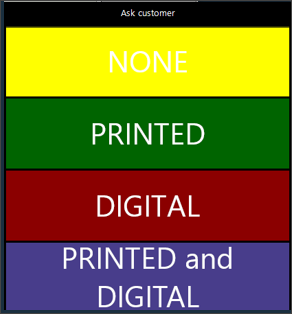
Ask shopper if they want their receipt printed, sent digitally by email, or both.
-
Tap the option matching the shopper's request.
If printed, hand shopper receipt after printing.
-
For digital or printed and digital requests:

-
If shopper is saved as a customer, the email address is pre-filled. Ask if that is the address to use.
If you have not added the saved customer to the transaction, use Search Customer to locate them.
-
A shopper saved as a customer can request to use an email address different from their saved address. If so, the associate is asked if the new email address should replace the address saved now.
-
If shopper is a guest (not in NSPOS), ask for their email address.
Tip:For shopper privacy and to improve accuracy, you might provide a paper and pen for the shopper to write their email address.
-
Enter the email address as needed.
-
Tap Done.
-
NSPOS validates that the email address is formatted correctly. It does not validate if the address is correct.
-
You are alerted that the receipt will be sent by email.

-
Notify shopper that the digital receipt will be sent to their email address.
-
-
If a printed receipt was requested, pass the receipt to the shopper.
For NSPOS 2020.1.X and later, NetSuite ERP saves the receipt in the transaction history. A sales associate can reprint a receipt from the register.
Re-send a Digital Receipt
If a shopper asks to have a receipt sent again, including to a different address, the action must be performed in NetSuite ERP. The option to re-send a receipt is not available from an NSPOS register.
The list of sent receipt email is saved with the employee record that uses the From email address. This is the address you choose when configuring your digital receipt setup.
To re-send a digital receipt email:
-
Go to Customization > Lists, Records, & Fields > Record Types.
-
On the NSPOS Enable Features row, click List.
-
Click View.
-
Open the Digital Receipt subtab.
-
Click the Sender Email Address name to open their employee record.
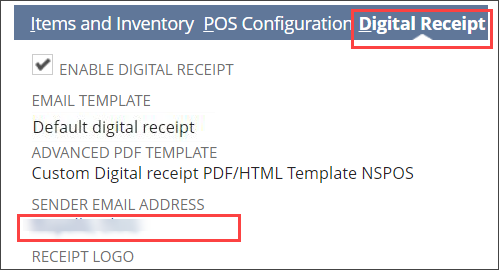
Email sent from this employee-record address are found under the Communication subtab.
-
Use the Primary Recipient column to locate the shopper's email address.
-
Click View for the desired email.

-
Click Reply to All.
-
Leave the Additional Recipients '<Type then tab>' field empty.
-
Click the Email field and enter the shopper's email address.
-
Click Merge & Send.
Tip:You can click Refresh for the list to confirm the email was sent.
Enabling Digital Receipts in NetSuite
Use the NSPOS Enable Features page to enable the digital receipt option on your registers. This page is also where you set up the default digital receipt. This universal default is used in all stores without a by-location digital receipt setup.
You can include your logo, company information, website, and add header/footer text to customize your digital receipt.
NSPOS uses NetSuite's Advanced PDF/HTML Template and Email Template features to configure digital receipts. You should familiarize yourself with the features before attempting to customize a receipt setup. See Advanced PDF/HTML Templates for Digital Receipts and Email Templates for Digital Receipts.
Upload your receipt logo before doing these steps. See Logos for Digital Receipts.
To enable and set up digital receipts:
-
Go to Customization > Lists, Records, & Fields > Record Types.
-
On the NSPOS Enable Features row, click List.
-
Click Edit.
-
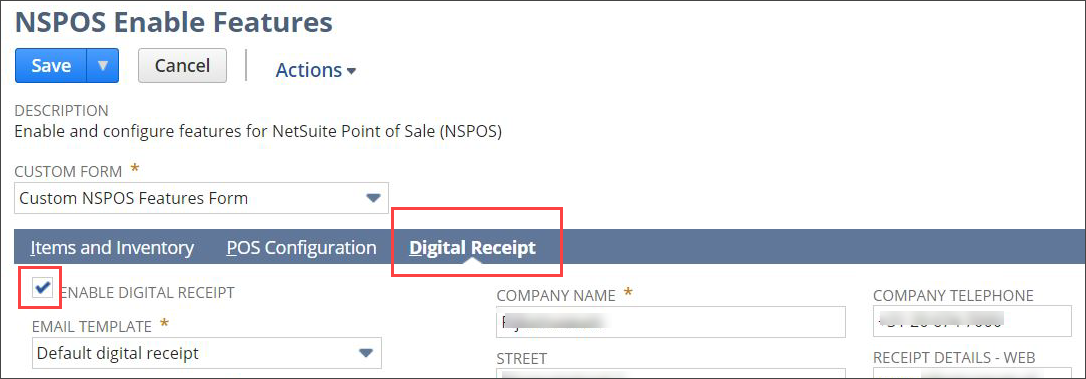
Open the Digital Receipt subtab.
-
Check the Enable Digital Receipt box.
Tip:If Enable Digital Receipt is not checked, the digital receipt setup fields will not appear in NSPOS.
-
Select the Email Template or use the default template.
The email template formats the email used to deliver the receipt. See Email Templates for Digital Receipts.
-
For Advanced PDF Template, select Custom Digital receipt PDF/HTML Template NSPOS.
The PDF template formats the digital receipt layout. You can customize a template using XML. See Advanced PDF/HTML Templates for Digital Receipts.
Note:Template procedures are standard NetSuite functionality.
-
Select the employee whose email address should be used for the Sender Email Address. This field configures the From: address.
Important:The owner of the sending email address must be set up as an Employee in NetSuite.
-
Select the Receipt Logo. See Logos for Digital Receipts.
-
Enter your Company Name and other business information that you want included on the digital receipt:
-
Enter the company Street address, City and state, ZIP, Country, and Company Telephone as it should appear on the receipt.
Tip:Include the State in the City field. For example, enter
Redwood Shores, CA. -
Use Receipt Details-Web to list a website to include. For example, enter
www.retailbusinessname.com. -
Enter Header Text to appear at the top of the receipt.
-
Enter Footer Text to appear at the bottom of the receipt.
-
Click Save.
-
Use any NSPOS register to finish the digital receipt setup. See Finishing the Digital Receipt Setup in NSPOS.
Setting Up Digital Receipts by Location in NetSuite
In addition to setting up a default digital receipt, you can set up unique receipts to use at specific locations. For example, you might want to use a different logo or display company information that is different from the default.
Locations without a receipt setup will use the default setup.
NSPOS uses NetSuite's Advanced PDF/HTML Template and Email Template features to configure digital receipts. You should familiarize yourself with the features before attempting to customize a receipt setup. See Advanced PDF/HTML Templates for Digital Receipts and Email Templates for Digital Receipts.
To set up a digital receipt for a location:
-
Log into NetSuite.
-
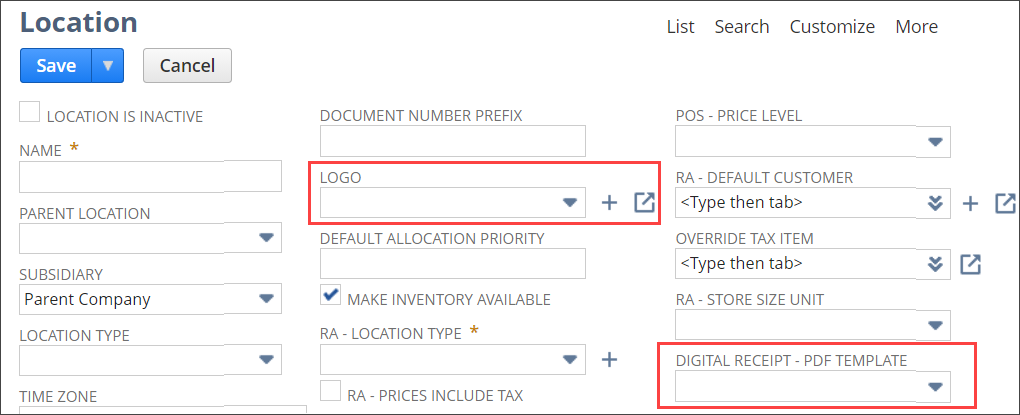
Go to Setup > Company > Locations.
-
Find the desired location and click Edit.
-
For Digital Receipt - PDF Template, select Custom Digital receipt PDF/HTML Template NSPOS.
The PDF template formats the digital receipt layout. You can also customize a template using XML. See Advanced PDF/HTML Templates for Digital Receipts.
Note:Template procedures are standard NetSuite functionality.
-
Select the receipt Logo. See Logos for Digital Receipts.
-
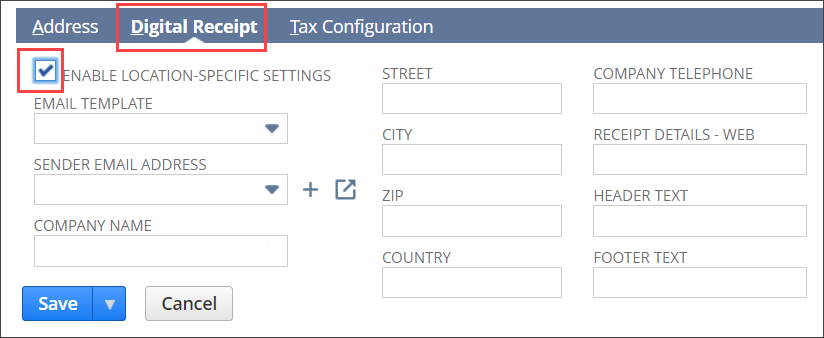
Open the Digital Receipt subtab.
-
Check the Enable Location Specific Settings box.
-
Select the Email Template or use the default template.
The email template formats the email used to deliver the receipt. See Email Templates for Digital Receipts.
-
Select the employee whose email address should be used for the Sender Email Address. This field configures the From: address.
Important:The owner of the sending email address must be set up as an Employee in NetSuite.
-
Enter your Company Name and other business information that you want included on the digital receipt:
-
Enter the company Street address, City and state, ZIP, Country, and Company Telephone as it should appear on the receipt.
Tip:For the City field, enter the City and State. For example, Redwood Shores, CA.
-
Use Receipt Details-Web to list a website to include. For example, enter
www.retailbusinessname.com. -
Enter Header Text to appear at the top of the receipt.
-
Enter Footer Text to appear at the bottom of the receipt.
-
Click Save.
-
If not already done, use any NSPOS register to finish the digital receipt setup. See Finishing the Digital Receipt Setup in NSPOS.
Finishing the Digital Receipt Setup in NSPOS
After setting up digital receipts in NetSuite ERP, you must configure the receipts in NSPOS. You can perform these steps on any NSPOS register. The next synchronization cycle will apply automatically the settings to other stores and registers.
To set up digital receipts in NSPOS:
-
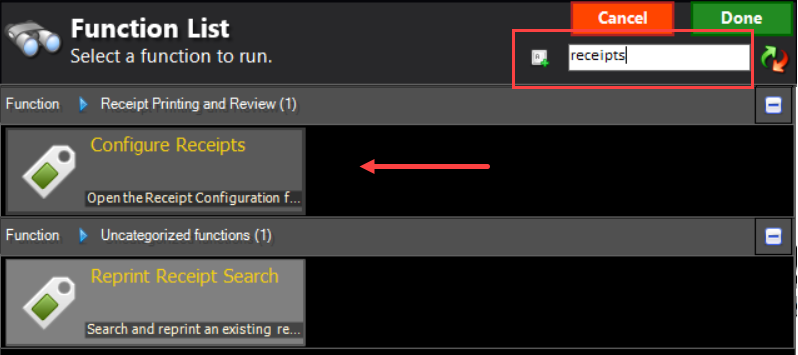
Press Ctrl+F12 on the keyboard to open the Function List.
-
Enter
receiptsin the search field. -
Tap Configure Receipts.
-
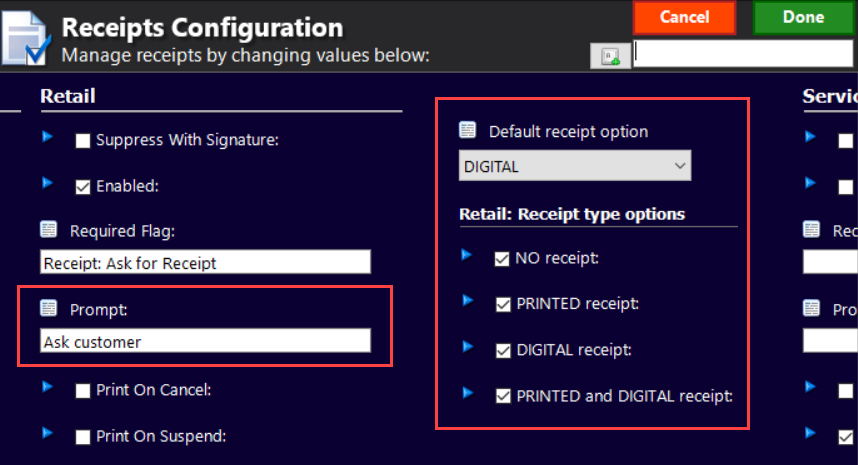
Scroll right to the Retail section.
-
To enable the Prompt for a receipt type, enter Ask customer (default).
-
Select a Default receipt option - None, printed, digital, or printed and digital. The default is the option pre-selected for the receipt prompt.
-
Under Retail: Receipt type options, check the receipt types to offer in the prompt.
If a receipt type is not selected, the Default receipt option is used.
Tip:To prevent the receipt prompt from appearing, check the Default receipt option and clear any checks in the Retail: Receipt type boxes.
-
Click Done.
Note:The Required Flag text field is not required. You can leave it cleared (empty).
Troubleshooting Digital Receipts
This topic provides steps for troubleshooting sending digital receipts to shoppers. For issues not listed here, contact NetSuite Customer Support.
To attempt sending a receipt email again, see Re-send a Digital Receipt.
-
Receipt email was undeliverable - To view email that could not be delivered, go to Lists > Mailing > Undelivered Emails. The page includes possible reasons that the delivery failed.
-
Receipt email was not sent - If a transaction invoice and receipt did not synchronize from the register to NetSuite, the email cannot be sent. Contact NetSuite Customer Support for assistance.
-
Receipt email not received due to incorrect email address - If a shopper contacts your business saying they had given an incorrect address, update the shopper's customer information in NSPOS. Then follow the steps to Re-send a Digital Receipt.
Working with Templates
The NSPOS 2020.1.X bundle includes one PDF/HTML template and one email template. Both templates use elements designed to be populated with NSPOS data. You should not customize these original template layouts.
If customization is desired, you can save copies of the templates and customize only those copies. Using copies to apply customizations can prevent future bundle updates from overwriting your work.
Note that template procedures are part of standard NetSuite functionality. Use the Help Center links included in the following topics as guides to customizing templates.
You should not customize the NSPOS default PDF/HTML and email templates. Apply customizations to template copies only.
Advanced PDF/HTML Templates for Digital Receipts
This template feature formats the digital receipt layout. You can use it to customize your digital receipts.
Customizing a PDF template requires a working knowledge of XML.
You must have the Advanced PDF/HTML Templates feature enabled.
To enable Advanced PDF/HTML Templates:
-
Log into NetSuite.
-
Go to Setup > Company > Enable Features.
-
Open the SuiteCloud subtab.
-
Check the Advanced PDF/HTML Templates box.
-
Click Save.
To work with the NSPOS PDF Template:
-
Log into NetSuite.
-
Go to Customization > Forms > Advanced PDF/HTML Templates.
-
Locate the template Custom Digital receipt PDF/HTML Template NSPOS.
-
Click Edit to view the XML source and make changes.
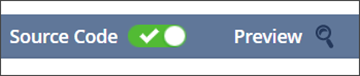
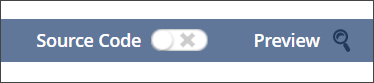
Tip:You can also edit a template in Preview mode by toggling Source Code off.
Read all prompts that alert you to possible saving issues when switching between Preview mode and Source Code mode.
-
Before making any changes, click Save As and enter a different name.
Then adjust the Company and any Location setups to use the PDF template copy.
For more information, see Using PDF Templates.
Email Templates for Digital Receipts
The email template formats the email used to deliver the receipt PDF. You can customize this email.
You must have Customer Relationship Management enabled first.
To enable Customer Relationship Management:
-
Log into NetSuite.
-
Go to Setup > Company > Enable Features.
-
Open the CRM subtab.
-
Check the Customer Relationship Management box.
-
Click Save.
To work with the NSPOS digital email template
-
Log into NetSuite.
-
Go to Documents > Templates > Email Templates
-
Locate the Default digital receipt template.
-
Click Edit to view the XML source and make changes.
The template Edit mode uses a text editor, not an XML source editor.
-
If you make changes, you should use Save As and enter a different name.
Then adjust the Company and any Location setups to use this email template.
For more information, see Working with Email Templates.
Logos for Digital Receipts
You can upload a logo image file for a digital receipt using either of two methods:
-
From the NSPOS Enable Features > Digital Receipt subtab, click + to upload.

You can also add a Logo from the location record.
-
Upload an image file to the File Cabinet. See Upload Images to the File Cabinet.