Restore Oracle System Assistant Software
If the Oracle System Assistant software has been overwritten, erased, or corrupted, you can download the image file that is available from the My Oracle Support site to restore Oracle System Assistant to the USB device.
Use this procedure to restore the Oracle System Assistant software.
Before You Begin
-
You must have local or remote view and response access to the server boot messages. For more information, refer to your server installation guide.
-
Download the appropriate image file from the My Oracle Support web
site.
Download the image that is specific to your server. The package name for the update image for the server is: system_name and SW version -- Oracle System Assistant
For information about accessing My Oracle Support and downloading this image, see Update Oracle System Assistant and the Firmware Files on the Oracle System Assistant USB Drive (Oracle System Assistant Release 1.1).
-
To make the update image available to the server, do one of the
following:
-
Use the image file to burn a physical DVD image.
Install the DVD in a DVD drive attached to the server.
- Make the update image file available to the server as an ISO image using the Oracle ILOM Remote Console application.
-
Use the image file to burn a physical DVD image.
-
Reset or power on the server.
Choose one of the following methods:
- From the local server, press the Power button (approximately 1 second) on the server front panel to power off the server, and then press the Power button again to power on the server.
- From the Oracle ILOM web interface, click Host Management > Power Control, and select Reset from the Select Action drop-down list.
- From the Oracle ILOM CLI on the server SP, type reset /System.

Note - These events occur very quickly. Please watch carefully for these messages as they appear only briefly on the screen. -
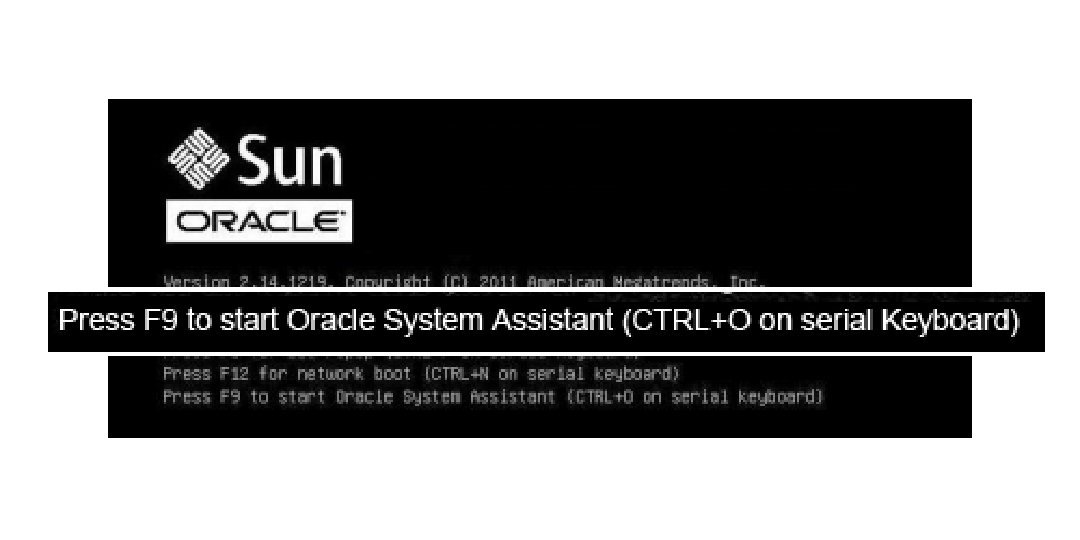
In the BIOS screen, press F8 to specify a temporary boot device for the Oracle
System Assistant installation.
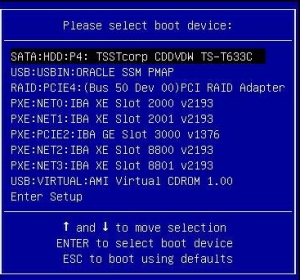
The Please Select Boot Device screen appears.

-
Depending on the method you used to make the recovery image available to the
server, perform one of the following steps:
Note - The items listed in the Please Select Boot Device menu might differ, depending on whether the system was booted in Legacy BIOS Boot Mode or UEFI boot mode.- If you chose to burn a recovery DVD and have placed the DVD into an attached DVD drive, select SATA:HDD:P4:TSSTcorp CDDVDW TS-T633C as shown in the Please Select Boot Device menu, and then press Enter.
- If you chose to use the Oracle ILOM Remote Console application to make the recovery image available to the server as a redirected DVD or as an ISO image, select USB:VIRTUAL:AMI Virtual CDROM 1.00 as shown in the Please Select Boot Device menu, and then press Enter.
A message appears, and a prompt asks whether you want to continue the recovery process.
-
To recover the Oracle System Assistant image, type yes, and
then press Enter.
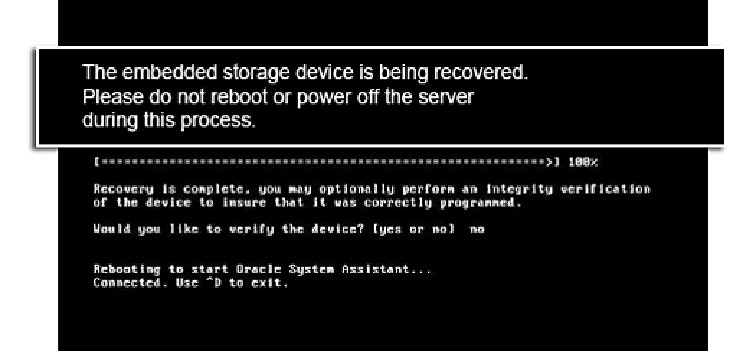
The following message appears, indicating the progress of the recovery process. Do not interrupt the recovery process.

When the recovery process is finished, you have the option to verify the integrity of the files on the USB drive.
-
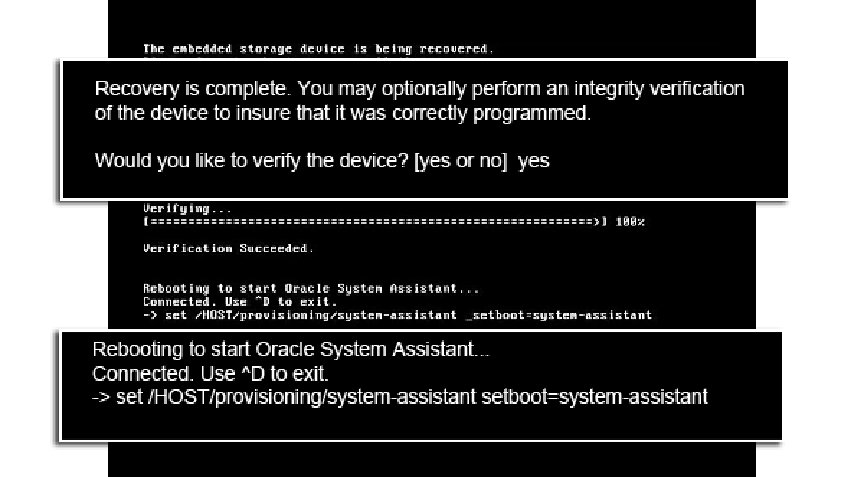
At the verification prompt, do one of the following:
The following screen appears and indicates that the Oracle System Assistant USB device was verified successfully. The system then reboots and launches the Oracle System Assistant application.
-
To skip a verification of the USB drive, type no,
and then press Enter.
The server boots to Oracle System Assistant.
-
To verify the USB drive, type yes, and press
Enter.
The verification process starts. When the process is finished, the server boots to Oracle System Assistant.

-
To skip a verification of the USB drive, type no,
and then press Enter.