Remove NVMe Cables
-
Prepare the storage server for service.
- Power off the storage server and disconnect the power cords from the power supplies.
- Extend the storage server to the maintenance position.
- Attach an antistatic wrist strap to your wrist, and then to a metal area on the chassis.
- Remove the storage server top cover.
-
Remove the air baffle.
Remove the air baffle by lifting the baffle up and out of the storage server.
-
Open the server fan assembly door and remove fan modules.
See Remove a Fan Module.
- Remove the storage server's front fan assembly door.
-
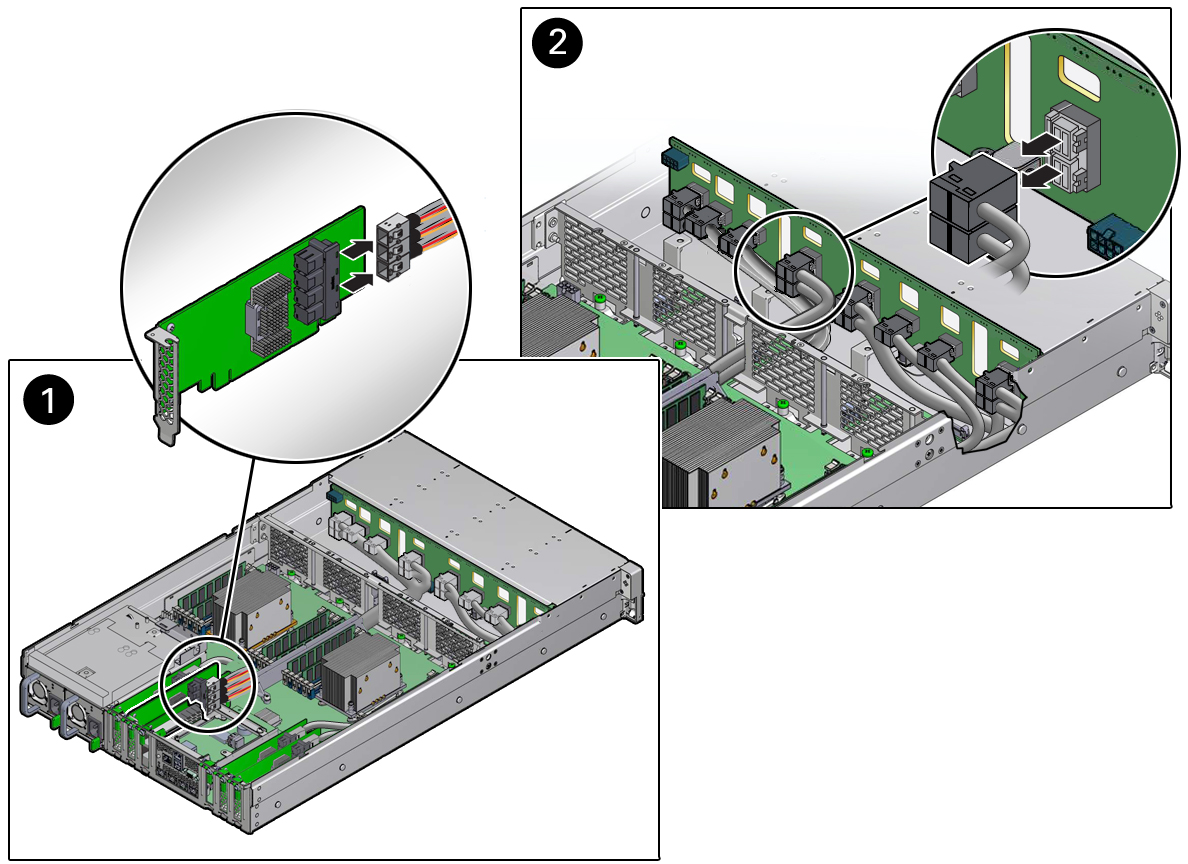
Disconnect the NVMe cables from the Oracle PCIe NVMe switch cards in PCIe slots
1, 2, 5, and 6 [1].
Press each latch, and then pull out to disengage the cable from each connector. See also Remove a PCIe Card.

-
Disconnect the twelve NVMe cables from the front storage drive backplane
[2].
Press each latch, and then pull out to disengage the cable from each connector.
-
Remove the NVMe cables from the server.
Note - NVMe cable connectors do not fit through the left-side chassis mid-wall. If you are removing NVMe cables between the disk backplane and PCIe slots 5 and 6, you first must remove the chassis mid-wall. For instructions, see Step 8 in Remove the Motherboard Assembly.Carefully remove the NVMe cable bundles from the center and left-side chassis mid-wall. Be careful not to snag the cables on the server components.