
|
|
|
Reservation Screen Details
The main part of the Reservation screen contains particulars about the guest's stay, including arrival and departure dates, room and rate information, payment method, credit cards, and packages. If the guest's stay covers multiple days, certain elements of the reservation, such as the rate code and rate, may not remain the same for the entire stay. If information varies over the length of the stay, the field is highlighted in yellow.
When reservation attributes regarding the room type, rate code, number of nights, etc. are made, you will be prompted: "Please verify the Rate code and Room type availability on the Rate Query Screen." OK is set as the default and is the only button for selection. But this message prompt can be hidden and this prompt would never be displayed. (See Pop Up Blockers for details.)
For No Show reservations, only the Comments field and Rate filed ellipsis button are active on the Reservation screen. Selecting the ellipsis button displays the Daily Details, Rate Info, and Short Info buttons and when selected, is displayed in view-only so that no modifications can be made.
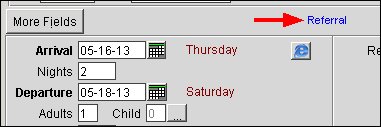
Available when the OPV_<version number> OPERA Vacation Ownership license is active, Referral Reservations can be indicated by selecting the Referral check box. When the OWNERSHIP > REFERRAL RESERVATIONS application parameter is set to Y, the Referral check box is displayed on the Reservation screen and on the Daily Details screen for Rental Reservations that meet the following criteria: Unit with a valid contract is assigned to the Rental Reservation.
This ![]() check box will identify if the reservation is a referral (selected) or not a referral (not selected). Also, a blue Referral text will display on the Reservation screen as an alternate indicator that the Rental Reservation is a Referral.
check box will identify if the reservation is a referral (selected) or not a referral (not selected). Also, a blue Referral text will display on the Reservation screen as an alternate indicator that the Rental Reservation is a Referral.
When a reservation has a mix of Referral statuses during the stay, both Referral and Non-Referral, then the Referral check box will display with a Yellow background as an easy indicator of this and displays as follows: ![]() See Daily Details and Multiple Rate Codes for further details.
See Daily Details and Multiple Rate Codes for further details.
The check box is available for selection for reservations that:
The check box is NOT available for Owner or Authorized user reservations.
The check box cannot be modified for reservations that:
The check box remains checked when:
The check box is updated from selected to not selected when:
Note: Should the User be granted the RESERVATIONS > OVERRIDE REFERRAL FLAG permission, they can modify the Referral check box back to checked in the following situations.
See Daily Details and Multiple Rate Codes and Rotation Setup for additional information.
The following fields are included on the body of the Reservation screen:
Note: Your property has the option of using the Screen Painter feature to add fields to the Reservation screen. Therefore, your screen display may not exactly match the description of the standard display provided in this help topic.
Arrival. Use the calendar tool or manually type in the date to select the arrival year, month and day. The week day name displays next to the date selected. The default is today's date. The date you select cannot be a past date. (If the RESERVATIONS > DEFAULT BLANK ARRIVAL DATE application parameter is set to Y, the Arrival Date field will be blank rather than defaulting to today's date. You must manually enter an arrival date.)
Note: You may enter +1, +2, ... or -1 -2, ... to advance or back-up the arrival and/or departure date by 1 day, 2 days, etc. Use ++1 or --1 to advance or back up by a week. Use +++1 or ---1 to advance or back up by a month.
Note: An additional view-only line appears on the Reservation screen, above the Arrival date field, to show the original arrival date of the No Show guest. The RESERVATIONS > ROLLING NOSHOW application setting allows you to select the reservation types that will be handled with rolling no show functionality. When a guest having a reservation type identified by this application setting fails to check in on the scheduled arrival date, the end of day process automatically extends the arrival date to the next business date until the reservation departure date is reached. (Day use reservations are not extended.) The reservation remains in the system until the departure date, at which time, if the guest has not checked in, the reservation displays a status of No Show. The guest may check in any day during the date range covered by the reservation.
Departure Date. The Departure Date field entry changes according to the entries in the Arrival Date and Nights fields. The default is the next business date. Use the calendar tool or manually type in the date to select the departure year, month and day. The week day name displays next to the date selected.
Note: If the External Activities Scheduler license code (OPX_CONC) is active, and activities are attached to the reservation, a message advises you if a change in departure date causes an activity to fall outside of the dates of the stay.
Note: When the RESERVATIONS > REFRESH RATES FOR EXTENSION DATES ONLY application parameter is set to Y, if a reservation is extended (new arrival date or new departure date), then the rates will be refreshed for only the additional dates that the reservation was extended by. See Refresh Rates for Extension Dates for details.
Nights. The number of nights the guest is staying. The default is 1. Changing the number in this field automatically changes the departure date. Conversely, changing the departure date automatically changes the number in this field. You may adjust the number by typing + or - in the field. The total number of nights displays next to the number entered. Enter 0 (zero) to reserve a day use room. The text Day Use displays next to the 0 entry.
Tip: When the RESERVATIONS > AUTO DEPOSIT COLLECTION application parameter is set to N and a reservation that has a deposit/cancellation rule automatically assigned to it has its number of nights changed, if the Save button is selected before the OK button, then the Deposit/Cancellation screen will not be displayed.
Adults. The number of adults for this reservation. OPERA calculates the room rate based on this number. The field defaults to 1.
Note: Zero may appear here if the reservation is for children who will be staying in their own room (unaccompanied by an adult). When sending reservations to BWI for reservations that have 0 guests, OXI will send the guest count as 1, not 0.
Note: Should the number of Adults or Children for the reservation be modified to be a number greater than the maximum number of occupants set for the room, then a warning prompt is displayed to notify the user. The prompt allows the user to override the maximum occupancy for the room, not allow the change in the number of guests for the reservation, or check and display the Rate Query Details screen (see Rate Query Details for details).
Note: When a package code is defined for the RESERVATIONS > PACKAGE FOR EXTRA BED application setting, then if the number of guests on a reservation exceeds the maximum number of occupants set for the room type, then an Extra Bed Package will automatically be attached to the reservation. This is due to the fact that the Max. Bedding Per Room Type field with the actual number of physical beds assigned to the room type, has been exceeded and an Extra Bed needs to be put into the room. If the reservation is for a Component Room, then the total number of beds for all the rooms that make up the suite are considered in determining if an extra bed is needed.
A Crib Package, as defined by the RESERVATIONS > PACKAGE FOR CRIB application setting, can also automatically be attached to a reservation. When using the Rates By Defined Buckets functionality, if a child's age falls within the age range specified by the RATES > MIN AGE RATE BUCKET 1 and RATES MAX AGE RATE BUCKET 1 application settings, then a Crib Package will automatically be attached to the reservation. If more than 1 child is attached to the reservation and falls within this age range then that many Crib Packages will be attached to the reservation so that the cribs are automatically placed in the room for the reservation.
Examples
Min Age Rate Bucket 1 = 0
Max Age Rate Bucket 1 = 2
Package for Crib = CRIB
Package for Extra Bed = EXTRA BED
Room Type = STANDARD, Max Occupancy = 2, with Max. Bedding Per Room Type = 2
Reservation 1
Adults = 1, Child = 1/Age = 1 (CRIB Package is automatically attached)
Reservation 2
Adults = 4 (2 EXTRA BED Packages are automatically attached)
Reservation 3
Adults = 2, Child = 3/Ages = 1,2,3 (2 CRIB and 1 EXTRA BED Package is automatically attached)
Reservation 4
Adults = 3, Child = 2/Ages 2,3 (1 CRIB and 2 EXTRA BED Packages are automatically attached)
When the reservation is being created with this functionality, the following message will be displayed, "Number of beds in the room can only accommodate xxx person(s). xxx extra bed(s) attached to the reservation. xxx crib(s) attached to the reservation." But this message can be hidden with the Popup Blocker functionality. Also, if the Sell Control is active for Item Inventory and there are not enough Cribs or Extra Beds in inventory, then the message "Insufficient sell control inventory items available, override?" is displayed.
Child. The number of children staying under this reservation. This field defaults to 0. In calculating the room rate, an additional charge may apply based on occupancy by children accompanied by an adult (depending on the rate setup).
Note: In a multiple property environment, the Child Age Buckets ellipsis button is available for all the properties, if only one property in the environment has the RATES > RATES BY DEFINED BUCKETS application function set to Y.
Note: If the RATES > RATES BY DEFINED BUCKETS application function is set to Y, and child age buckets have been set up using the RATES > MIN AGE RATE BUCKET and MAX AGE RATE BUCKET application settings, an ellipsis button appears next to the Child field. Select this button to view or edit the number of children in each age group (e.g., 1-12 Years, 13-15 Years, 16-18 Years). Enter the age of the first child in the Child 1 Age field, enter the age of the second child in the Child 2 Age field, and so on. When you are done, select the OK button and the number of children in each age group will appear in the fields to the left.
Number of Rooms. Enter the number of rooms for this reservation. The field defaults to 1. If, for example, the guest requires 2 rooms, enter 2 in this field. All rooms will be of the same room type. Alternatively, if the guest requires more than one room, you may use the Add On option (Reservations > New/Update Reservation > Options > Add On). With the Add On option, this reservation is duplicated, but you can change the room type for the second (duplicate) reservation. The number of rooms entered here is subtracted from availability.
Note: When adding-on a reservation to a single reservation with multiple rooms (Reservations > New/Update Reservation > Options > Add On), the message "Do you want the add on reservation to be for X rooms?" is displayed. If you select No, an add on reservation is created for only one room. If you select Yes, an add on reservation will be created for the number of rooms in the original reservation.
Room Type. Select the down arrow to display the Room Types list of values (e.g., deluxe double, deluxe king, standard double, etc.). Choose a room type from the list. The room type is automatically populated when you select a rate code and room type from the Rate Query screen (see Rate Code, below). Double-click on the Room Type field entry to display a picture of the room type (if available) and a description of the room type. (See Image and Image Maintenance for details.)
Note: Once the reservation has been saved and a confirmation number has been generated, the number of rooms entered in the Number of Rooms field gets deducted from the property's inventory of this room type (provided the reservation type has been configured as "Deduct from Inventory").
Note: If the DNM (Do Not Move) check box is selected, changing the assigned room before check-in is not allowed for the reservation; in addition, you cannot change the room type as this would unassign the room. (See DNM, below.)
Note: If a multi-night reservation has multiple rate codes or multiple rate amounts over the course of the stay, the Room Type, RTC, and Rate Code fields are unavailable for editing on the Reservation screen. These fields may, however, be changed by using the Edit Daily Details screen accessed by selecting the ellipsis button beside the Rate field or by selecting the Daily Details lamp on the Reservation screen.
RTC (Room Type Charged). When the RESERVATIONS > ROOM TYPE TO CHARGE application parameter is set to Y, this field is displayed. Select the down arrow to display the Room Type list of values. Choose from this list to specify the room type for which the guest will be charged. The default RTC is the room type appearing in the Room Type field. The room type selected in the Room Type field remains as the type of room that is inventoried. If the room type is changed for the reservation and the RTC does not match the new value, then a message prompt is displayed asking if the RTC should be updated to the new room type value.
When making a rate award redemption reservation with the USE RTC FOR RATE AWARDS application parameter set to Y, the RTC room type will be evaluated against the award rate. Even if the RTC room type is not defined in the award rate, it can still be used. When the USE RTC FOR RATE AWARDS parameter is set to N, users can only book room types defined in the award rate and the RTC field must be the same as the room type.
Room. Select the down arrow to display the Available Rooms Search screen. The screen displays room numbers for the selected room type, along with room features, floor number, reservation status, and current housekeeping status associated with each. You may search to identify clean rooms, smoking and no smoking rooms, and rooms with specific features such as a particular view. Double-click on the Room field entry to display a picture of the room (if available) and a description of the room. (See Image and Image Maintenance for details.)
Note: The Room field is also available in ORS/SFA when the property is live in the ORS/SFA environment with an active PMS license. The logged in user must have the permission Blocks > ROOM ASSIGN.
If you have chosen a room type configured as Auto Room Assign (see Room Type Configuration for details) OPERA will automatically assign a room number to a new reservation when the reservation is saved, provided a room number has not already been manually selected for the reservation. If no room numbers belonging to this room type are available for auto room assignment, a room number will not be automatically assigned to the reservation. Auto room assignment is available only when you are creating a new reservation except when creating a new reservation for a sharer by selecting a profile (see Shares), or when creating new reservations by splitting a multi-room group reservation (see Group Rooming Lists).
When directed to the Reservation screen from Front Desk > Arrivals, only rooms that have the same room features, as the reservation has attached, appear in the Available Rooms Search screen when selecting the down arrow for the Room field.
You may use the down arrow to choose a room only if the guest has not already checked in. If the guest has checked in, use the Room Move feature to change the guest's room (select the Room Move button from the Reservation Options menu).
When the RESERVATIONS > CONNECTING ROOMS application parameter is set to Y and the room you select has connecting rooms, you will be prompted whether you want to create a reservation for the connecting rooms when you save this reservation. The default response is No. (This prompt does not appear for Walkin reservations.) This message prompt can be hidden with a default value selected, see Popup Messages for details.
When the ROOMS MANAGEMENT > ROOM CONDITIONS application is set to Y and a room condition exists for the room that the guest is being checked in to, then a message prompt is displayed that states "This room has a condition of <room condition>. Do you wish to continue?"
When assigning a room to a Share Reservation, assuming the RESERVATION > SHARES application function is set to Y, with different arrival and departure dates, the room will be assigned to all of the reservations in the share according to their arrival and departure dates.
If you change the room number on a shared reservation when none of the sharers have checked in, the following message appears: "Guest is sharing. Keep the room assigned to the other sharers which will break this share reservation?" If you select No (the default), the room is unassigned from all sharers and the new room you select for the current reservation will also be assigned to the other sharers. Select Yes to break the current reservation from the share and assign the current reservation to a different room. The original room will remain assigned to the other sharers.
If a room number is changed for a non-share reservation, then the following prompt is displayed: "Room XXX is already booked by XXX whose arrival date is XXX and departure date is XXX. A share will be created. Select this room anyway?" This message can be hidden so that it is not displayed at all (see Pop Up Blockers for details). If the message is selected to be hidden, the user only receives the "Room XXX is already booked by XXX whose arrival date is XXX and departure date is XXX" message and is not prompted to create a share.
When the ROOMS MANAGEMENT > DISCREPANT ROOMS application function is set to Y and the current reservation is assigned to a room with a discrepancy, which is when the Housekeeping status of the room differs from the Front Office status of the room, a message prompt is displayed. The messages states "Room XXX is <discrepant reason> discrepant? Do you want to continue?" Answer Yes to move the reservation and select No to choose another room.
If the room number you select is an individual room element belonging to a component room, you will be prompted "Room <number> is part of a component room. Do you wish to continue?" Available when the GENERAL > COMPONENT ROOMS application function is set to Y. (This prompt can be hidden if the property chooses. See Pop Up Blockers for details.)
Note: When the OPV_<version number> OPERA Vacation Ownership System license code is active and a room number is manually typed in that is not the first unit in rotation, then the Rotation Room Override prompt will display for a reason as to why that room was selected (See Rotation Room Override for details).
Note: When the OPV_<version number> OPERA Vacation Ownership System license code is active, when a profile is attached to the reservation that is not an owner or authorized user for a particular unit, the unit number entered is a fractional unit, the unit number entered is not part of the Rental Program, and the Fractional period for the reservation stay dates have been defined, the user would be prompted with "Room is not in the Rental Program during this time period. Please select a different room number".
Note: When the OPV_<version number> OPERA Vacation Ownership System license code is active, only the Rooms that the Authorized User is authorized to use will be available for selection when creating the reservation or completing a Room Move for the reservation, as long as other units are not already assigned to or occupied by another reservation.
Note: The Reservations > Check as Do Not Move Room and Reservations > Uncheck as Do Not Move Room permissions control the user's right to change or unassign a room number if a room has been assigned to the reservation. If these permissions are granted, the user may change a room number or move the guest from one room to another. If the user does not have these permissions, the user can reverse a check in, but cannot change or unassign the room number.
Note: When the OPV_<version number> OPERA Vacation Ownership System license code is active and the OWNERSHIP > RECIPROCAL OWNERSHIP application parameter is set to Y, when the Room number is changed a message is displayed to notify the user that the guest is the Owner and will be given an option to create a Reciprocal Owner. Selecting Yes will display Reciprocal Owner in the OWNER_FF_DISP field when it is screen painted on the Reservation screen in the Header area.
When the OWNERSHIP > RECIPROCAL OWNERSHIP application parameter is set to Y, then the Owner Only Rooms for the applicable dates of the contract will be available for selection when creating/updating the reservation for the Owner/Auth. User. Upon selecting a different Owner Room, a message is displayed advising the user that the reservation will be converted to a Reciprocal Ownership Reservation.
When the OWNERSHIP > RECIPROCAL OWNERSHIP application parameter is set to Y, when an owner is currently checked into their own unit as an owner reservation and a room move is then performed to another rental room that is owned by another owner, a message displays that the reservation will be converted to a Reciprocal Ownership Reservation.
When the OWNERSHIP > RECIPROCAL OWNERSHIP application parameter is set to N and the Owners has multiple units at the property, then only those units will be available for selection in the Rooms field when creating/updating the reservation for the Owner/Auth. User. But if the Owner only has 1 unit at the property, trying to update the Room field will display a message that states, "No other Units are available for this Owner." If the room number assigned to an Owner Reservation is removed, that reservation is converted to a Rental reservation and user is prompted to confirm the change.
Extn. When the GENERAL > EXTENSION NUMBER application function is set to Y, this field is displayed. The Extn. field is used when phone extension numbers are available in a room. Multiple extensions might be assigned to a single-door room, for example, if it is actually a suite consisting of two sleeping rooms (each with its own phone extension number) connected by a common sitting area. Furthermore, such a room might be occupied by two or more guests as a share, and it may be desirable to assign a separate extension to each of the sharers. (By so doing, not only can phone charges be kept separate, but a POS interface can use the extension number, rather than the room number, to post charges separately to the sharers.)
The Extn. field shows the extension assigned to the reservation. If more than one extension is selected, the Extn. field has a yellow background. Select the down arrow to open the Extension Numbers list of values which shows the extension numbers that are associated with the room.
Note: The specific extensions available in the list of values will depend on the room you have selected. Therefore, you must choose a room before this field becomes active.
When the guest (or a sharer) checks in to this room, any of the extension numbers assigned to the room can be chosen (using the Payment Method screen that appears at check in) for the person checking in. The selected extension is automatically activated through the interface. If an extension has already been assigned to the guest at check-in, that extension is marked on the Extension Numbers list of values by default.
To assign an extension or change the extension for this reservation, select the extensions from the Extension Numbers list of values. For example, if room 5002 has 2 extensions available (i.e., 5001 and 5002), you may assign either or both of these extensions to the reservation.
Rate Code. Enter the desired rate code directly, or select the down arrow to open the Rate Query Details screen. For new reservations, a default rate code appears here if it is set by the RESERVATIONS > DEFAULT RATE CODE application setting.
On the Reservation screen (and on the Edit Daily Details screen) the Rate Code field also supports partial search on a rate code. To use this feature, enter the first character or characters of the rate code and tab out of the field. OPERA will display the Rate Query Details screen with all rate codes that match so that you can make your choice. You may also use the percent sign (%) as a wildcard to represent any characters. If no matches are found, OPERA will display the Rate Query Details screen as if you had selected the down arrow. See Rate Code Search for details.
This field is mandatory, and will be bolded, for individual reservations if the RESERVATIONS > RATE CODE MANDATORY INDIVIDUAL application parameter is active and for reservations that are part of a business block when the RESERVATIONS > RATE CODE MANDATORY BLOCK application parameter is set to Y.
When you select a rate code and room type from the Rate Query screen, the room type populates the Room Type field, the rate code populates the Rate Code field, and the rate populates the Rate field. Whether a deposit is required, or a cancellation penalty applies may be determined by the reservation type and/or rate code. Double-click on the entry in the Rate Code field to display the Rate Summary screen. See Rate Information for details.
The rate code you select may have a default market code and/or source code associated with its rate header, its rate detail, or both. When this is the case, the default market code and/or source code auto-populates the reservation Market field and/or Source field. If a default market code and/or source code is specified for both the rate code's rate header and rate detail, the code set for the rate detail takes precedence. If you have already specified a market code and/or source code for this reservation, and the codes you specified are different from the codes set for the rate code, a message prompts you to update the Market and/or Source fields with the rate code defaults. These updates occur on individual as well as block reservations that meet these conditions.
When the RESERVATIONS > AUTO DEPOSIT COLLECTION application parameter is active and a deposit rule is defined for the corresponding rate code that coincides with the reservation dates, a popup message appears: "A XXX Deposit Rule is required for the Rate Code. Do you wish to continue?" If you select Yes, the Deposit Cancellation screen appears with the Payment screen overlaid. If you select No, you cannot make the reservation for the selected rate code. This message can be configured to be hidden and not displayed. See Pop Up Blockers for details.
Note: When the OPV_<version number> OPERA Vacation Ownership System license code is active and Comp (complimentary) is selected in the Rate Code field when making a reservation for a rental room with a comp nights restriction, OPERA prompts, "Room has used X number of complimentary nights and has Y complimentary nights left between DD/MM/YY and DD/MM/YY. Do you want to continue?". This allows the property to view the number of comp nights used and the number remaining. This prompt only appears if the maximum number of nights specified in the comp nights restriction have not been used.
Note: When the OPV_<version number> OPERA Vacation Ownership System license code is active, if the rate code defined in the OWNERSHIP > OWNER RATE CODE application setting or OWNERSHIP > AUTHORIZED USER RATE CODE application setting is the Room Type of the unit and does not have any Rate Details existing for the selected unit room type it, then a reservation cannot be created. A display prompt stating, "Could not find rate information for the selected room type" is displayed when trying to create the new reservation. In such a scenario for an owner reservation, the reservation screen will display however the Owner Rate Code will not automatically default into the reservation details.
Note: When the RATES > APARTMENT STYLE BILLING application function is set to Y, an ASB rate code can be changed for future, non-billed billing cycles for the guest's reservation. And if different ASB Rate Codes are used during the guest's reservation, then the Rate Code field will be highlighted with a yellow background. See Rate Code Configuration for details.
Note: When rates are applied directly to the Room Grid screen and a Rate Code with unique values is attached to the PM reservations, OPERA will default to the Rate Code of the PM reservation. Otherwise, rates entered manually in the Room Grid are used. See Business Block Reservations for more details.
Note: The rate code attached to a reservation cannot be changed if an advance bill has been posted for the reservation. The rate code attached to a reservation cannot be changed if the rate code includes a package with an allowance and part or all of the allowance has been consumed.
Fixed Rate. This feature allows manual changes to rates that would otherwise be set by rate codes. When the RESERVATIONS > FIXED RATE application function is set to Y, this field is displayed and fixed rate functionality is enabled. (See Fixed Rates for details.)
When a property has Fixed Rates set to Y in the Field Defaults screen (See Field Defaults for details), the new reservations will have this check box selected by default. Should users change an existing fixed rate reservation's attributes that directly affects the rate amount, i.e. rate code, the Fixed Rate check box will remain checked. But, if a user un-selects the Fixed Rate check box and saves the changes, then the reservation is saved without the check box selected.
Note: For multiple night stays, you may set a fixed rate for individual nights by selecting the ellipsis button next to the Rate field, then choosing the Daily Details button in order to display the Daily Details screen. Edit the rate amount for those dates to set a fixed rate.
Note: When creating an Add On reservation based on a reservation that has fixed rate flag, the new reservation will be created with fixed rate flag and the same fixed rate amount as on the original reservation.
When the add on reservation is being created and user gets to the reservation screen, a message prompt is displayed to either change the rate to the configured rate amount or accept and continue with the fixed rate amount.
Rate. The room rate. The rate is automatically populated when you select a rate code and room type. You may select values for the Rate Code and Room Type fields individually, or you may select a rate from the Rate Query screen, in which case the Room Type, Rate Code, and Rate are auto-populated. The Rate field is highlighted in yellow when the selected rate code involves a rate change during the period of the guest's stay, and then returns to white once the rate change date is past. For example, assume the rate for the Friday through Sunday period is 150 while the rate for the period Monday through Thursday is 350. If the guest is staying for 5 nights, the Rate field will be highlighted in yellow. On Monday, the Rate field will return to white background.
Note: When the MEMBERSHIP > AWARDS application function is active (set to Y), the Rate Code/Rate fields remain highlighted in yellow when any multiple rate codes or rate changes exist at any point over the course of the stay, whether current, past, or future.
Select the ellipsis button and choose Daily Details to check the rates that will apply during the guest's stay. See Rate Options Menu, below.
The rate amount and the ellipsis dots are shown in red if an upsell has been applied to the reservation. See Reservation Upsell for details.
Note: If the RATES > MULTI CURRENCY application parameter is set to Y and rate codes are configured in various currencies, the rate amount displayed is based on the currency of the rate code.
Note: Rate changes may automatically appear on reservations that are associated with a business block when the dates of the reservation are changed. This is because the reservation pulls rate information from the business block header for those dates for which a rate was not explicitly set by the reservation. For example, assume that a business block for 04-01- 07 to 04-04-07 has a rate code of CORP1 set for it. Also assume a block reservation is made for 04-01-07 but with a RACK rate. Later, the reservation dates are extended to include 04-05-07. The rate code for the new night will automatically be pulled from the business block header (CORP1) and the result will be a rate change for this reservation. The same shall occur if the arrival date is set prior to the original arrival date. The existing rate code attached to the reservation will be applied to the additional day set for the arrival.
And when changing the dates/rates of a block reservation that does not have a rate code defined, the message prompt "Rate for reservation should be XXX. You are charging XXX. Do you want to update the rate to XXX?" Answering No does not update the rate for the block reservation and the rate amount on the reservation remains the same and does not repopulate from the rate amount defined on the block grid. But answering Yes will update the rate for the reservation.
Changing a rate for a reservation will display a popup message that states, "Different rates may apply during the stay. Please check multiple rate screen to verify." This popup message may be hidden by your property. See Popup Blockers for details.
Curr. The currency in which the rate is displayed. Select the down arrow to see the rate displayed in an alternate currency. This field is not available if a rate code has been selected in the Rate Code field.
Note: When different rate codes with different associated currencies are used for a multiple night stay reservation, the Currency field along with the Rate Code and Rate fields, are displayed with a highlighted yellow background. See Daily Details and Multiple Rate Codes for more details.
Block Code. If this reservation is for a guest who is part of a business block or group, use this field to specify the block or group code. Select the down arrow to display the Block Search screen. From this screen you may search for the block; from the list of room types available for the each night of the block you may then select the room type for the reservation.
When the BLOCKS > MAXIMUM NIGHTS FOR BLOCK RESERVATIONS application setting is set, the maximum number of nights a Block Reservation can be booked or extended cannot exceed this value. For example, a Business Block is created for 30 nights and the setting has a value of 15. When creating a Reservation with the Block for the full number of nights, this message will be displayed: "Maximum of 15 nights applicable for this Block Reservation." The Reservation cannot be saved until the number of nights is changed to 15 or less.
When the RESERVATIONS > AUTO DEPOSIT COLLECTION application parameter is active and a deposit rule is defined for the corresponding block code that coincides with the reservation dates, a pop-up message is displayed stating "A XXX Deposit Rule is required for the Block Code. Do you wish to continue?" If you select Yes, the Deposit Cancellation screen appears with the Payment screen overlaid. If you select No, you cannot make the reservation for the selected block code. This message can be configured to be hidden and not displayed. See Pop Up Blockers for details.
Note: When entering a reservation for a member of a business block or group with a rate code attached to either the post master reservation or the business block, the rate code for the reservation is automatically copied over. See Business Block Reservations for more information.
Note: After a reservation has been assigned to a Block Code that has an Agent, Company, Group, Source, or Contact Profile attached, updating the Block Code for the individual reservation to another Block Code that falls within the same time frame does not update the profiles attached. These will remain as the initial profiles that were attached to the initial Block Code for the reservation.
ETA. Enter the estimated time of guest's arrival. Once the guest has checked in, this field automatically displays the actual arrival time.
Res. Type. Select the down arrow to display the Reservation Type list of values. Choose a reservation type (e.g., 6 p.m. guaranteed, guaranteed credit card, non-guaranteed, etc.) from the list. For new reservations, a default reservation type appears here if it is set by the RESERVATIONS > RESERVATION TYPE application setting.
OPERA stores availability information by reservation type; you can see how many of the expected arrivals are guaranteed for a 6 p.m. check-in, guaranteed for a late check-in by credit card, non-guaranteed, etc. (Front Office > Arrivals). Whether a deposit is required, or a cancellation penalty applies may be determined by the reservation type and/or rate code.
When the RESERVATIONS > AUTO DEPOSIT COLLECTION application parameter is active and a deposit rule is defined for the corresponding reservation type that coincides with the reservation dates, a popup message is displayed stating "A XXX Deposit Rule is required for the Reservation Type. Do you wish to continue?" If you select Yes, the Deposit Cancellation screen appears with the Payment screen overlaid. If you select No, you cannot make the reservation for the selected reservation type. This message can be configured to be hidden and not displayed. See Pop Up Blockers for details.
Market. Select the down arrow to display the Market Code list of values. Choose a market code from the list. The market code indicates the marketing classification to which this reservation belongs (e.g., government, medical, airline, etc.). This information is used to collect information for statistical reports.
Note: This field may be auto-populated with a default market code if one has been specified for the selected rate code. If default market codes have been specified for both the rate code's rate header and rate detail, the market code set for the rate detail takes precedence. When changing a reservation's details, if the market or source codes are different than those for the selected rate code, users will be notified and can choose to update the reservation to the market and source configured on the rate code or keep the current market and source codes.
Source. Select the down arrow to display the Source Code list of values. Choose a source code from the list. The source code indicates how the guest may have learned about the property (e.g., convention bureau, newspaper ad, telephone marketing, walk-in, direct mail promotion, etc.). This information is used to collect information for statistical reports.
Note: This field may be auto-populated with a default source code if one has been specified for the selected rate code. If default source codes have been specified for both the rate code's rate header and rate detail, the source code set for the rate detail takes precedence. When changing a reservation's details, if the market or source codes are different than those for the selected rate code, users will be notified and can choose to update the reservation to the market and source configured on the rate code or keep the current market and source codes.
Origin. Select the down arrow to display the Origins list of values. Choose a category of business channel (e.g., central reservations offices, GDS members) from which this reservation originated. Reservation origins may be cross-referenced with reservation sources for statistical use (for example, to see how many guests who made a reservation via GDS were attracted by a direct mail promotion).
Payment. Select the down arrow to display the Payment Methods list of values. Choose a payment method (e.g., Visa, MasterCard, American Express, cash, check, direct bill) from the list. When you collect an advanced deposit, accept a payment, or check out this guest, OPERA automatically defaults to this payment method.
When the RESERVATIONS > PAYMENT TYPES PER WINDOW application function is set to Y, multiple payment methods can be made for a reservation. If more than one method is applied, the background of the Payment field will be yellow and an ellipsis button displays beside the down arrow. Select the ellipsis button to view or edit the Payment Methods screen (See Multiple Payment Methods for details).
If you select a credit card payment method and the IFC > CREDIT CARD PROMPT application setting is set to Always, OPERA will ask if you want to swipe the credit card or not. OPERA also prompts whether you want to add the credit card number to the guest's profile. If you select Yes, the credit card number you enter in the Credit Card No. field, and the expiration date you enter in the Exp. Date field will be stored in the guest's profile and will be available when the guest makes reservations in the future. (Whether or not you are prompted to add the credit card information from the profile depends on the setting of the PROFILES > PROFILE CREDIT CARDS application parameter.) If the IFC > CREDIT CARD PROMPT application setting has a value PROMPT, then a message to swipe the Credit card is prompted only when the amount being charged to the card is more than the existing authorization on the selected card or if an authorization is being requested for the 1st time on a credit card or there is no existing authorization for a credit card.
When the PROFILES > PROFILE CREDIT CARDS application parameter is set to Y and a credit card payment type is selected in the Payment field on the Reservation screen, if the guest has credit cards attached to their profile, the Credit Cards screen appears, allowing you to select an existing credit card. If you select an existing credit card, the Credit Card No. and Expiration Date fields on the Reservation screen will be auto-populated. If you close the Credit Card screen without making a selection, you are prompted, "Do you want to attach this credit card to the profile?" Respond Yes to attach the new credit card information to the guest's profile, or No if you do not want to attach the information to the profile.
When the IFC > CC NUMBER NOT MANDATORY FOR RESERVATION application parameter is set to Y, a credit card number and expiration date are not mandatory when making or changing a reservation with a credit card payment method, nor is a credit card number required when checking the guest in or while the guest is in-house. In addition, when this option is set, no credit authorization is performed at check in or by end of day routines.
Note: When the guest chooses to pay by credit card, you may skip the Payment field and go directly to the Credit Card No. field to enter the credit card number. OPERA will automatically select the appropriate payment method.
When the RESERVATIONS > MANDATORY AR ACCOUNT FOR DIRECT BILL PAYMENT TYPE application setting has been set to Reservation or Reservation/Check In, if the Direct Bill payment type is selected and an AR number does not exist for the profile, a message prompt is displayed stating the "No AR account exists for this profile, would you like to create one?" The user can then create an AR account and continue with the creation of the reservation.
Note: When the OPV_<version number> OPERA Vacation Ownership System license is active and the RESERVATIONS > MANDATORY AR ACCOUNT FOR DIRECT BILL PAYMENT TYPE application is set to Reservation, Check In, or Reservation/Check In, then for an Owner/Auth. User reservation, a valid AR account must exist if Direct Bill payment method is being associated with a reservation.
When the RESERVATIONS > CC PRE CHECK IN AUTHORIZATION application parameter is set to Y, a credit card payment method is selected, and an EFT interface has been configured, a property can obtain credit card authorizations for guests arriving on the current business date, without checking in the guest at that time. For example, if a guest arrives early to the property and attempts to check in, but the room is not ready yet. In this situation, the guest would be pre-registered and all of the information collected to finish the registration process, including swiping and manually authorizing the guest's credit card for the reservation. When the guest's room becomes available, the guest can be checked in as the Credit Card Swiped check box is now selected and the room keys could be delivered to the guest instead of the guest having to return to the reception area.
Note: If a due in reservation already has sufficient authorization, user will not be prompted with a question "Do you wish to authorize the credit cards for this pre-check in reservation." However, if any changes occur to the reservation that necessitate additional authorization, then the prompt will appear.
Credit Card No. The guest's credit card number. This field is mandatory if you select a credit card payment method in the Payment field. When the guest makes a payment or checks out, the payment method defaults to this credit card number. (The guest can select a different credit card or a different payment method altogether.) Once the reservation is saved only the last 4 numbers of the credit card number will be shown; the remainder of the numbers will be masked with Xs. When the credit card icon displays at the end of the field, the Credit Card Vault functionality is active. See Credit Card Vault for details.
Note: For security reasons, if a credit card is swiped with the cursor in this field, the information associated with the credit card is displayed as a series of asterisks. This is also true if you manually type a credit card number beginning with a % sign (e.g., %9238...). The asterisks will resolve to the masked credit card number. For users that are granted the RESERVATION > CREDIT CARD INFORMATION VIEW permission, they can double-click on the masked credit card number to display it. When this action is completed, an entry is logged into the User Log recording the user ID, date & time, action performed, etc. See User Log Activity for details.
Exp. Date. If you entered a credit card number in the previous field, you must enter the card expiration date here. When you look up a reservation having a masked credit card, and the date expires, the word EXP appears on the Reservation Snapshot Screen. For users that are granted the RESERVATION > CREDIT CARD INFORMATION VIEW permission, the expiration date is displayed, not masked.
Approval Code. Approval code for the guest credit card.
Approval Amt. Approval amount for the guest credit card. This is the authorization amount for the credit card associated with Billing screen window 1 only. If a credit card is associated with a different Billing screen window, select Options > Credit Cards > Authorizations to see all credit card authorizations for this reservation.
Suite With. The room number for rooms connected to the room identified in the Room field, if applicable.
CRS No. The confirmation number from a central reservation system, if applicable. Depending on the CRS, this number may be auto-populated when the reservation originates from a central reservation system. Select the ellipsis button to manually enter an external reference number. A yellow background indicates more than one CRS number is associated with the reservation. The value displayed in the CRS No. field may be a value that has been defined by the RESERVATIONS > EXTERNAL REF NUMBER TO DISPLAY application setting. See External Reference for details.
Confirmation. Select this check box to request a confirmation letter for a new and/or updated reservation.
Note: When the OPR<version number>ORS license code is active, the parameter CRO > Reservation > LAUNCH CONFIRMATION FROM CLOSING SCRIPT can be selected in ORS. This parameter will only be visible when CRO > Selling Screen > Parameter > Endscript parameter is On. When the CRO > Reservations > LAUNCH CONFIRMATION FROM CLOSING SCRIPT parameter is activated, the Confirmation check box is removed from the Reservation screen and placed on the Closing Script screen. This provides agents the opportunity to review the reservation before sending a confirmation. See Closing Script Confirmation and Confirmation Letters for more information.
Here are some guidelines on the behavior of this check box:
Note: The Confirmation button from the Reservation Options menu can be used to access the Confirmation screen and request a confirmation letter regardless of the Confirmation Letter application settings and whether or not a confirmation has already been sent.
Guest Balance. Displays the amount accrued on the guest folio.
Discount Amount/%. Available when the RESERVATIONS > RESERVATION DISCOUNTS application function is set to Y. The Discount fields are enabled and can be applied when the user has the permission of Reservation > Discount. The discounts are logged in the User Activity Log (Reservation > Options > Changes).
Note: If the ORS application setting Global > Reservations > Parameters > Always Fixed Rates = Y, the intended discount will not be applied after the reservation is saved.
Enter an amount (in the Discount Amt field) or a percentage (in the Discount % field) to apply a discount to the rate when the rate is associated with a rate code. The Rate field is adjusted by the amount or percentage entered.
For non-business block reservations that do not have a rate code attached, entering a value in the Discount Amt or Discount % field will not affect the Rate amount which is manually entered; it is assumed that you would have already entered the discounted rate. The information in the Discount Amt or Discount % field is used for accountability, tracking and reporting.
For business block reservations that do not have a rate code attached and that do not have a rate amount specified on the block header, entering a value in the Discount Amt or Discount % field will not affect the Rate amount which is manually entered, but would inform you that the amount entered is potentially different than the expected amount.
For business block reservations that do not have a rate code but that do have a rate amount defined on the block header, entering a value in the Discount Amt or Discount % field will change the Rate amount because there is a comparison rate amount available.
Note: If the Rates > Multi Currency application parameter is set to Y and rate codes are configured in various currencies, the rate amount displayed is based on the currency of the rate code.
The Discount Amount and % options are mutually exclusive and only one option can be used per reservation. If you enter a discount amount and then attempt to enter a discount percentage, the first entry disappears and only the last entry remains. This circumvents both options being used on one reservation. The discount cannot exceed the room rate. A discount amount or a discount percentage with a minus sign (e.g., -25) increases the rate by the given amount or percentage. For example, if the rate is 275 and the discount amount is -25, the rate becomes 300.)
Note: When a rate code is assigned to the reservation, the Discount Amt, Discount %, and discount Reason fields cannot be edited if the Discount check box is not selected on the Rate Setup screen's Rate Header tab (Configuration > Rate Management > Rate Classification > Rate Code). If a reservation exists with a discount applied, and a new rate code is selected which does not support discounts, the discount amount and/or percentage values are removed and the fields cannot be edited. (See Rate Header Tab for details.) Should the Reservations > Fixed Rate application function be active, changing the Rate Code disables the Discount Amt, Discount %, and discount Reason fields, but when the application function is inactive, then manually modifying the rate will disable the Discount Amt, Discount %, and discount Reason fields.
If a multi-night reservation has multiple rate codes or multiple rate amounts over the course of the stay, the Discount Amt and Discount % fields are unavailable for editing on the Reservation screen. Discounts may, however, be applied on a per-night basis by using the Daily Details screen. (See Daily Details screen for details.) When discounts are applied on a per-night basis, the discount for the current night's stay (or the first night's stay prior to the arrival date) is shown in the Discount Amt. or Discount % field with a yellow background. If discounts apply to nights of the stay, but not to the current night (or the first night's stay prior to the arrival date), the field has a yellow background with no amount or percentage value entry.
The discount for the current night's stay (or the first night's stay prior to the arrival date) cannot be edited if an advance bill has been generated for that date.
See Fixed Rates for more information about fixed rates and discounts.
Reason. Available when the RESERVATIONS > RESERVATION DISCOUNTS application function is set to Y. Mandatory if a discount applies to the reservation. Select the down arrow to display the Discount Reason list of values. Choose a reason (e.g., promotional discount, rate discrepancy) for the discount given in the Discount Amt/% field.
TA Rec. Loc. The travel agent record locator; available when the RESERVATIONS > TA RECORD LOCATOR application parameter is set to Y. This alphanumeric identifier can be used on the Reservation Search screen to locate this reservation. The same TA record locator may be assigned to more than one reservation. See Travel Agent Reference Number for more information. This option can be applied to individual as well as Business Blocks.
Specials. Select the down arrow to display the list of Specials code values. Check special requests (e.g., foam pillows, crib, rollaway, extra towels) from the list. If you select items, OPERA prompts you to indicate whether you want to add these specials to the guest's profile for this property. (This prompt may be hidden. See Popup Blockers for details.) See Propagation of Specials, Features, Preferences and Comments from the Profile to the Reservation for information on how Specials can be automatically copied from the guest profile to the reservation. If the FRONT DESK > FULL DESCRIPTION application parameter is active, for future and in-house reservations, hovering over this field displays the full description of the code values.
Note: The field will show with a yellow background if any of the Specials were inherited from the attached Company/Source/Travel Agent profile.
Packages. Select the down arrow to display the Packages screen. This screen lists any packages associated with the reservation, either attributable to the rate code that has been selected or added separately to the reservation along with the Package Consumption/Pricing details. When a package is configured as part of the rate code, the rate is inclusive — the package price is included in the rate. Only the packages that cover the dates of the reservation are displayed in the Packages list. Reservations with rate-inherited packages as well as packages selected here, can be exchanged with external systems. This allows for the update to an underlying package price while keeping the package price on the reservation intact - the package price at the time of booking will remain regardless of the updating of the underlying packages’ price.
When a Package is attached to a reservation and the stay dates are updated and fall outside of the start and end dates of the Package, then a message is displayed stating "An attached package does not have package details associated for this time period." After closing the message, the cursor is taken back to the Nights field and the number of nights is changed back to the reservations original amount.
Block reservations created via the Rate Query (F5) Block field inherit the package from the block header if there is one and will not refer to the Package field on any of the PM Reservations associated to the block. For example:
When a package is attached to the reservation through the rate code, the Packages field label is shown in blue. Select the down arrow to see the Packages screen. Exclusive packages are not included in the rate. When an exclusive package is associated with the reservation, a separate amount appears to the right of the Package field showing the combined rate plus package price. In addition, the package code is displayed in the Packages field. You may use the Packages screen to change whether a package is inclusive or exclusive. But, Packages configured with an allowance are always inclusive. See Package Codes for details on configuring packages when selecting Configuration > Rate Management > Packages.
For floating allowance packages, when attached to the reservation and the allowance is created upon the check in of the reservation, the package can be deleted from the reservation before the End of Day procedure is run, but not after. The user can set an end date by editing the package, to prevent the consumption of the existing allowance by the guest.
For In House reservations with Next Day Packages attached directly to the reservation for which an allowance has been created during the End of Day procedure, the package cannot be deleted from the reservation since there is an unconsumed allowance. In this case, a message will be displayed to notify the user of this and will also instruct the user to change the End Date to the Business Date - 1, if future allowances are to be prevented. Once the existing allowance is either consumed or package profit/loss is posted during the End of Day procedure and there are no more existing unconsumed allowances for the current or future dates, then this package can be deleted.
What happens to Packages/Items when the Stay Dates of a reservation are modified? |
||
Scenario |
Result |
|
Packages/Items with a rate code attached |
Leaves the begin and end dates blank for the package and automatically updates the dates for the items with the modified reservation dates. The Item Availability is verified and an override is prompted and displayed if necessary. |
|
Packages/Items with NO rate code attached |
If dates exist for the Package, then the package dates are automatically updated to the modified reservation dates. If not dates exist for the package, then the begin and end dates are left blank for the package. |
|
Packages with NO items attached |
If dates exist for the Package, then the package dates are automatically updated to the modified reservation dates. If not dates exist for the package, then the begin and end dates are left blank for the package. |
|
Package with NO dates |
Leaves the begin and end dates blank for the package. |
|
Packages with dates |
Automatically updates the package dates to the modified reservation dates. |
|
Dates are NOT the same as the old stay dates |
The Package Screen is displayed. |
|
Packages with items attached |
If dates exist for the Package, then the package dates are automatically updated to the modified reservation dates. If not dates exist for the package, then the begin and end dates are left blank for the package. |
|
Dates are the same as the old stay dates |
Automatically updates the package dates and item dates to the modified reservation dates. The Item Availability is verified and an override is prompted and displayed if necessary. If it is unable to override, then the Item Inventory screen is displayed. |
|
Inventory Items with NO Packages are manually attached |
Automatically updates the inventory item dates to the modified reservation dates. |
|
Comments. Comment associated with this reservation. Position your pointer over the Comments field to see the complete text of the comment. Select the down arrow to display the Reservation Comments screen. Use this screen to enter new comments and to review all comments associated with this reservation. If reservation comments are associated with this reservation, the Comments lamp appears in the lower section of the Reservation screen. If there are multiple comments, the Comments field has a yellow background. See Propagation of Specials, Features, Preferences and Comments from the Profile to the Reservation for information on how Comments can be automatically copied from the guest profile to the reservation.
Promotions. When the RATES > PROMOTIONS application function is set to Y, this field is displayed. Select the down arrow to display the Promotions List. Promotions (e.g., Fall Holiday, Superbowl Sunday, Buy One Get One Free) that are currently available are displayed on this screen. You may select one promotion from the available promotions list.
ECertificate. Available when the PROFILES > OCIS E-Certificates application parameter is set to Y. Enter an e-certificate number to consume for the reservation. If entering more than one e-certificate, separate each e-certificate with a comma. For more information, see E-Certificate Consumption.
Note: When the RESERVATIONS > OPERA BENEFITS application parameter is set to Y, selecting the E-Certificate LOV will open the OPERA Benefits screen. From this screen, you can select a benefit e-certificate to use for the reservation. See Applying a Benefit E-Certificate to a Reservation for more information.
Coupon. Available when the RATES > PROMOTION COUPON CODES application parameter is set to Y. When a coupon code is entered, the Promotions field will automatically be populated with the linked promotion code. See the Generating and Exporting Coupon Codes topic for more information.
Note: When the RESERVATIONS > OPERA BENEFITS application parameter is set to Y, selecting the Coupon LOV will open the OPERA Benefits screen. From this screen, you can enter a benefit coupon and use it for the reservation. See Applying a Benefit Coupon to a Reservation for more information.
Item Inv. Available when the RESERVATION > ITEM INVENTORY application is set to Y, inventory items (for example, extra beds, cribs, recreational equipment, audio-visual hardware, and so on) may be attached directly to a reservation, through a package, or through the rate code. You may also attach inventory items to the reservation "manually." To do so, select the down arrow to open the Item Inventory screen.
Note: The Item Inv. field label is displayed in blue if a package is attached to the reservation through the rate code, and that package includes inventory items. Select the down arrow to see the Item Inventory screen.
If a package is attached to the reservation manually, and that package includes inventory items, or the inventory items are attached manually to reservation, then the item codes itself are displayed in this field instead of the blue label.
Certain items may have traces associated with them when they are configured. If so, the traces will automatically be attached to the reservation. Certain items may have a maximum quantity that may be attached to the reservation depending on the room type. If the limit is exceeded, the following message appears: "The selected number of inventory items exceeds the maximum allowed for the room type." Select the down arrow on the Item Inv. field to display the Item Inventory Screen where you may determine which items exceed the quantity limit. (See Room Type Inventory Limit for details.)
PIN Code. When the RESERVATIONS > CASHIER FLOW AT CHECK IN AND/OR DURING STAY application setting is set to Force Advance Bill or Force Advance Bill and Payment, this view only field shows the key PIN generated for the reservation.
Key Valid. When the RESERVATIONS > CASHIER FLOW AT CHECK IN AND/OR DURING STAY application setting is set to Force Advance Bill or Force Advance Bill and Payment, this view only field shows the date through which the key generated for this reservation is valid. See Force Advance Bill and Payment at Checkin and Force Advance Bill for details.
Along the bottom of the screen the following view-only information is displayed:
Created By. The OPERA user who created this reservation.
Created On. The date this reservation was made.
Updated By. The user who last updated the reservation.
Updated On. The date that the reservation was last updated.
Note: When the Reservation screen is opened for a reservation with DUE IN status, the List of Preferences pop-up screen displays Codes, Descriptions, and Types for all Specials, Features, and Preferences from the reservation. This view-only screen is scrollable and can be moved around on the Reservation screen. Clicking on any fields or buttons on the Reservation screen closes the List of Preferences pop-up screen.
See Reservation Main Screen Painting Elements for details.
The following is a list of the additional screen paintable fields for the Reservation Details section of the screen.
Adults Tax Free. Enter the number of adults on the reservation that should be considered as Tax Free.
Arr Station Code. When the RESERVATIONS > TRANSPORTATION application function is set to Y, enter the code for the airport, bus station or other location of the guest arrival; for example, JFK International, Penn Station, Port Authority Bus Terminal.
Arr Transport No. When the RESERVATIONS > TRANSPORTATION application function is set to Y, enter the transportation number such as the airline flight number/city of origin applicable to the guest mode of transportation upon arrival; for example Flight 1660 from Buenos Aries, or Silver Meteor from Chicago.
Arr Transport Type. When the RESERVATIONS > TRANSPORTATION application function is set to Y, select the down arrow to display the Transportation Type list of values. Choose the arrival method of transportation used by the guest (charter bus, limousine, airline, taxi cab, train).
Arrival Comments. Enter in comments that are associated to the guest's arrival. Once the guest has been checked out or the reservation is canceled, then this field becomes disabled.
Auth. User. Available when the OPV_<version number> OPERA Vacation Ownership license is active and OWNERSHIP > ADD AUTH USER ON THE FLY application parameter is set to Y, if the selected room is a rental unit per the owner contract, then this check box can be selected to make the guest attached to the reservation an Authorized User for the unit. The user will be prompted with the message "Would you like to add <Last Name>, <First Name> as an Auth User for the fractional unit <room number>?" When an Authorized User is added on the fly and the reservation stay dates span multiple fractional ownership periods, a prompt displays indicating the condition and the Authorized User is added to all fractional ownership date ranges. See Owner Tab and Fractional Ownership for details.
Authorizer. Available if the OPP_GCA Comp Accounting add-on license is active. Select the down arrow to choose an authorizer for this reservation. This authorizer will be recognized by the PTS system as the "trip authorizer." See Gaming Authorizers for details. Authorizer's can automatically be assigned to specific promotions in the Promotion Code setup (See Promotion Codes for details). If an Authorizer is assigned to a Promotion Code, then the Authorizer is automatically populated in this field when the promotion is selected in the Promotion field.
Award. Select to add a membership award to the reservation. When selected, rate codes can be attached to the reservation along with membership award redemptions. This enables members to pay some nights of their stay with money and some with membership points.
Award Code 1. Available when the MEMBERSHIP > AWARDS application function is set to Y, enter the award code for the reservation.
Award Membership ID. Enter the award membership ID.
Award Membership Type. Enter the award membership type.
Award Voucher 1. Available when the MEMBERSHIP > AWARDS application function is set to Y, enter the valid voucher number for the award.
C/O Time. Available on the Available Rooms Search and Room Assignment screens, the field must be screen painted on the Reservation Details or More Fields screen to be available for use here. If a late checkout is permitted for this guest, you may enter the time here. When the guest checks out, the actual check out time will be automatically entered here.
When the CASHIERING > SCHEDULED CHECKOUT application function is set to Y, this field can be used to specify the time (on the guest's departure date) when the guest will be automatically checked out, providing the guest's Billing screen has a zero balance. This field, along with the Scheduled Checkout check box, is included on the Privileges screen, but may be screen painted on the More Fields tab. See Scheduled Checkout for details.
Note: The Caller Comments / Email / Fax / First / Last / Phone fields will be blank each time the reservation is accessed and ready to receive new caller details. Caller information will not be copied to add-on reservations, party reservations, or block reservations. To access previous Caller information, select the Reservations screen options menu Call History button.
Caller Comments. When the RESERVATION > CALLER INFORMATION application function is set to Y, enter any comments relating to the caller. If information is entered into this field, then all of the caller information will be saved for the reservation. The call is considered finished when the Reservation screen is closed by selecting the OK or Close button.
Caller Email. When the RESERVATION > CALLER INFORMATION application function is set to Y, enter any comments relating to the caller. If information is entered into this field, then all of the caller information will be saved for the reservation. The call is considered finished when the Reservation screen is closed by selecting the OK or Close button.
Caller Fax. When the RESERVATION > CALLER INFORMATION application function is set to Y, enter any comments relating to the caller. If information is entered into this field, then all of the caller information will be saved for the reservation. The call is considered finished when the Reservation screen is closed by selecting the OK or Close button.
Caller First. When the RESERVATION > CALLER INFORMATION application function is set to Y, enter any comments relating to the caller. If information is entered into this field, then all of the caller information will be saved for the reservation. The call is considered finished when the Reservation screen is closed by selecting the OK or Close button.
Caller Last. When the RESERVATION > CALLER INFORMATION application function is set to Y, enter any comments relating to the caller. If information is entered into this field, then all of the caller information will be saved for the reservation. The call is considered finished when the Reservation screen is closed by selecting the OK or Close button.
Caller Phone. When the RESERVATION > CALLER INFORMATION application function is set to Y, enter any comments relating to the caller. If information is entered into this field, then all of the caller information will be saved for the reservation. The call is considered finished when the Reservation screen is closed by selecting the OK or Close button.
CC Name. When a credit card payment method is selected, swiping the credit card automatically populates this field with the name on the credit card and is sent to the credit card interface as Guest Name. If the credit card information is attached to the guest profile (by answering Yes to the prompt, "Do you want to attach this credit card to the profile?") this name will be shown as part of the credit card information on the Credit Card screen accessed via the Profile Options menu.
This field can also be populated by an external system. For example, if the name on the credit card is included as part of the credit card information that is inserted into a profile or reservation by an external system, this field will automatically be populated with the name on the credit card and is sent to the credit card interface as Guest Name. If the external system does not include the name on the credit card as part of the credit card information, this field will remain blank and can be edited, but will send the profile name to the credit card interface.
Note: When credit card information is manually entered into the Credit Card No. and Exp. Date fields of the Reservation screen, the Name on Card field will remain blank and can be edited. Swiping a credit card will automatically populate the Name on Card field with the name on the credit card.
CC Swiped. When a credit card payment method is selected for window 1, the card is swiped or the EMV chip read/dipped, and successful authorization is received through the interface, a check mark appears in this field. This field is updated during check in or at any other time during the guest's stay when a credit card is swiped and successful authorization is received. This field cannot be manually edited. The description can be changed to a relevant one such as CC Swiped/Chip (when chip-and-PIN [EMV] is active, this is dependent on the vendor providing the card entry method).
Note: The CC Swiped flag is not copied to add-on reservations or to shares created from a profile with payment details copied from the originating reservation.
Children (Tax Free). Enter the number of children on the reservation that should be considered as Tax Free.
Color. Available if the RESERVATIONS > RESERVATION COLOR DEFINITION application setting is set to Reservation. See Color Box under Reservation Header, above. See Reservations Color Codes for details.
Comp Type. Select the comp type to associate to the guest or the reservation. For example, you might use this feature to identify guests according to their gaming expertise.
Coupon. Enter the code for the coupon that is being used towards the reservation.
Custom Ref. Enter the custom reference to use with the reservation.
Default Folio Address. This field element can be screen painted when the PROFILES > DEFAULT FOLIO ADDRESS application parameter is active. When saving a reservation where a designated default folio address exists for the profile (irrespective of the existence of an Account Number and/or Cost Center value being associated), this prompt appears: 'Do you want to select a Default Folio Address for this reservation?' Selecting Yes opens the Addresses screen. Select the OK button for this address to print on the folio, which can be generated for the billing window that has this guest’s / individual profile associated. The address section of the folio will also show the Account and Cost Center. To change or remove the Default Folio Address, select the LOV to open the Addresses screen and uncheck the X and then select the OK button.
Dep Carrier Code. When the RESERVATIONS > TRANSPORTATION application function is set to Y, enter the code associated with the air, rail, bus or car rental transport company being used by this guest upon departure; for example, Delta, Amtrak, Greyhound, Avis.
Departure Comments. Enter comments that are associated to the guest's departure. Once the guest has been checked out or the reservation is canceled, then this field becomes disabled.
Dep Station Code. When the RESERVATIONS > TRANSPORTATION application function is set to Y, enter the code for the airport, bus station or other location of the guest departure drop off; for example, JFK International, Penn Station, Port Authority Bus Terminal.
Dep Transport No. When the RESERVATIONS > TRANSPORTATION application function is set to Y, enter the transportation number such as the airline flight number/destination applicable to the guest mode of transportation upon departure; for example Flight 1660 to Buenos Aries, or Silver Meteor to Chicago.
Dep Transport Type. When the RESERVATIONS > TRANSPORTATION application function is set to Y, select the down arrow to display the Transport Types list of values. Choose the departure method of transportation used by the guest (charter bus, limousine, airline, taxi cab, train, rental car).
DNM. (Do Not Move). Available when the RESERVATIONS > DO NOT MOVE ROOM application function is set to Y. A room must have been selected in the Room field for this check box to be available. As long as this check box remains selected, the background of the Room field is displayed in red and the room number chosen cannot be changed (see Note below). (In addition, you cannot change the room type, as this would unassign the room.) The Do Not Move functionality is in-effect until the guest checks in. Once the guest has checked in, the Do Not Move is canceled and room moves may be performed for the guest as usual. See the Shares help topic for additional information on this feature in a sharing scenario.
Note: Separate user permissions in the Reservations group control the user's rights to check and un- check DNM. If Check As Do Not Move Room is granted, you may check the DNM check box. If Uncheck As Do Not Move Room is granted, you may un-check the DNM check box.
Drop Off Time. When the RESERVATIONS > TRANSPORTATION application function is set to Y, enter the time for the guest to be dropped off.
Guest Status. Select the status of the guest.
Guest Type. Select the type of guest that is associated to the reservation.
Lease Balance. Available when the RATES > APARTMENT STYLE BILLING application function is set to Y, the Lease Balance is the asb_flag transaction indicator marks each charge in the FINANCIAL_TRANSACTIONS table. Transactions that are flagged as [N]ightly Rental Posting and [W]aived Nights Rental Posting are included in the Lease Balance amount.
Pick Up Time. When the RESERVATIONS > TRANSPORTATION application function is set to Y, enter the time for guest pick-up.
Preferences. Select the down arrow to display the list of Preference Groups and Preference values. Check preferences from the list. If you select items, OPERA prompts you to indicate whether you want to add these preferences to the guest's profile for this property. See Propagation of Specials, Features, Preferences and Comments from the Profile to the Reservation for information on how Preferences can be automatically copied from the guest profile to the reservation. The Smoking preference associated with the profile attached to the reservation, if any, is shown in blue type in the area between the Reservation screen's header and details section. The Smoking preference may only be set from the Profile screen (Profile Options > Preferences). If the FRONT DESK > FULL DESCRIPTION application parameter is active, for future and in-house reservations, hovering over this field displays the full description of the code values.
Also if a Preference Group is selected as a Reservation Preference from Configuration > Profiles > Preferences > Preference Groups, then adding a preference to the reservation will prompt with "Do you want to attach this Preference to the Profile?" Selecting Yes will attach the preference to the guests profile and selecting No will only attach the preference to the reservation.
Note: On the Reservation screen, if duplicate Preference Codes are configured in OPERA, then manual entry of the Preference Code into the Preferences field cannot be completed and the Preference Codes must be selected/de-selected from the list of values that is displayed by selecting the down arrow for the field.
Prorated. When the OPO_<version number> OPERA Vacation Ownership license code is active and the RATES > APARTMENT STYLE BILLING application function is set to Y. If coming to the Reservation screen via Rate Query and the Prorated check box was selected on it, then this will by default be selected. This check box would be selected on a per night basis for any additional nights that exceed the lease agreement.
Purpose of Stay. Select the reason for why the guests are staying. This field can be screen painted on the Reservation Screen when the OPP_<version number> OPERA Property Management Systems and/or OPR_<version number> OPERA Reservation System license is active. When a Purpose of stay is selected in PMS, it will automatically be populated for the reservation in ORS. When the Purpose of Stay is updated in ORS, it is automatically updated in PMS. But it the Purpose of Stay is removed in PMS or ORS, it will remain unchanged in the other system.
Reservation UDF Fields. User definable fields.
When the OPX_RAIN2 OPERA 2-Way Exchange for Rainmaker license is active and the MEMBERSHIP > YIELD MARKET LOOKUP application function is set to Y, an additional application setting is available in the Membership group called CUSTOMER VALUE. When completing a reservation lookup based on the Yield Market Type, should the UDF field defined for the Customer Value application setting be screen painted, then this value is populated. If it does not exist in the lookup, then the screen painted field will be blank.
Room Features. When the RESERVATIONS > RESERVATION ROOM FEATURES application parameter is set to Y, select the down arrow to display the list of Room Feature Code values. Check room features (e.g., tile floor, no smoking, balcony, etc.) from the list. If you select items, OPERA prompts you to indicate whether you want to add these room features to the guest's profile for this property. (This prompt may be hidden. See Popup Blockers for details.) See Propagation of Specials, Features, Preferences and Comments from the Profile to the Reservation for information on how Room Features can be automatically copied from the guest profile to the reservation. If the FRONT DESK > FULL DESCRIPTION application parameter is active, for future and in-house reservations, hovering over this field displays the full description of the code values.
Room Instructions. This field is also available on the Housekeeping Options screen (select the Housekeeping button from the Reservation Options menu). See Housekeeping Option for details. Information entered in Room Instructions can be included on Housekeeping Task sheets.
Room Status. The view only Room Status field shows the housekeeping status of the room assigned to the reservation. The background color of the field matches the color used to indicate the housekeeping status in other OPERA screens such as the Housekeeping screen and the Room Assignment screen. Dirty is red; Pickup (available if the ROOMS MANAGEMENT > PICKUP STATUS application function is set to Y) is yellow; if the ROOMS MANAGEMENT > INSPECTED STATUS application function is set to Y, Inspected is green and Clean is cyan; if the ROOMS MANAGEMENT > INSPECTED STATUS application function is set to N, Clean is green.
Note: The Room Status field will be visible only during the period from the arrival date (once a room number has been assigned) through check out.
Tax Type. Select the down arrow to display the Tax Types list of values. Choose the tax type (e.g., regular guest, state tax exempt, city tax exempt) for this reservation. For example, state employees may be exempt from paying state tax if they are staying on official business. The setting here will determine which, if any, taxes are applied to transactions posted to this guest's bill. By default, all taxes will be applied unless specifically exempted by the selection made here.
Note: For reservations made in ORS, and inserted in PMS via OXI, the following condition must be true for the tax type to also be sent with the reservation:
The Tax Type field must be screen painted on the Reservations More Fields tab in PMS and ORS.
Application Function CASHIERING > TAX TYPES must be set to Y.
Once these conditions are met, the Tax Type is exchanged in the OXI outbound XML message.
Total. This read-only field displays the total of the rate plus any inclusive and/or stand-alone packages. The amount takes into consideration the package posting rhythm. For example, assume the guest is staying from June 3 through June 4. The reservation has a rate code that includes a package which is posted on the last night of the stay. The Total field will not display on the Reservation screen on June 3; the Total field will display on June 4 and will be the total of the room rate plus the package. If the package were to be posted every night of the stay, the Total field would be shown on the Reservation screen for all dates of the stay.
Total Points. Total membership points to be consumed for the membership award. This field will be populated dynamically as a calculated value.
When you select the ellipsis button next to the Rate field, an options menu appears with the following functions available:
Refresh Rates. Select this option to make sure you are displaying the most current rate information, particularly when you are updating an existing reservation. For example, if the rate amount is changed from 100 to 150, new reservations will be booked at the new rate of 150. However, to update an existing reservation made before the rate change, you would use this option to refresh the rate to reflect the current amount. Not only rate amounts, but other rate code details, such as changes to packages associated with the rate code, will be refreshed as well.
Note: If the rate amount shown in the Rate field is designated a Fixed Rate and the amount differs from the rate specified by the rate code, when you select Refresh Rates you are prompted: "Rate for the reservation should be XXX. You are charging XXX. Do you want to update the rate to XXX?" Select Yes to update the rate amount or No to keep the rate amount shown in the Rate field.
Note: When the RATES > REFRESH MANUAL PACKAGES application parameter is set to Y and the Package has been manually added to the reservation, if the Price or Allowance is updated for the Package in configuration, then the Price and/or Allowance will be updated in the Package Consumption/Pricing Grid when the Refresh Rates button is selected on the reservation screen.
Daily Details. Select this option to see the Daily Details screen. This screen shows the individual rates for each night of the guest's stay. Yellow highlighting indicates that there is a rate change over the course of the stay. (Rate codes may change over the course of the guest's stay. For example, a guest traveling on business may spend the first two nights of his stay at a corporate rate. If the guest decides to stay an extra night for personal reasons, he may change to a rack rate for the final night; in this scenario, multiple rate codes will apply to the stay.)
Rate Info. This information is available for all reservations with or without an attached rate code. Select this option to go to the Rate Summary screen. This screen shows rate information for each day of the guest's stay.
Short Info. Available when a rate code is attached to the reservation. Select this option to view the text description for this rate code. See Rate Header Tab for details.
Upsell. Available when the RESERVATIONS > RESERVATION UPSELL application function is set to Y. Select this option to open the Available Upsells screen or the Upsell Activity Log, depending on whether an upsell has been applied to the reservation. See Reservation Upsell for details.
Show Me
See Also