This section describes how to create a content targeter that you can use to display appropriate content to specific users.
From the Home page, select Commerce Merchandising > Targeting and Segmentation.
Specify a name and an optional description for the project that will manage the creation and versioning of the new targeter.
Select Targeters from the Show list.
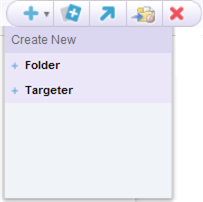
Click the Create New… icon and select Create New > Targeter.
Complete the fields in the General tab as follows:
Name: Enter a name for the new targeter. The name can include spaces.
Description: Enter some descriptive text to help identify the new targeter.
Content Source: Select a repository from the Content Source drop-down list. The repository you select determines the content items, content type, and content properties you can target against. The targeter will apply only to items in this repository.
Content Type: Select the type of content you want to target against. The type corresponds to the subset of items defined for the item descriptor type in the content repository definition file. Each item type has its own properties. For more information, refer to the Repository Guide.
Profile Type: Select the type of users to whom this targeter can apply. The options that appear are the item descriptor types in the profile definition file being used by your system, including any sub-types of those items.
Note that you cannot edit these settings after you have clicked the Create button to create the targeter. Switching to the Rules tab also makes these settings permanent for this targeter.
If you are creating a targeter in a multisite environment and you want to specify an As Seen On filter for site-specific rules, make sure you select a Content Source that is a multisite repository item with site membership and a Content Type that has site membership. For more information about site membership, see Site-Specific Repository Data (Site Membership) in the Multisite Administration Guide. For more information about As Seen On filters, see Creating an As Seen On Filter.
By default, targeters are stored as files with the extension
.propertiesin/atg/registry/RepositoryTargeters. To change the folder where the new targeter is stored, click Select Parent and specify the new folder.Note: If you need to change the location after the targeter has been created, use the Move icon.
When you have completed the fields in the General tab, click Create. The new targeter appears in the Browse tab, and it is added to the project as an asset.
Click Rules to display the Rules tab, and then follow the procedure in the next section, Defining Targeter Rules.
Note that it is possible to continue to the Rules tab without clicking the Create button first; however, doing so means that the changes you have made so far are not saved, and the targeter will be lost if your session ends or if you navigate to a different part of the UI. If you select Create, the new targeter is preserved, and you can continue the process of defining it at any time.
