Navigating Viewpoints
By default, viewpoints are displayed in a tabbed layout, but you can also display them side by side.
Tabbed Layout
The tabbed layout lets you work with one viewpoint at a time. For example, you need to work with only the Depts by Geography viewpoint.
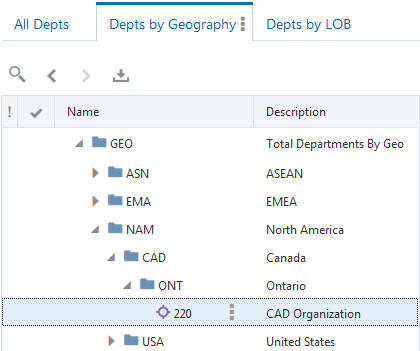
You can also select a viewpoint to work with from the drop-down list at the far right of the tabbed layout. This list is helpful when you have a lot of viewpoints.

In tabbed layout, you can hover over the viewpoint name to get more information about the application and dimension. You can also see if the viewpoint is a target of a subscription (see Subscribing to Viewpoints), the viewpoint binding status (see Binding Status), and the start and end dates of the blockout period if the viewpoint is currently blocked out (indicated by a yellow blockout icon) or has an upcoming blockout period (indicated by a green blockout icon). See Requests and Blockout Periods.
Time labeled viewpoints are indicated by a Time Label
![]() icon. Viewpoint with a private time label are indicated by a
Private Time Label
icon. Viewpoint with a private time label are indicated by a
Private Time Label
![]() icon.
icon.
Note:
If the viewpoint is the target of multiple subscriptions, the name of the first one that was created is displayed and the additional number of subscribing viewpoints is indicated with a plus sign (for example, +2).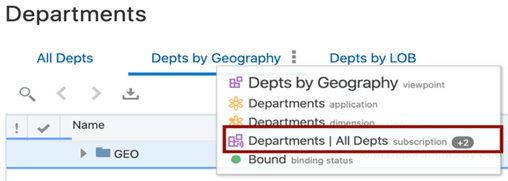
In the tabbed layout, the node type of a selected node in the viewpoint is displayed
above the right panel. Click the node type to open it in the inspector. See Inspecting a Node Type.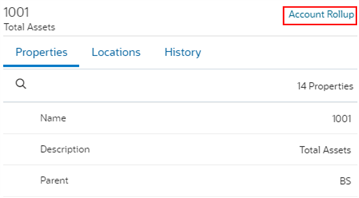
Side by Side Layout
With a side by side layout, you can:
- Visually compare the nodes, properties, and relationships between two viewpoints
- Locate a node from one viewpoint in the other viewpoint
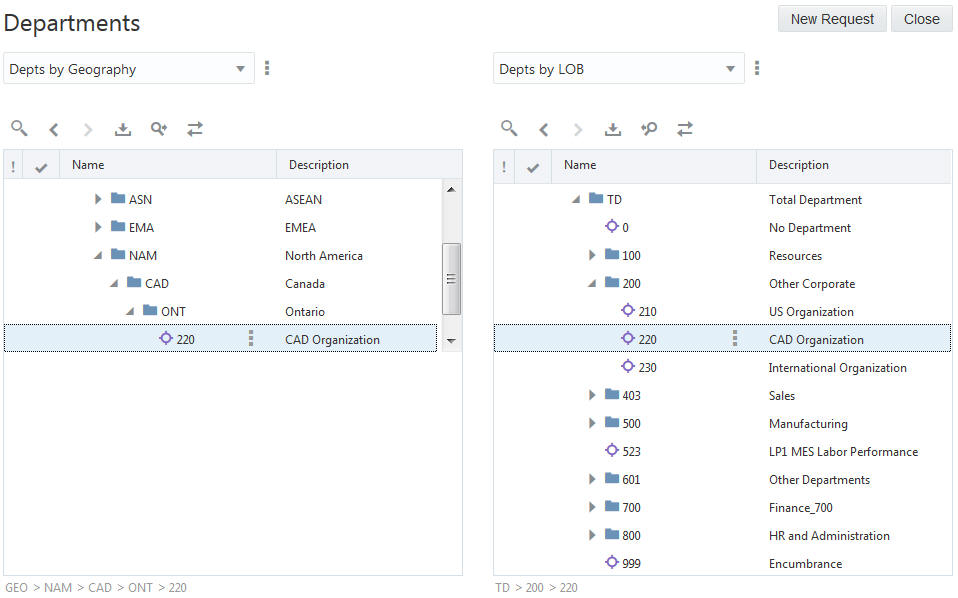
- Align nodes between two viewpoints. As you click on a node in one viewpoint, the node is highlighted in the other viewpoint.
- Perform request actions using action menus.
- Drag and drop nodes across viewpoints. To drag and drop nodes from a viewpoint, you must have at least Participant(Read) permission on the data object in the source viewpoint and at least Participant(Write) permission on the data object in the target viewpoint, and Add or Insert must be an allowed action.
Note:
Node type converters are needed to compare, locate, align, and drag and drop nodes of different node types across two viewpoints in side by side layout, see Working with Node Type Converters.See Displaying Viewpoints Side By Side.
For example, you can use a side by side layout to locate node 220 in both the Depts by Geography viewpoint and the Depts by LOB viewpoint.
You can navigate viewpoints in several ways:
Node Details Pane
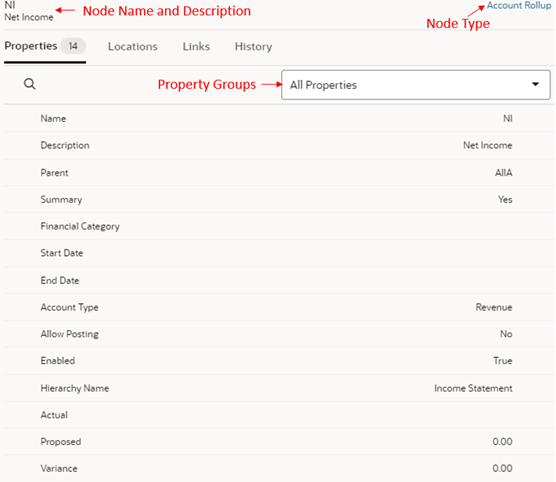
The node details pane displays information for a node in a viewpoint. View owners can configure the viewpoint to display specific properties (see Configuring How a Viewpoint Displays Properties) and change the order of the properties in the view (see Changing the Order of Displayed Properties). Users can also use the Property Groups drop down menu to filter the list of properties that are displayed in the viewpoint (see Creating, Editing, and Deleting Property Groups).
The node details pane is displayed to the right of the main tab in the tabbed layout, and on the bottom of each viewpoint in the side by side layout.
Use the tabs in the node details pane to access the following information:
- Properties: Displays the properties for a selected node. See Working with Node Properties
- Locations: Identifies all of the locations of a selected node in a hierarchy viewpoint grouped by parent. See Viewing Node Locations.
- Links: For matched nodes, displays link information about a selected node including the source of the node and downstream linked nodes. See About Node Links.
- History: Displays the history of transactions on a selected node. See Viewing Node Transaction History.
Viewpoint Menu
In both the tabbed and side by side layouts, click Viewpoint
Menu
![]() next to a viewpoint name to access these operations:
next to a viewpoint name to access these operations:
-
Inspect: Opens the viewpoint inspector, see Inspecting a Viewpoint.
-
Query: Opens the viewpoint query panel, see Querying a Viewpoint.
-
Compare: Opens the Compare pane so that you can determine the node differences between two viewpoints, see Comparing Viewpoints
-
Validate: Validates the nodes in the viewpoint, see Validating a Viewpoint.
-
Add Favorite: Adds the viewpoint to your Favorites list. Viewpoints in your Favorites list are indicated by a
 icon. You can remove a viewpoint from your Favorites list by
selecting Undo Favorite. See Working with Favorites.
-
Copy: Makes a copy of the viewpoint, see Copying a Viewpoint.
-
Download to file: Downloads the viewpoint data to an .XLSX file, see Downloading a Viewpoint.
-
Load: Opens the viewpoint load screen with the current viewpoint selected to be loaded into, see Working with Viewpoint Loads.
Note:
If the viewpoint is currently blocked out due to application blockout settings, the Load option is not available. -
Open in new tab: Opens the viewpoint in a duplicate tab. See Using Duplicate Viewpoint Tabs.
Viewpoint Toolbar
When working in a viewpoint, the viewpoint toolbar provides access to the following functions:
| Icon | Function |
|---|---|
| Search
|
Searches for a node in the viewpoint. See Searching for Nodes. |
| Back and Forward
|
Navigate backwards and forwards to previously selected nodes. |
| Download to File
|
Downloads the selected node and its descendants to a file. See Downloading a Viewpoint. |
| Expand/Collapse All Below
|
Click and select Expand All Below or Collapse All Below to expand or collapse all levels of descendants below the selected node. |
| Locate Node
|
In side by side layout, locates the selected node from one viewpoint in the other viewpoint. See Locating Nodes. |
| Align Node
|
In side by side layout, aligns nodes and properties. See Aligning Nodes. |