Creating Putaway Types
Putaway Types group similar products based on how they need to be stored as inventory in the warehouse.
Example: Smartphones and Tablets can have Putaway Type “ELECTRONICS”.
- The first step in setting up system directed putaway is to define the default putaway types.
- Navigate to the ‘Putaway Type’ UI screen and click ‘Create’
- Enter the following information for each putaway type:
- Putaway Type Code
- Description of the Putaway Type
- Click ‘Save’.
Once all putaway types have been created/defined, the putaway types are defined at the item level or ASN level. This is dependent on business requirements and process flows.
If it is determined that the item level will be used, the following steps explain how to add a putaway type to an item.
- From the “Items” screen, select the item that requires a putaway type defined, and click Edit ().
- Scroll down until the ‘Putaway Type’ drop-down is visible. Click on the drop-down
and select the applicable putaway type.
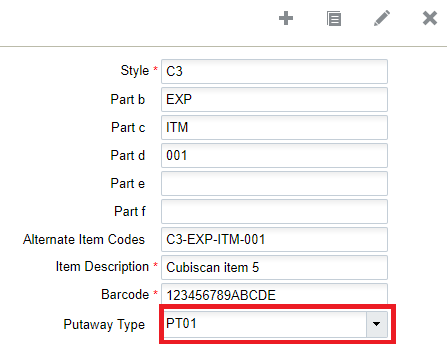
- Once the putaway type has been selected, click the ‘Save’ button to save the changes
made to this item.Note: If the item master is interfaced into WMS, the putaway type can be defined ahead of time. The field associated with the putaway type on the interface file is ‘putaway_type’.