Install the Rackmount Shelf Rails
 | Caution - If you are relocating the server to another rack, you must use the latest rackmount kit to install the server. For a comparison of the original and the latest rackmount kits, see Rackmount Kit Comparison. Contact your Oracle Service representative for information about ordering the new rackmount kit. |
-
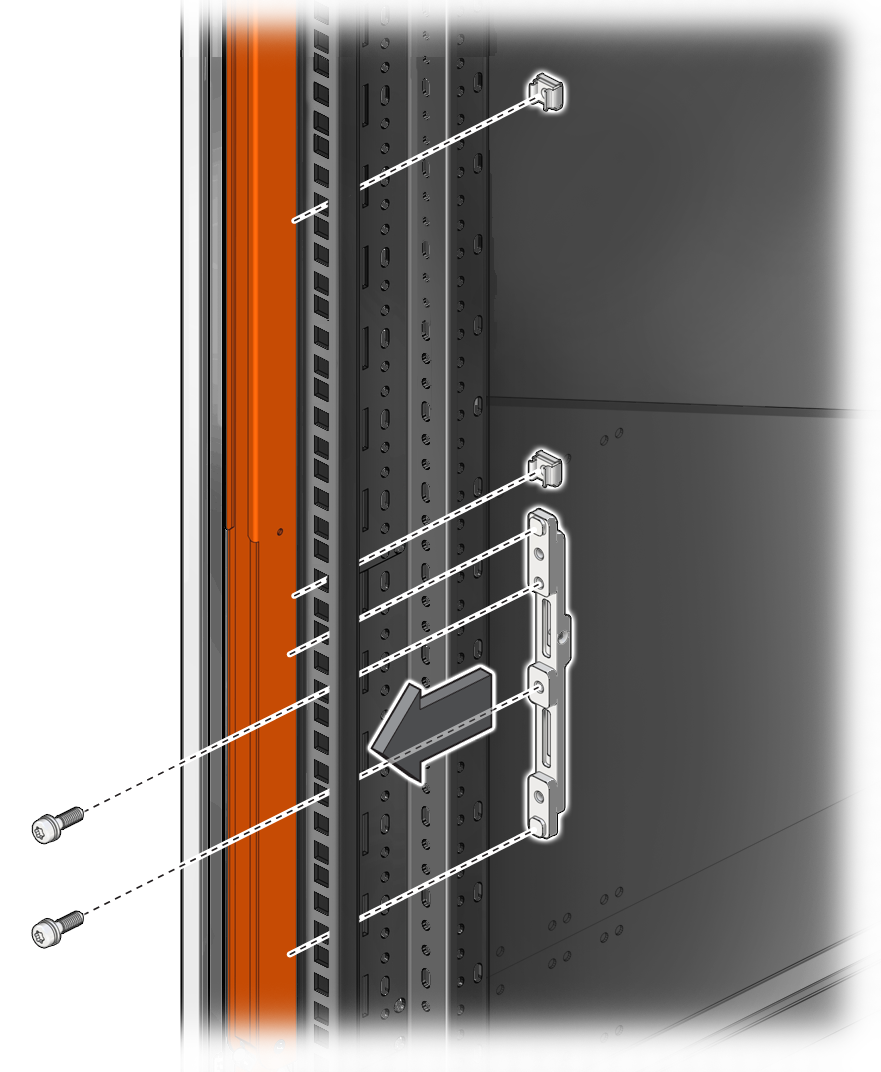
Repeat the following steps for both the left and right front mounting
points:
-
Place the adapter bracket in the marked location.
Note - Each adapter bracket has an up arrow to indicates its proper orientation. -
Use a T30 Torx screwdriver to secure the adapter bracket using two M6
screws.
Secure the screws in the center and the second from the top adapter bracket screw holes.

-
Insert two cage nuts in the second and 16th holes above the top of the
adapter bracket.
For instructions on inserting cage nuts, see Insert Cage Nuts Into Rail Holes.
-
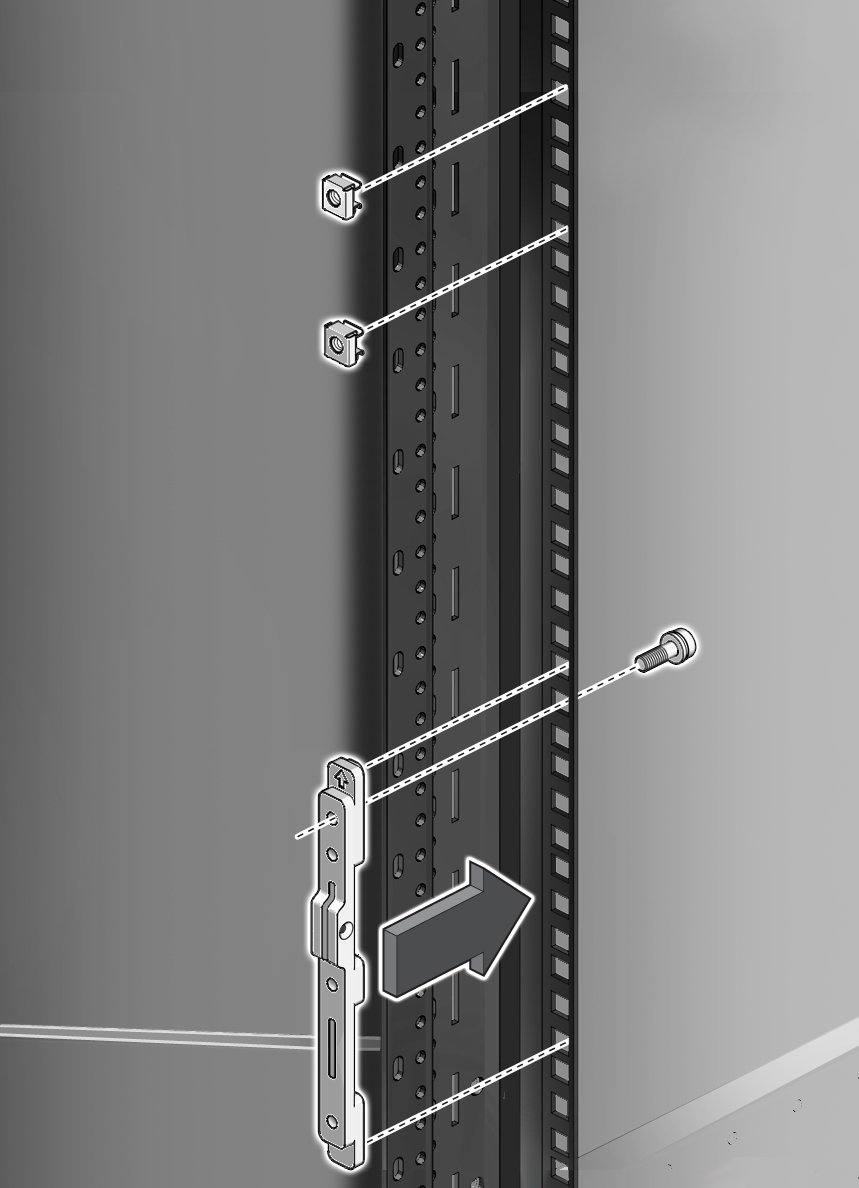
Place the adapter bracket in the marked location.
- Repeat the following steps for both the left and right rear mounting points:
-
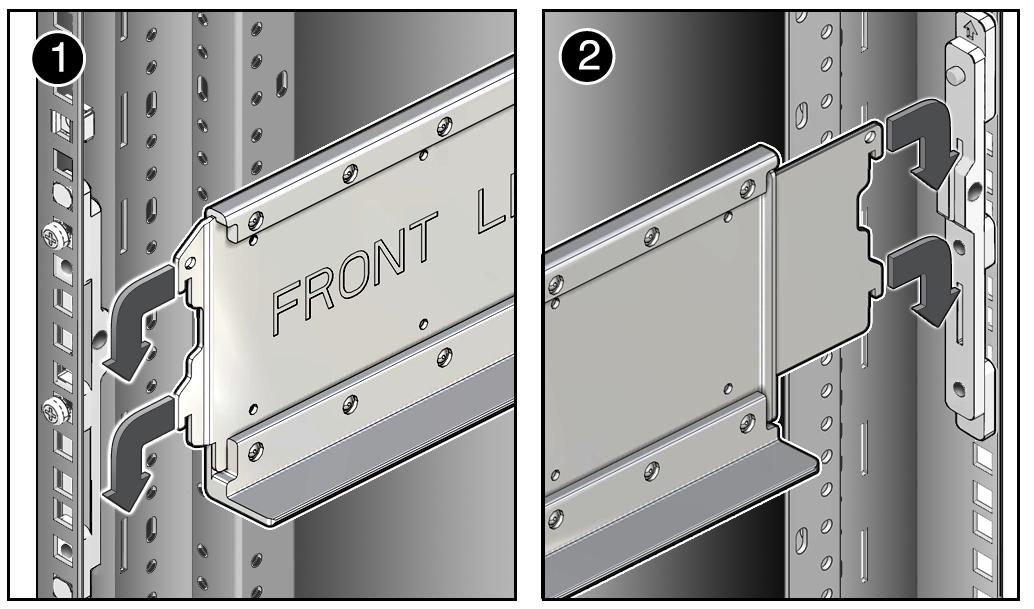
Repeat the following steps to install the left and right shelf rails.
Note - The shelf rails are marked "FRONT LEFT" and "FRONT RIGHT" (as viewed from the front of the server).- Position the shelf rail between the front and rear rack rails.
- Extend the shelf rail and insert the rear hooks into the adapter slots.
- Push the shelf rail down to engage the hooks.
- Insert the front hooks into the adapter slots.
- Push the shelf rail down to engage the hooks.
-
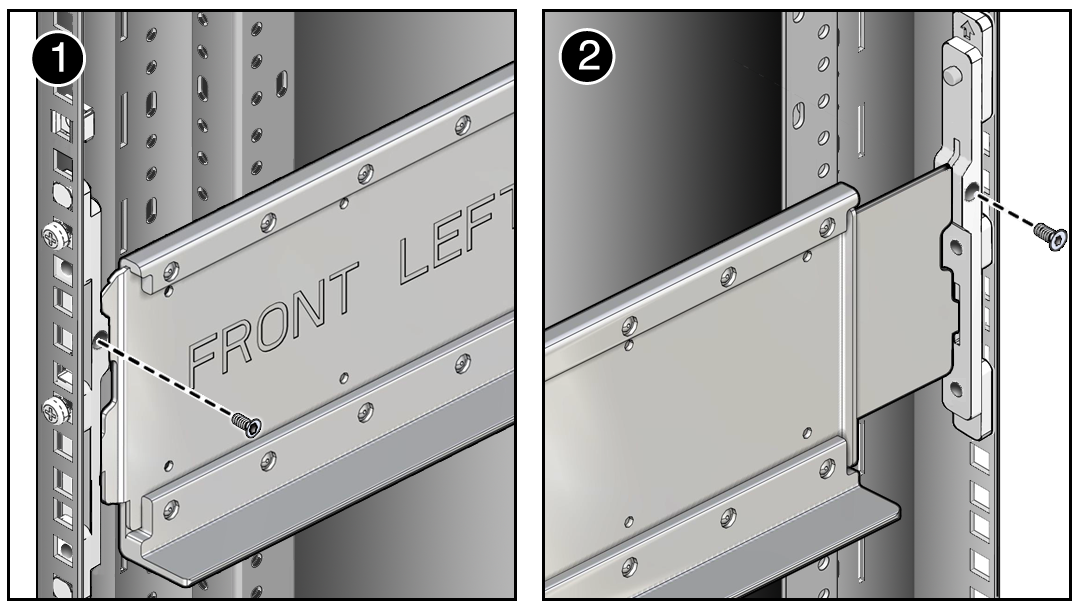
Confirm that all of the rail hooks are fully engaged in the front and
rear adapters.

-
Use a T20 Torx screwdriver to secure each shelf rail with two rail
lock screws (one M4 flathead screw on each adapter bracket).

- Continue the installation by installing the lower rear bracket.
