Remove the Twelve-Drive Backplane
-
Prepare the server for service.
- Power off the server and disconnect the power cords from the power supplies.
-
Attach an antistatic wrist strap to your wrist, and then to a metal
area on the chassis.
See Prevent ESD Damage.
- Extend the server into the service position.
-
Remove the fan cover.
Remove the three top screws and the two side screws, then remove the cover.
-
If necessary, remove the fan modules from the server.
See Remove a Fan Module.
-
Pull each drive and filler out far enough to disengage it from the drive
backplane.
Note - You do not need to completely remove the storage drives from the server. Simply pull them out far enough to disengage them from the drive backplane. If you do remove the storage drives from the server, record their locations so that you can reinstall them in the same locations. -
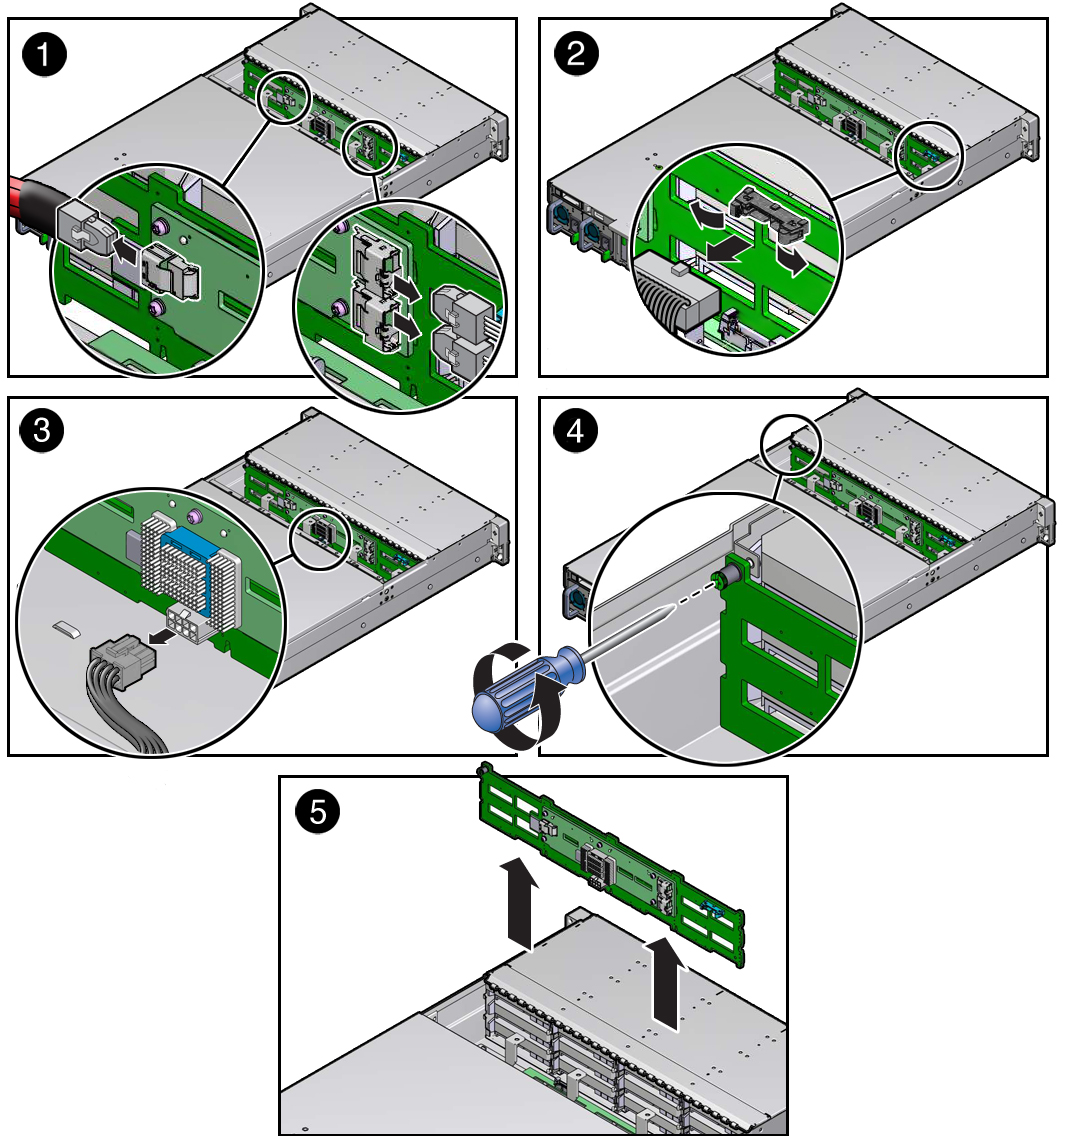
Disconnect the cables from the SAS expander and drive backplane.

- Disconnect the three SAS cables from the SAS expander (panel 1).
- Disconnect the auxiliary signal cable from the drive backplane (panel 2).
- Disconnect the power cable from the drive backplane (panel 3).
- Using a No. 2 Phillips screwdriver, loosen the captive screw that secure the drive backplane to the disk cage.
- Lift the drive backplane and attached SAS expander, over the nine hooks that secure it, then lift the assembly up and out of the chassis.
- Place the drive backplane on an antistatic mat.