Using the LSI MegaRAID Configuration Utility Menu to Create a Bootable Logical Drive (x86)
This section describes how to use the LSI MegaRAID Configuration Utility menu in the BIOS Setup Utility to create a logical drive on an x86 system. You can then define the logical drive as bootable, and install an operating system onto that logical drive. Follow the procedures in this section if you have set your system BIOS to UEFI Boot Mode. If you have set your sytem BIOS to Legacy Boot Mode, do not perform the procedures in this section. Instead, go to Using the BIOS Configuration Utility to Create a Bootable Logical Drive (x86).
Before performing the steps in this section, verify the firmware level on the HBA and perform any firmware updates, as necessary. For information about updating firmware, see HBA Software Installation.
Perform the following procedures, in the order listed, to create a logical drive on an x86 system:
To Verify the Drives and Their Slots (x86)
This procedure helps you identify drives to be used in a logical drive configuration.
- Access the system console from the Oracle Integrated Lights Out Manager (ILOM) software or Video Graphics Array (VGA) video port.
-
Initiate a system boot.
During the boot process, the BIOS initialization banner lists information about the discovered SAS adapters and devices that are attached to the discovered HBAs in the system.
- Press F2 during the boot process, when prompted, to launch the BIOS Setup Utility, and then use the right arrow key to navigate to the Advanced menu.
-
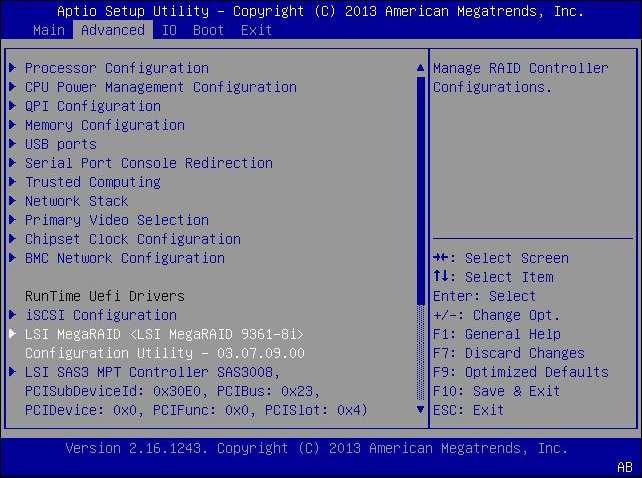
Use the arrow keys to navigate to the LSI MegaRAID Configuration
Utility menu option, and press Enter.
-
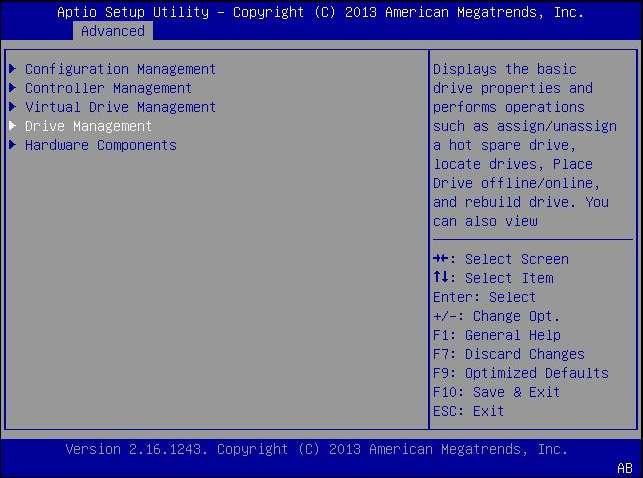
From the menu options that are displayed, use the arrow keys to
navigate to the Drive Management menu option, and press Enter.
-
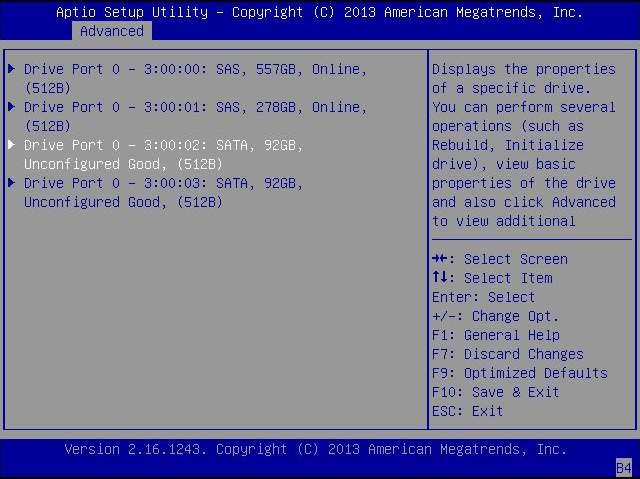
From the page that is displayed, review the attached drives and note
their respective slots for future reference.
In the following example, there are four drives in slots 0, 1, 2, and 3. Slots 2 and 3 are not currently used (indicated by the Unconfigured Good text). You can use Unconfigured Good drives to be part of your logical drive configuration.
To Create a Logical Drive (x86)
After you have verified which drives are available for logical drive configuration, as described in To Verify the Drives and Their Slots (x86), you can use those drives to create a logical drive. In the following procedure, drives 2 and 3 (3:00:02, 3:00:03) are being used to create a RAID 1 volume.
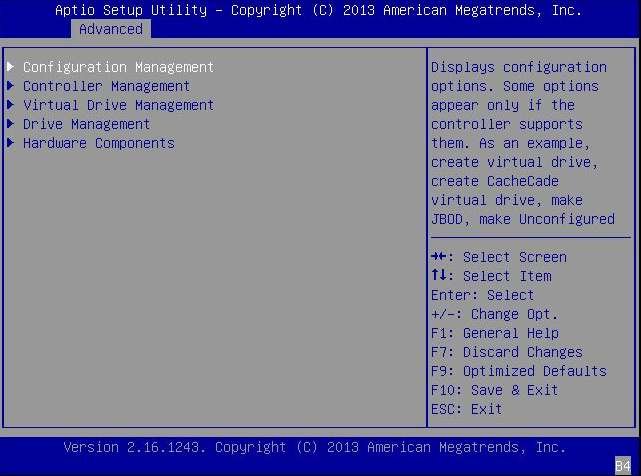
- From the Drive Management screen that is displaying the attached drives, press the Esc key to
return to the previous menu, use the arrow keys to navigate to the
Configuration Management menu option, and press Enter.
-
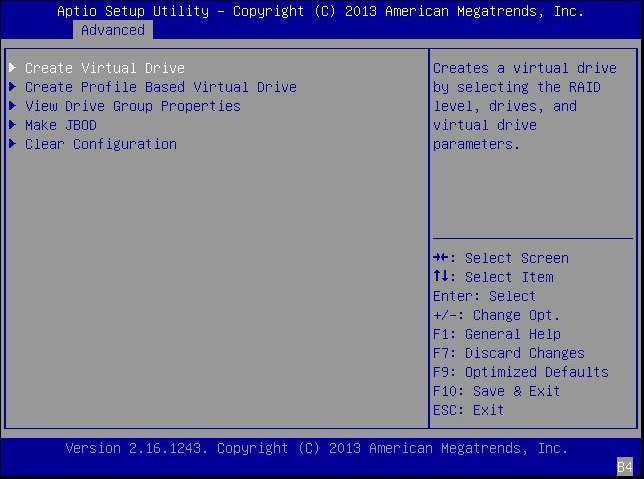
From the page that is displayed, use the arrow keys to navigate to the
Create Virtual Drive menu option, and press Enter.
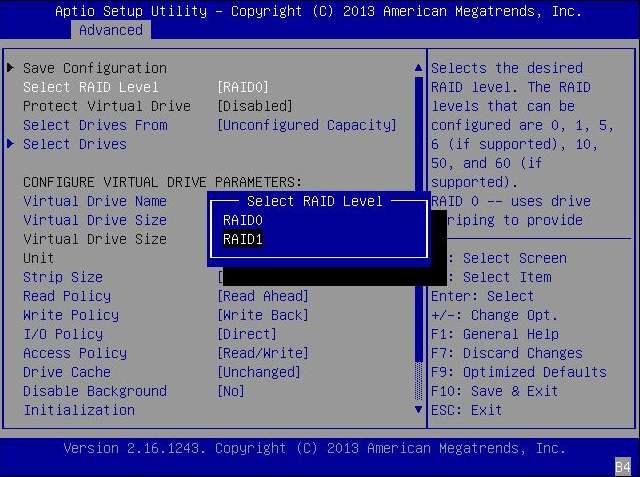
- From the page that is displayed, navigate to the Select RAID Level field, press Enter to
display the Select RAID Level popup window, choose the RAID level that
you want, based on your requirements, and press Enter.
In the following example, the RAID 1 level is selected.
-
Use the arrow keys to navigate to the Select Drives field, and press
Enter.
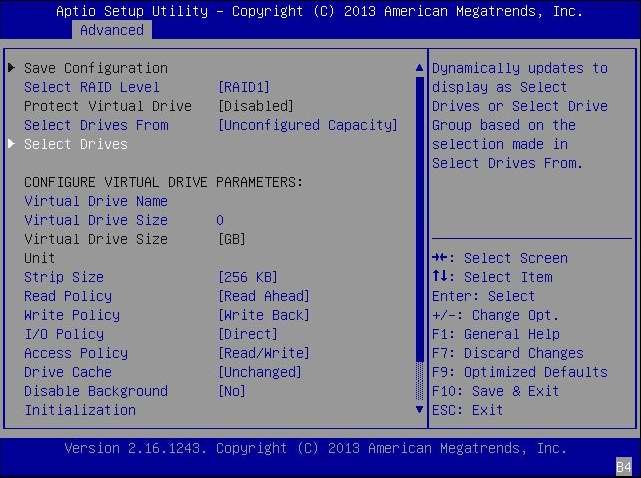
- For each drive that you want
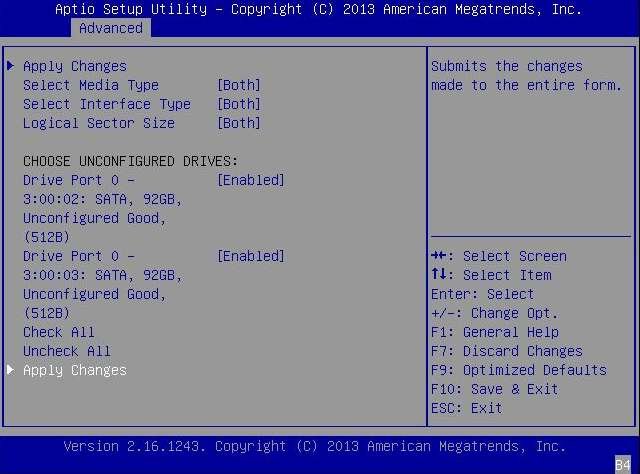
in the RAID volume configuration, do the following:
- Use the arrow keys to navigate to the drive.
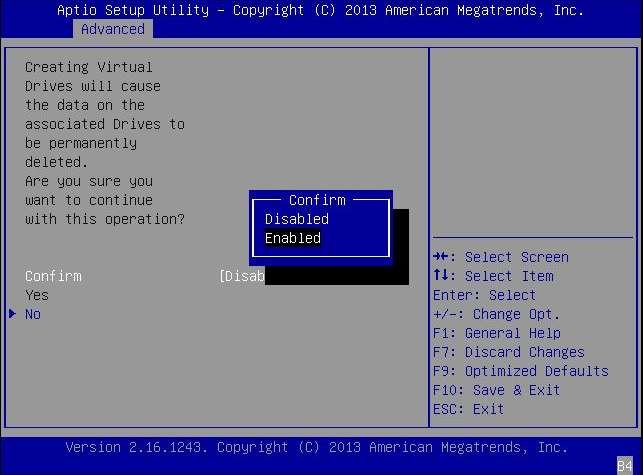
- Use the arrow keys to navigate to the Enabled or Disabled field associated with the drive, and press Enter.
- From the popup window that is displayed, use the arrow keys to navigate to the Enabled field,
and press Enter.
The drive is now listed as Enabled. In the following example, drives 2 and 3 are enabled.
- After you have enabled all the
drives that you want to be part of the logical drive, use the arrow
keys to navigate to the Apply Changes field on the same page, and
press Enter.
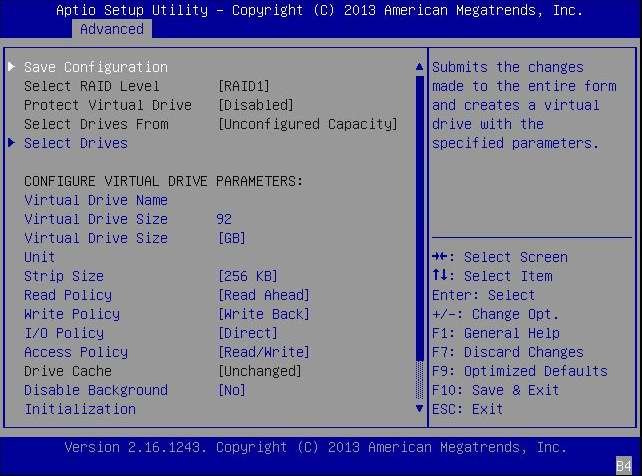
The logical drive is now created with the drives that you enabled, and the Confirmation page is displayed.
-
Press Enter on the Confirmation page to return to the Create Virtual
Drive page.
- Complete the steps in To Confirm the Logical Drive Creation (x86).
To Confirm the Logical Drive Creation (x86)
Before You Begin
Before performing this procedure, verify the drives and their slots (see To Verify the Drives and Their Slots (x86)) and create a logical drive (see To Create a Logical Drive (x86)).
-
On the Create Virtual Drive page, optionally make any changes that
you would like (such as defining a drive name), and press Enter at the
Save the Configuration field to save the new configuration.
The Save Configuration confirmation page is displayed.
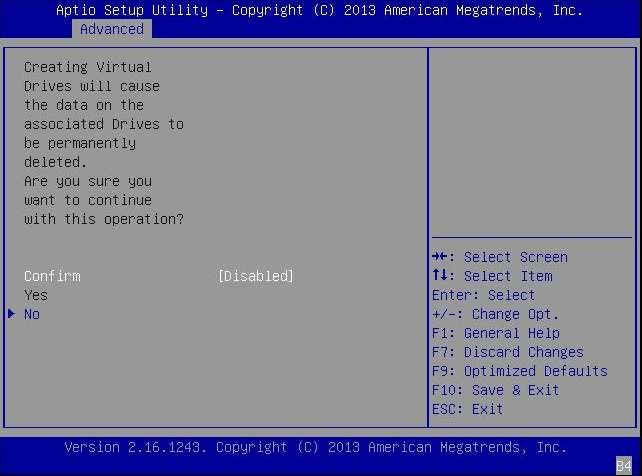
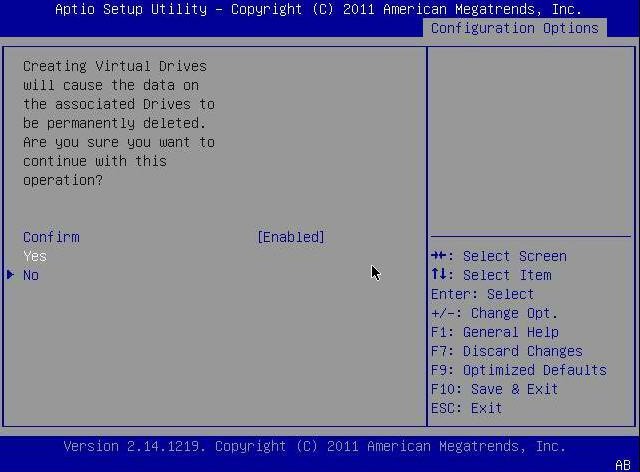
- Confirm the drive creation by doing the following:
-
At the page that is displayed, press Enter to complete the virtual
drive creation.
A message is displayed, stating that the virtual drive creation was successful and that all free unconfigurable space has been used.
-
To verify that the logical drive (virtual drive) was created, press
the Esc key to return to the Configuration Utility menu, use the arrow
keys to navigate to the View Drive Group Properties menu option, and
press Enter.
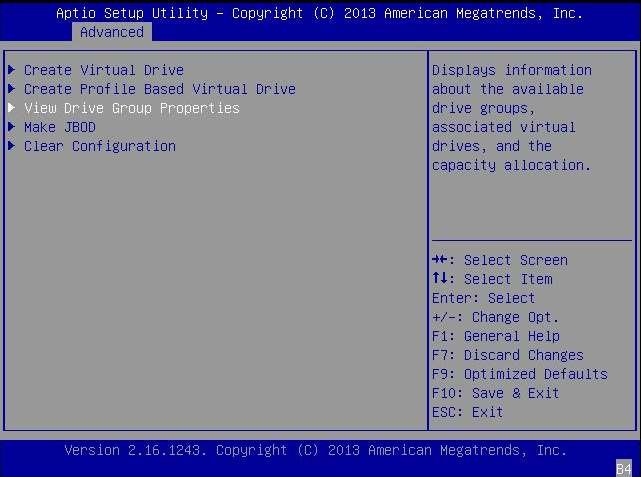
-
Review the logical drive information on the page that is
displayed.
In the following example, Drive Group 2, Virtual Drive 4 has been created.
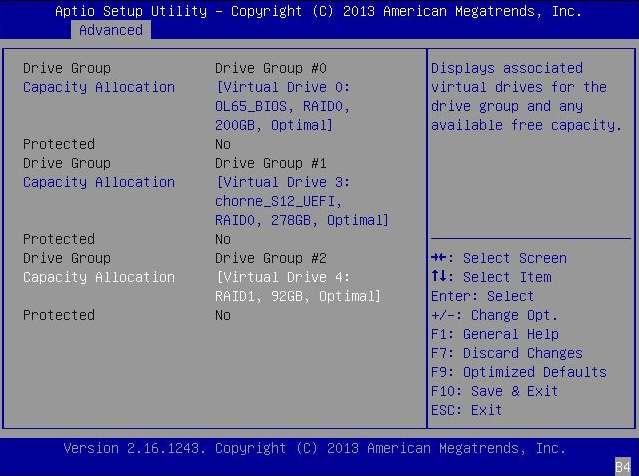
-
Exit the BIOS Setup Utility and reboot into the Oracle System
Assistant utility (if available on your system) to install an OS on that
logical drive or to manipulate the boot drive.
For information about verifying the label of the newly created logical drive, see To Verify That the Label of a Logical Drive Is Valid.
For information about Oracle System Assistant, refer to the Administration Guide for your system.
For information about installing the Oracle OS, see Installing the Oracle Solaris OS.
