Install a Power Supply
- Remove a power supply.
- If necessary, release the CMA to access the power supplies.
See Release the CMA.
Do not allow the CMA to hang unsupported while it is unattached.
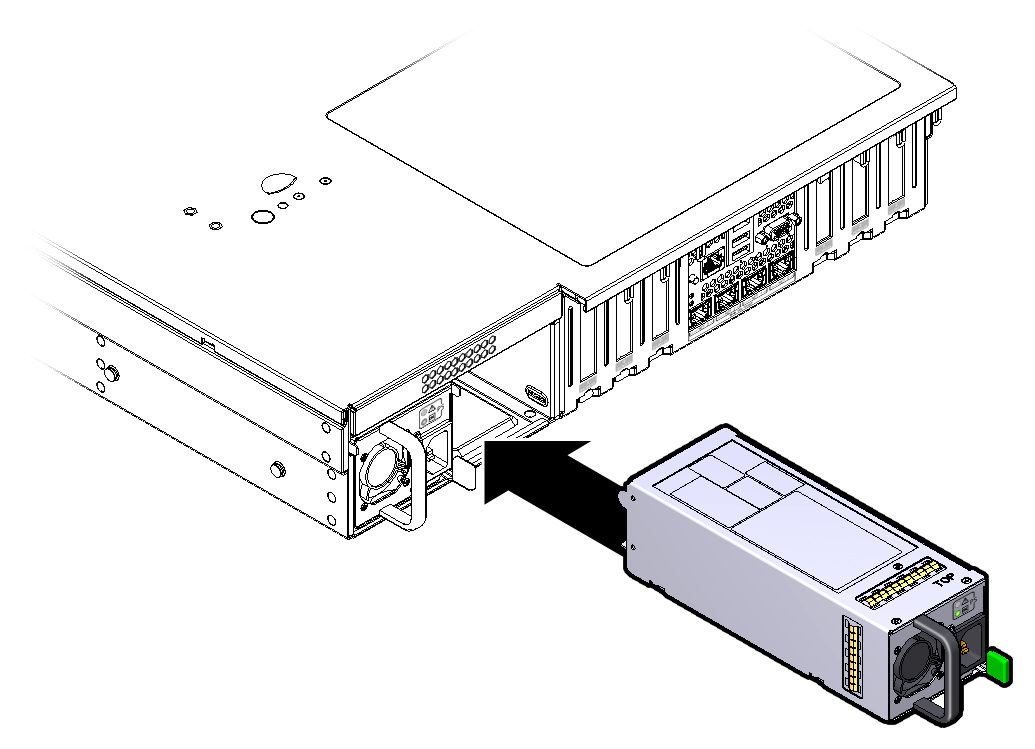
- Align the power supply with the empty power supply chassis bay.
- Slide the power supply into the
bay until it is fully seated.
You will hear an audible click when the power supply is fully seated.

- Reconnect the power cord to the power supply.
- If you disconnected the two CMA left-side connectors, reconnect the CMA.
For instructions on reconnecting the CMA see Attach the CMA to the Server in SPARC T7-1 Server Installation Guide.
- Verify that the AC OK LED is lit.
- Verify that the following LEDs
are not lit:
Service Required LED on the power supply
Front and rear Service Required LEDs
Rear PS Failure LED on the bezel of the server
See Interpreting LEDs.
- Verify the power supply.