Install a Fan Module
 | Caution - To ensure proper cooling, ensure that you install the replacement fan module in the same slot from which the faulty fan was removed. |
- Remove a fan module.
See Remove a Fan Module.
- Unpack the replacement fan module and place it on an antistatic mat.
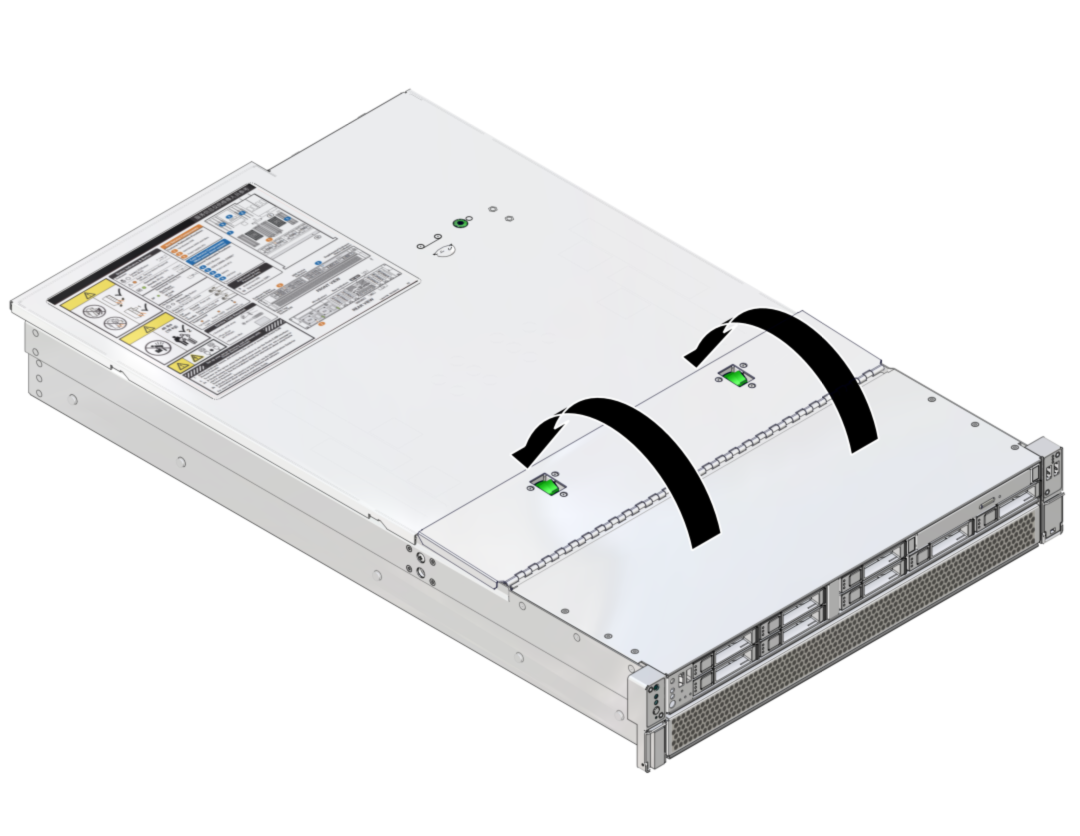
- Open the fan door.
- Install the replacement fan module into the server by
completing the following tasks.

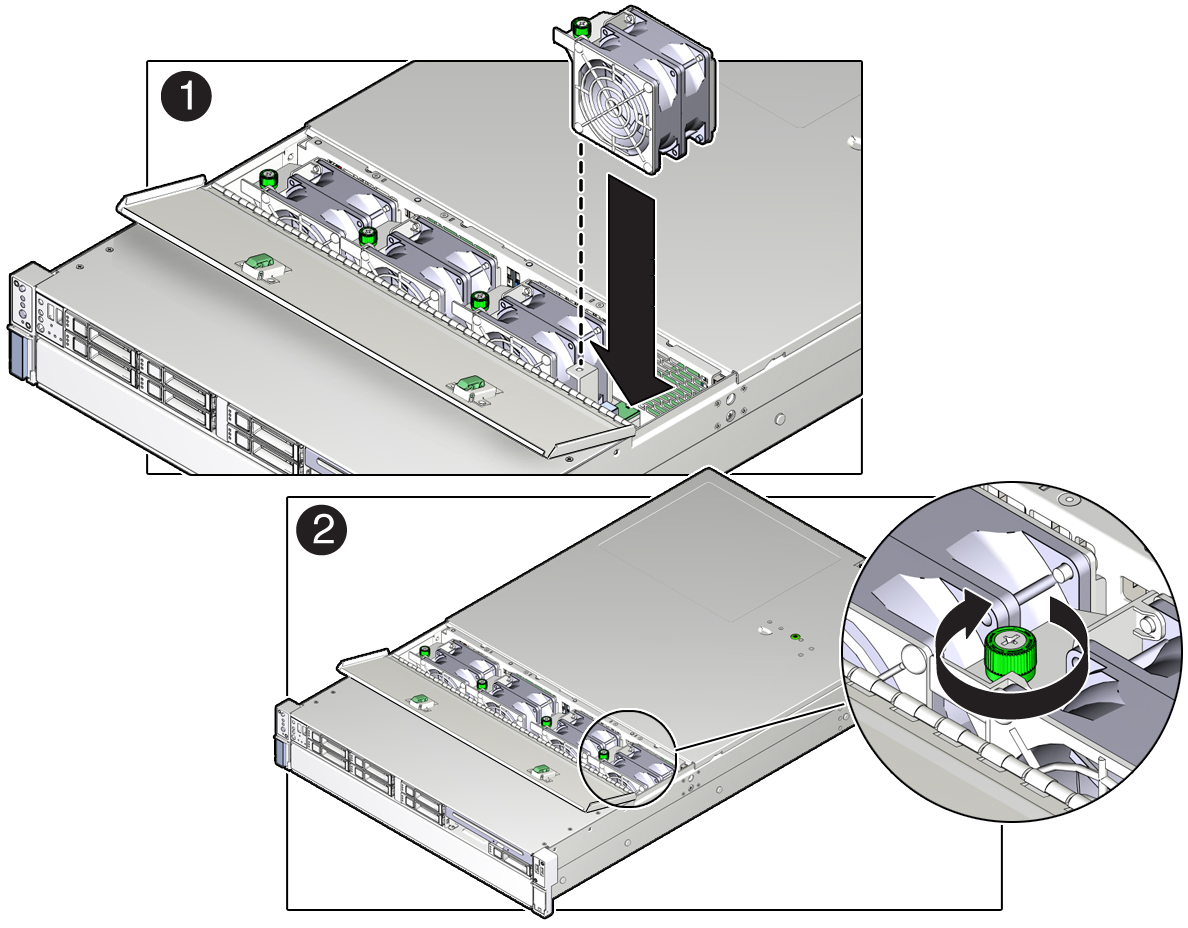
- Align the fan module and slide it into the fan slot (panel 1).
Note - Fan modules are keyed to ensure that they are installed in the correct orientation.Ensure that the cables threaded between the two middle fan modules are not caught.
- Apply firm pressure to fully seat the fan module.
You will hear a click when the fan modue is properly seated.
-
Tighten the green screw to hold the fan module in place (panel 2).
This screw should only be finger tight. Do not use a screwdriver to tighten it.
- Align the fan module and slide it into the fan slot (panel 1).
-
If the server is powered during this procedure, verify the new fan
module.
See Verify a Fan Module.
-
Close the fan door.
Swing the fan door closed, then press down until the two green buttons snap into place.

- Return the server to the normal operating position.
- When the server is powered, verify the new fan module. See Verify a Fan Module.