Configure RAID Using RSTe
This procedure configures a RAID volume so that you can install an operating system.
Note - This procedure applies only to servers with SATA M.2 SSDs.
-
Access the host console locally or through Oracle ILOM.
For instructions, see Accessing Oracle ILOM.
-
Reset or power on the server.
For example, to reset the server:
-
From the local server, press the On/Standby button on the front panel of the server for approximately 1 second to power off the server, and then press the On/Standby button again to power on the server.
-
From the Oracle ILOM web interface, select Host Management → Power Control, and in the Select Action list box, select Graceful Reset, Reset, or Power On. Click Save, and then click OK.
-
From the Oracle ILOM CLI, type: reset /System.
For more details, see Controlling System Power.
The power-on self-test (POST) sequence begins. The system boots to the BIOS Setup Utility.
-
-
When prompted in the BIOS screen, press F2 (Ctrl+E from
a serial connection) to launch the BIOS Setup Utility.
Note - The steps and screens in this procedure are examples. What you actually see might differ depending on your system equipment and configuration. -
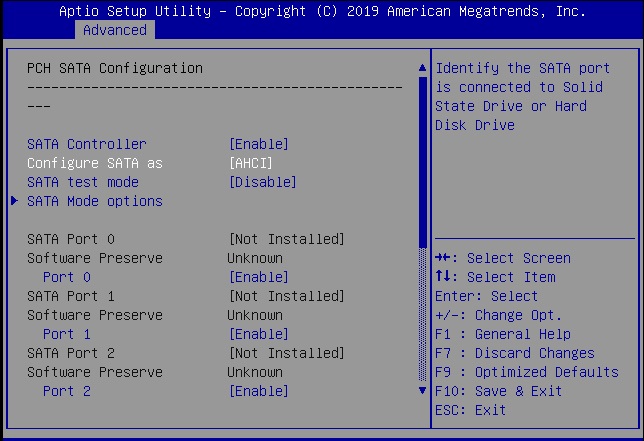
On the BIOS Setup Utility screen, select the Advanced tab, select
PCH SATA Configuration, and press Enter.
-
On the PCH SATA Configuration screen, select Configure SATA
as.
-
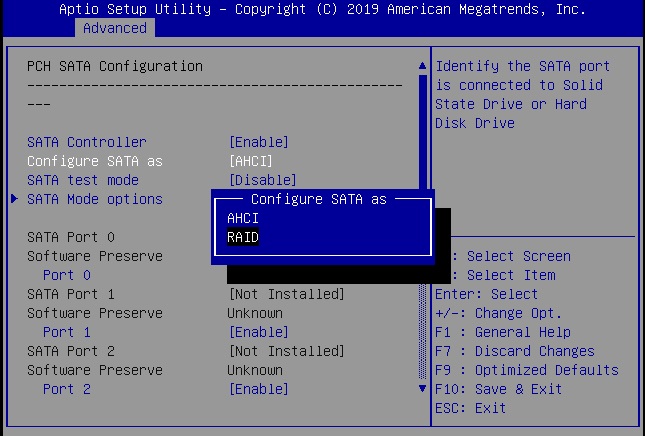
In the Configure SATA as pop up, select RAID and press
Enter.
- On the Save&Exit screen, select Save Changes and Exit and press Enter.
- Press F2 to return to the main BIOS Setup Utility menu.
-
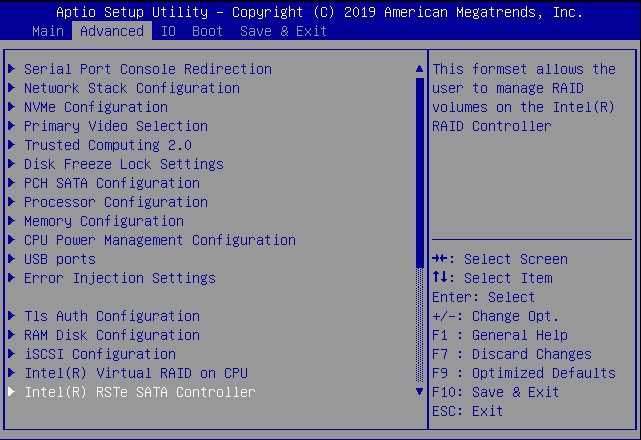
Return to the Advanced menu and press Enter to select the Intel
RSTe SATA Controller option.
-
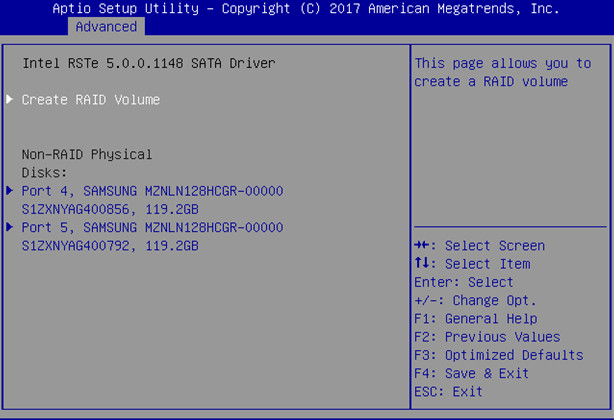
Select Create RAID Volume and press Enter.
-
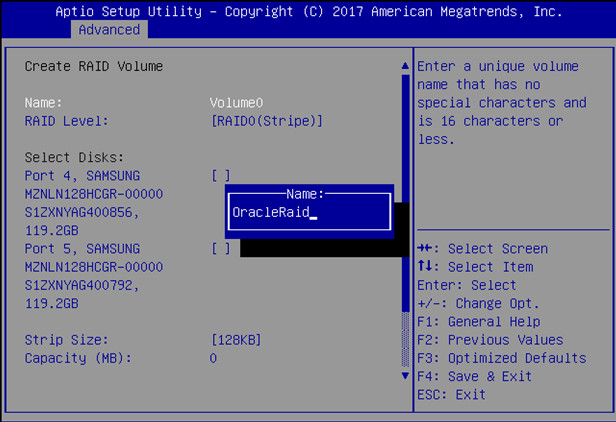
On the Create RAID Volume Screen, select Name, and
press Enter.
You can assign a name to the RAID volume.
-
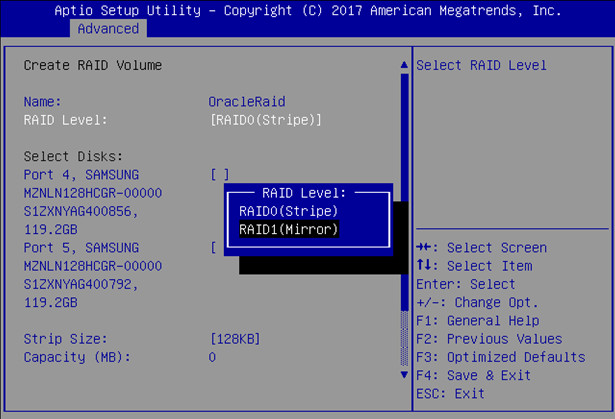
Select RAID Level and press Enter to set the RAID
level.
-
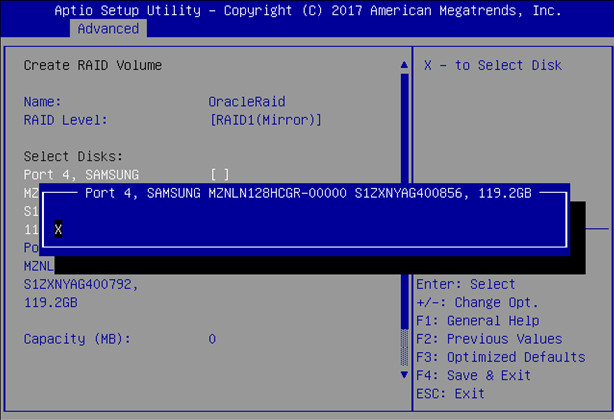
Select the disk you are configuring for RAID.
-
Scroll to the bottom of the Create RAID Volume screen and select
Create Volume. Press Enter.
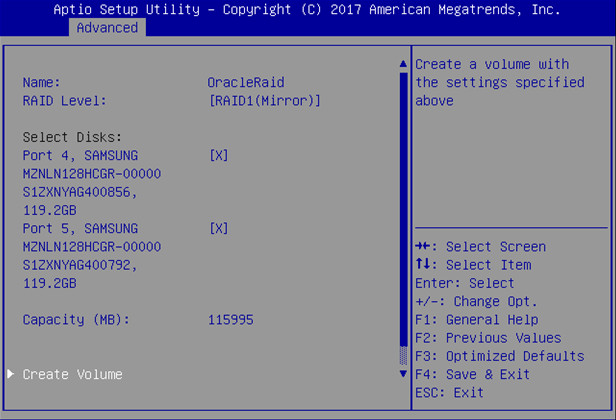
- The volume appears under RAID volumes. Press ESC to return to the BIOS Setup Utility Main menu.
-
On the Save&Exit screen, select Save Changes and
Exit and press Enter.
This completes the RAID configuration. You can now install an operating system on the volume that you created.