Install the Shipping Bracket With Cable Trough (Optional)
If you plan to ship the server in a rack with a space of one or more rack units below the server, you must install the Shipping Bracket With Cable Trough to prevent damage to the server. The bracket is required for each server in the rack that meets this requirement.
The Shipping Bracket With Cable Trough is a separately orderable option. For information about ordering the Shipping Bracket With Cable Trough, contact your Oracle Sales representative.
-
Unpack the Shipping Bracket With Cable Trough and components.
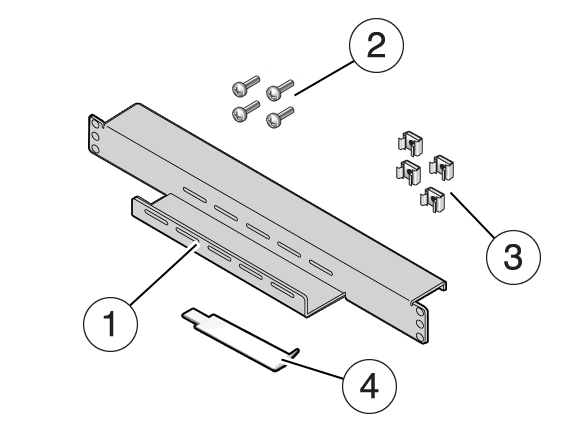
The following components are needed for the installation:
 NumberDescription1Shipping Bracket With Cable Trough2Four 16-mm M6 screws3Four cage nuts4Cage nut insertion tool
 -
For racks configured with square hole RETMA rails, install the four cage nuts
as follows.
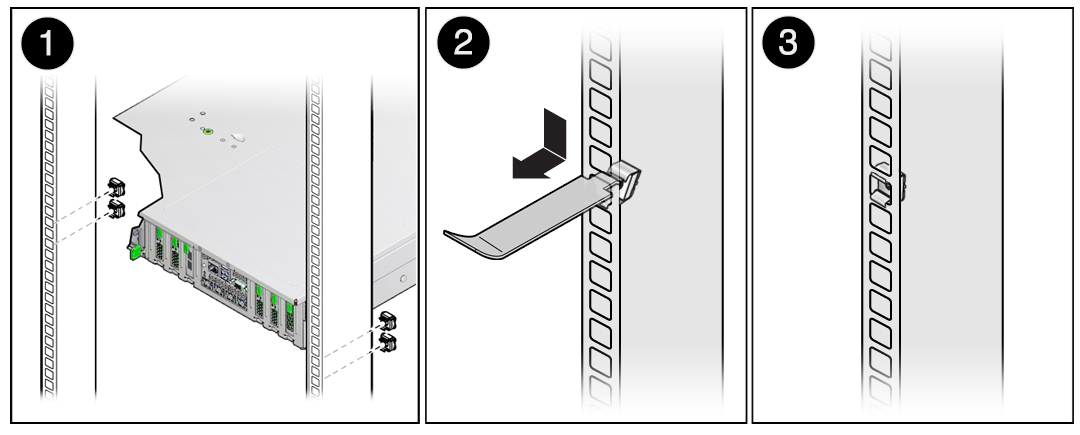
Note - This step is not necessary for racks configured with threaded RETMA rails.- Using your equipment's rack alignment template, or other equipment documentation, locate the first and third rail holes below the rear panel of the server, along the left and right sides of the chassis. [1]
- Retrieve a cage nut and hook the bottom lip of the cage nut in one of the rail holes.
- Insert the tip of the cage nut insertion tool through the rail hole and hook the top lip of the cage nut. [2]
- Using the insertion tool, pull the cage nut through the hole until the top lip snaps into place.
- Repeat Step 2a through Step 2d for the remaining cage nuts.

-
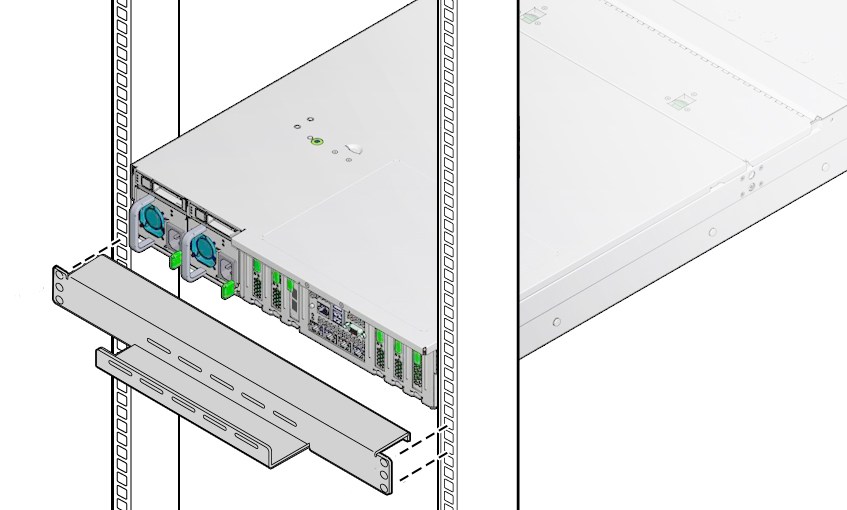
Slide the bracket underneath the rear bottom edge of the server chassis with
the cable trough facing up, aligning the top holes in the bracket with the first
rail holes below the rear panel of the server.

-
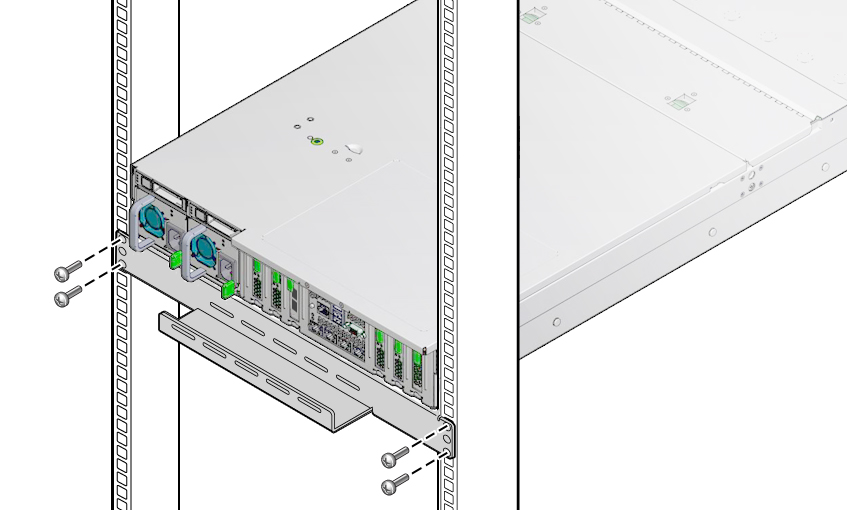
Using a No. 2 Phillips screwdriver, secure the bracket to the rack using four
16-mm M6 screws.
Ensure that the bracket rests firmly against the bottom of the server chassis.

- If necessary, lay any cables protruding from the server back panel into the cable trough.