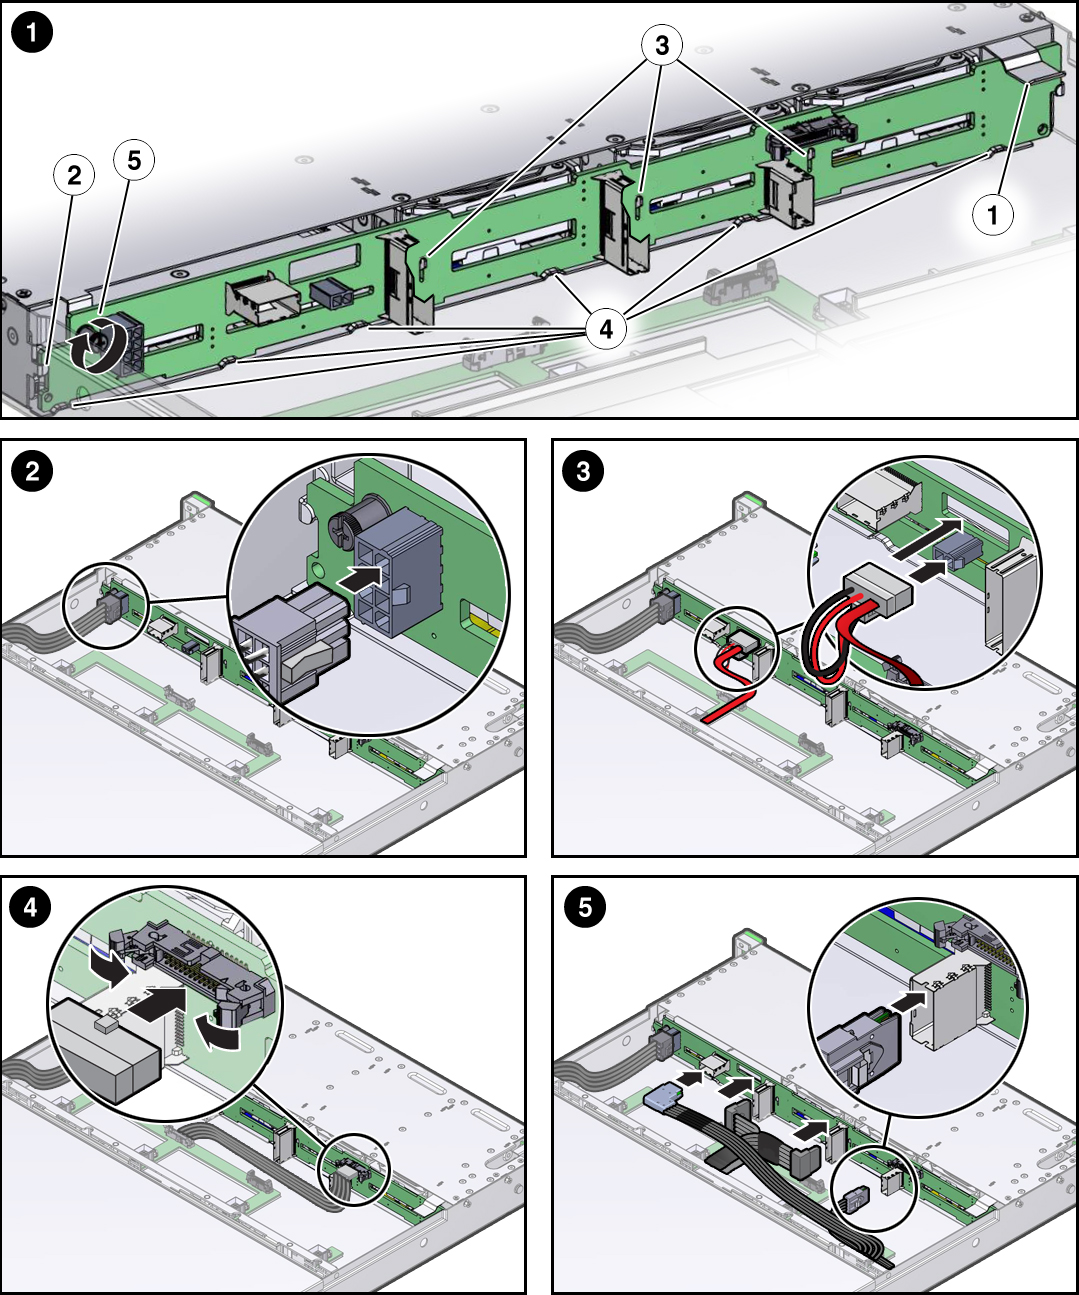
Install the Disk Backplane
 | Caution - The disk backplane should be installed only by authorized Oracle Services personnel. |
-
To place the backplane into the disk cage, do the
following:
- Lift the metal spring retainer [frame 1, callout 1] and position the backplane so that it fits into the two metal brackets that are located on the chassis side walls [1, 2].
- Lower the disk backplane into the disk cage so that it engages the three metal hooks in the disk cage [1, 3]
- Continue to lower the disk backplane into the disk cage until it is positioned in all six troughs that are located at the bottom of the disk cage [1, 4] .
- Turn the disk backplane captive screw clockwise until the disk backplane is secure [1, 5].

- Reconnect the disk backplane power cable to the disk backplane [2].
- If the server has a DVD drive, perform the following steps:
- Reconnect the disk backplane auxiliary power and signal cable to the disk backplane [4].
- Reconnect the SAS cables and the switch card cables (if present) to the disk backplane [5].
- Reinstall all of the storage drives into the storage drive cage.
- Install the disk cage cover.
-
Install all four fan modules.
See Install a Fan Module.
-
Return the server to operation.
- Close the server fan door.
- Return the server to the normal rack position.
- Reconnect the data cables to the server and reconnect the power cords to the server power supplies.
-
Power on the server.
See Power On the Server.
Verify that the Power/OK status indicator is steady on.