Remove the Rear Chassis Subassembly
-
Verify that the rear chassis subassembly needs to be replaced.
Use the server software to determine if the rear chassis subassembly needs to be replaced. See Detecting and Managing Faults for more information.
- Power off the server.
- Disconnect the power cords.
-
Go to the rear of the server and remove the following components:
-
All five fan modules – see Remove a Fan Module.
-
All PCIe carriers or PCIe fillers – see Remove a PCIe Card Carrier. Make note of the slots for each carrier or filler panel so that you can install them into the same slots.
-
Rear I/O module – see Remove the Rear I/O Module.
You will install these components into the replacement rear chassis subassembly once you have replaced the faulty subassembly.
-
-
Go to the front of the server and remove the following components:
-
Both processor modules or processor filler modules – see Remove a Processor Module or Processor Filler Module.
-
Main module – see Remove the Main Module.
-
All four power supplies – see Remove a Power Supply.
-
-
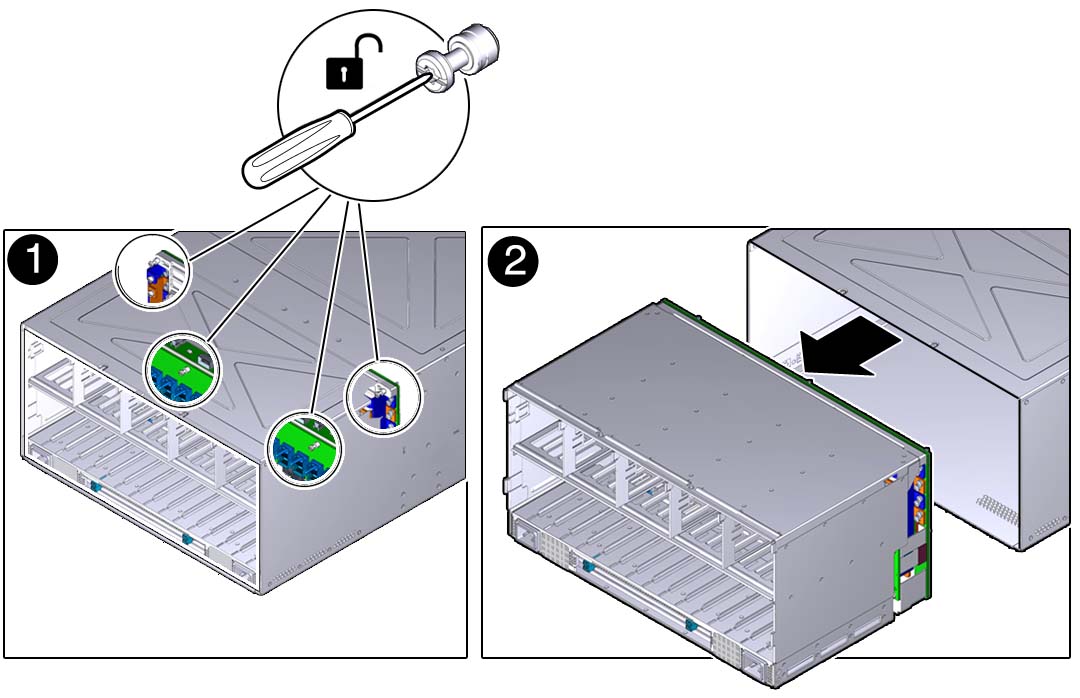
Locate the eight green mounting screws that secure rear chassis
subassembly.

- Using a Phillips screwdriver, loosen the five screws that secure the rear chassis subassembly to the system chassis.
- Slide the rear chassis subassembly out and away from the server.