Install the Drive Backplane
 | Caution - This procedure requires that you handle components that are sensitive to electrostatic discharge. This discharge can cause failure of server components. |
-
Take the necessary ESD precautions.
See Prevent ESD Damage.
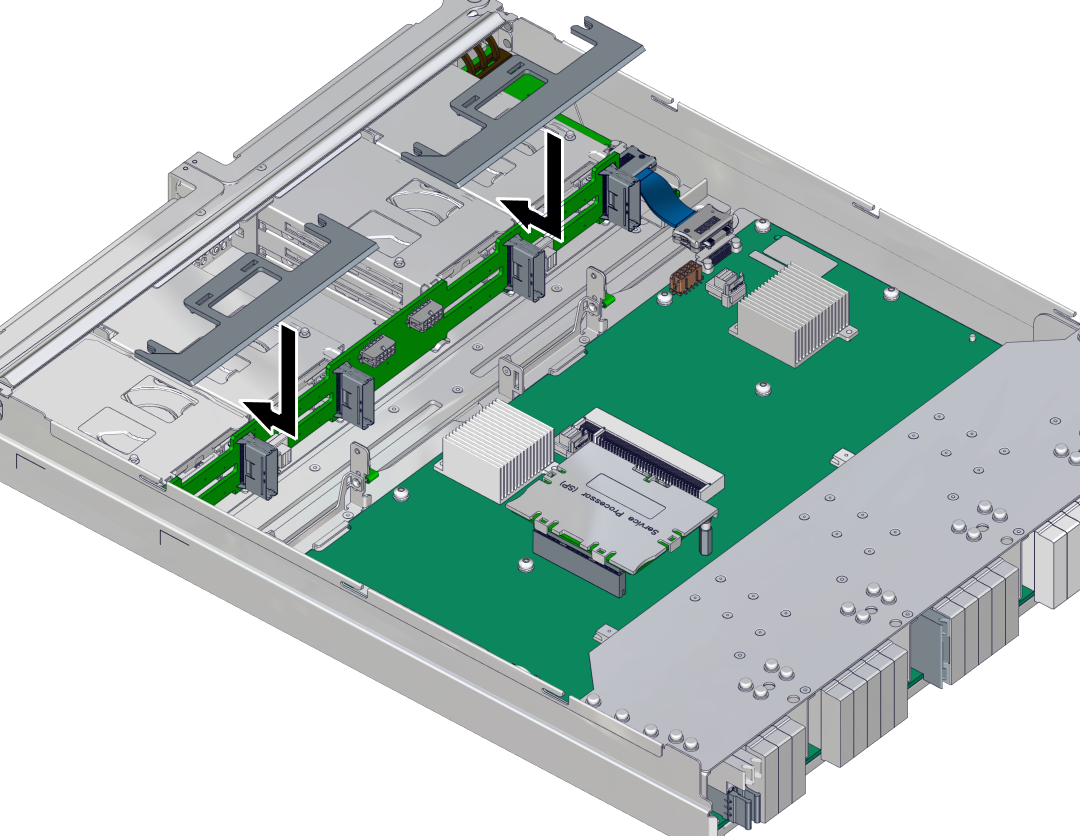
- Position the drive backplane in the main module.
- Lower the drive backplane into place.
-
Slide the plastic retaining panels into place over the drive backplane so that
the notches in the panels slide underneath the metal mounting studs on the hard
drive assembly.

- Press on the press point on the retaining panel to secure it to the top of the hard drive assembly.
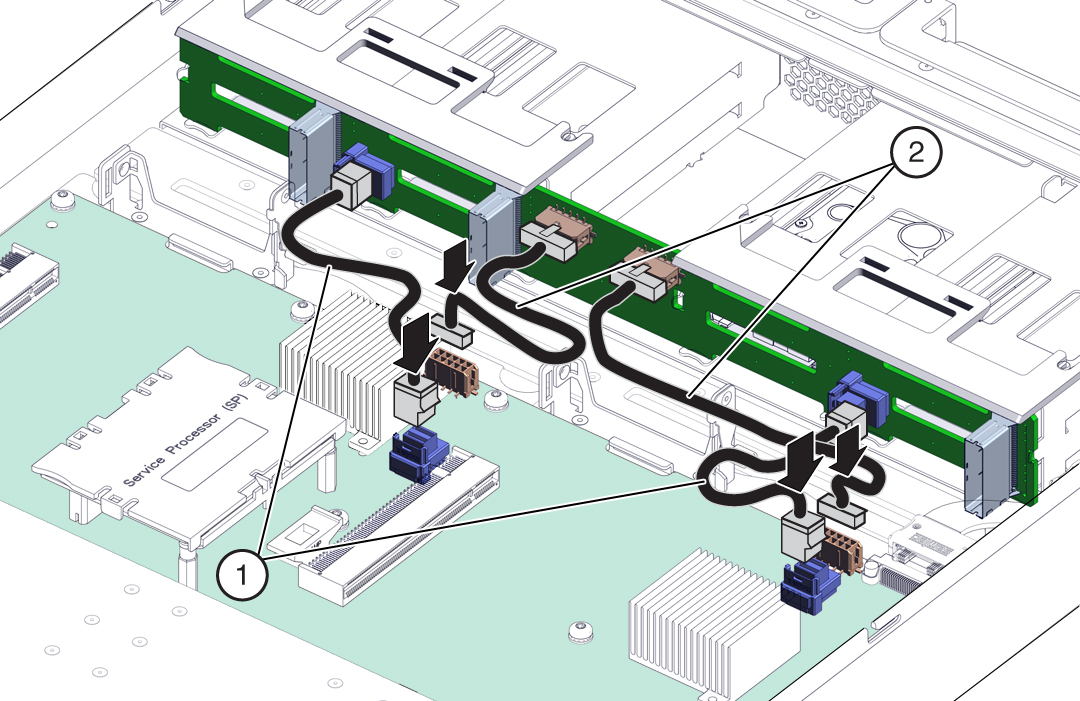
-
Connect the drive backplane cables to the drive backplane and the
motherboard.
- Connect the data cable to the drive backplane and the motherboard.
-
Connect the power cable to the drive backplane and the
motherboard.
 1Data cable, drive backplane connections2Power cable, drive backplane connections
- Insert the main module back into the server.
-
Install the hard drives into the main module.
Refer to the notes that you took when removing the hard drives to install them back into their original slots. See Install a Hard Drive.
- Power on the server.