Install an Oracle Server X5-2M
-
Follow the safety precautions provided in the “Preparing for Service” topic at:
http://docs.oracle.com/cd/E41059_01/html/E48312/napsm.z4000019165586.html#scrolltoc
-
Confirm that you have the correct node configuration for your modular system.
Two node configurations, based on the switch configuration for your system, are available. See Switch and Node Configurations.
-
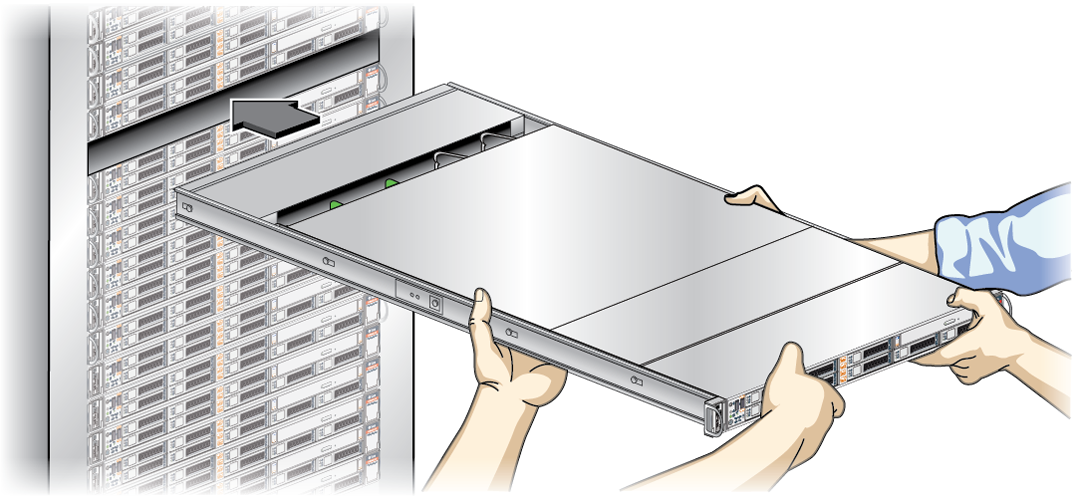
Arrange for an assistant to help you carry and install the node.

Caution - Ensure that both persons support the front and rear of the node from underneath to prevent damage to it.
-
Using two persons, align the node with the open slot.

-
Carefully engage the node with the rails on each side of the system, then slowly push the node straight forward, completely into the system.
The mating backplane connectors engage. The green OK LED begins to flash, indicating power-up sequence has started.
When the green OK LED is solid, the node is initialized and ready for installing and updating software.
- Tighten the two thumbscrews on the node's front rails.
- Activate the node if it is an ASR asset.
- If the node installed is a replacement for a faulty node, use the same packaging to ship the faulty node to Oracle.
- Install and update the software.