Replace an FBS PCB
This task can take approximately 30 minutes to complete.
Before You Begin
You can identify a faulty FBS PCB (also known as FBN) location with diagnostics.
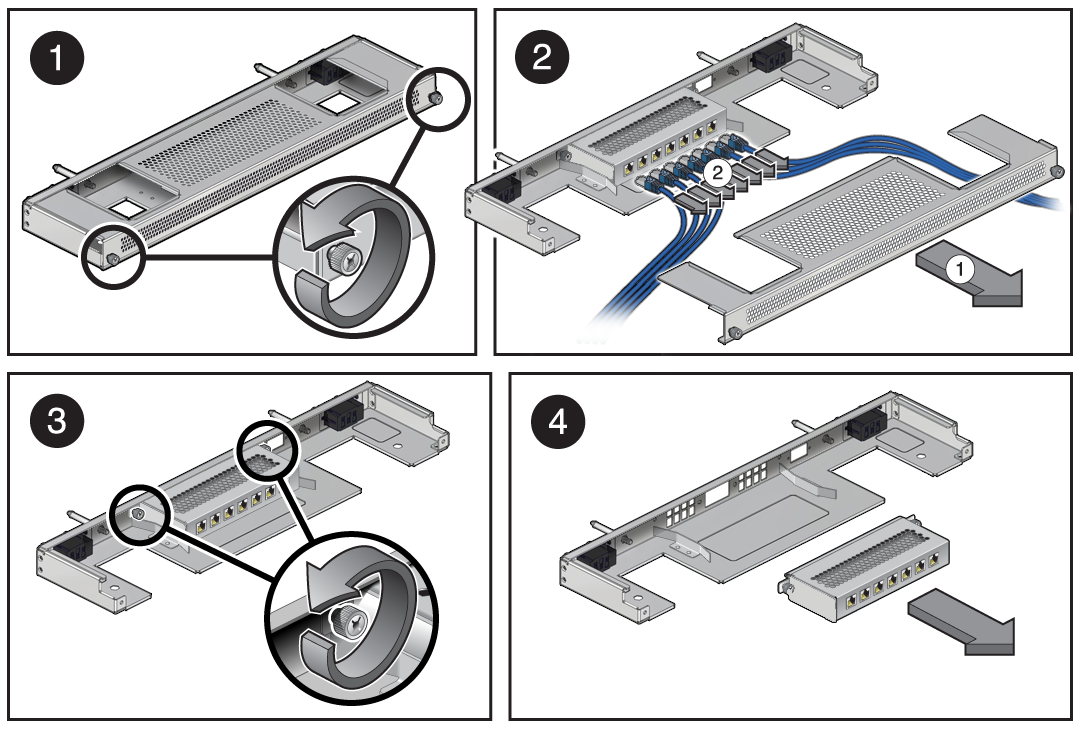
If the FBS PCB fault cannot be corrected, replace the FBS PCB as follows. The PCB is a unit within the FBS that gets replaced when there is a fault.
- Follow safety and ESD precautions.
- From the front, locate the node corresponding to the location of the FBS PCB you are replacing.
- Power down the host.
-
Power down the node by performing one of the following.
- Slide the node out about 3-4 inches
-
Remove the node completely
See Remove an Oracle Server X5-2M or Remove an Oracle Server X6-2M.
-
From the rear of the modular system, remove the faulty FBS PCB and install a replacement.

-
Reboot the FMM.
The system management software automatically configures the replacement PCB.
Note - Wait until the FMM is back online and the LED on the PCB stops blinking before continuing. -
Install the node into the corresponding slot.
For detailed instructions, see Install an Oracle Server X5-2M or Install an Oracle Server X6-2M.