Attach the CMA to the Server
Before attaching the CMA to the server, ensure that the correct cable covers are installed on the CMA.
- Prepare the CMA for installation on the server.
- To make it easier to install the CMA, extend the server approximately 13 cm (5 inches) out of the front of the rack.
-
Take the CMA to the back of the equipment rack, and ensure that you have adequate room to work
at the back of the server.
Note - References to “left” or “right” in this procedure assume that you are facing the back of the equipment rack.
Note - Throughout this installation procedure, support the CMA and do not allow it to hang under its own weight until it is secured at all four attachment points. -
Install the CMA's connector A into the left slide rail.
-
Insert the CMA's connector A into the front slot on the left slide rail until it locks into
place with an audible click (panels 1 and 2).
The connector A tab goes into the slide rail's front slot (panel 1).
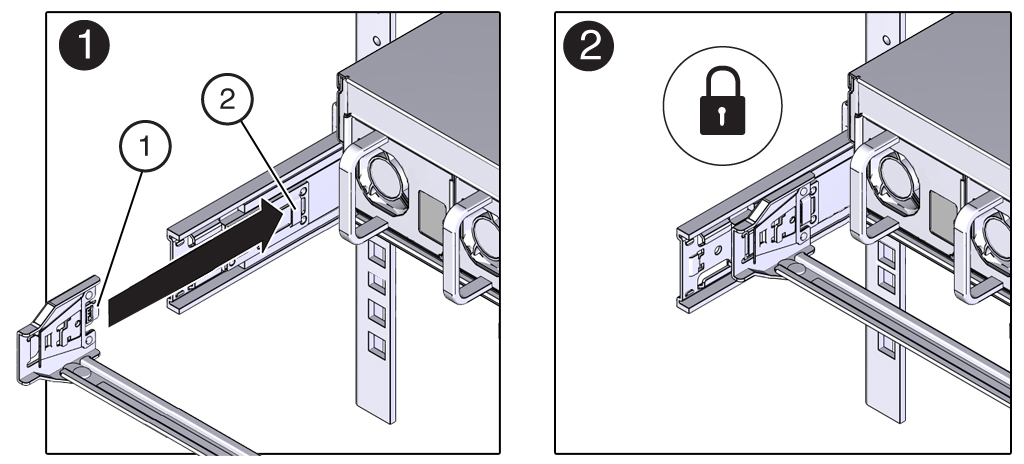 No.Description1Connector A tab2Left slide rail front slot
 - Gently tug on the right side of the front slide bar to verify that connector A is properly seated.
-
Insert the CMA's connector A into the front slot on the left slide rail until it locks into
place with an audible click (panels 1 and 2).
-
Install the CMA's connector B into the right slide rail.
-
Insert the CMA's connector B into the front slot on the right slide rail until it locks into
place with an audible click (panels 1 and 2).
The connector B tab goes into the slide rail's front slot (panel 1).
-
Gently tug on the right side of the front slide bar to verify that connector B is properly
seated.
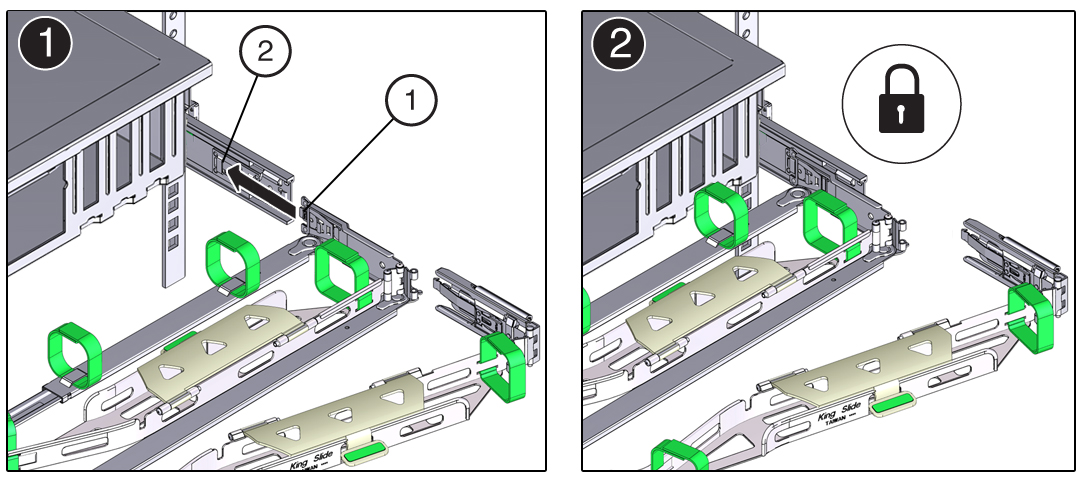 No.Description1Connector B tab2Right slide rail front slot
-
Insert the CMA's connector B into the front slot on the right slide rail until it locks into
place with an audible click (panels 1 and 2).
-
Install the CMA's connector C into the right slide rail.
-
Align connector C with the slide rail so that the locking spring (callout 1) is positioned
inside (server side) of the right slide rail (panel 1).
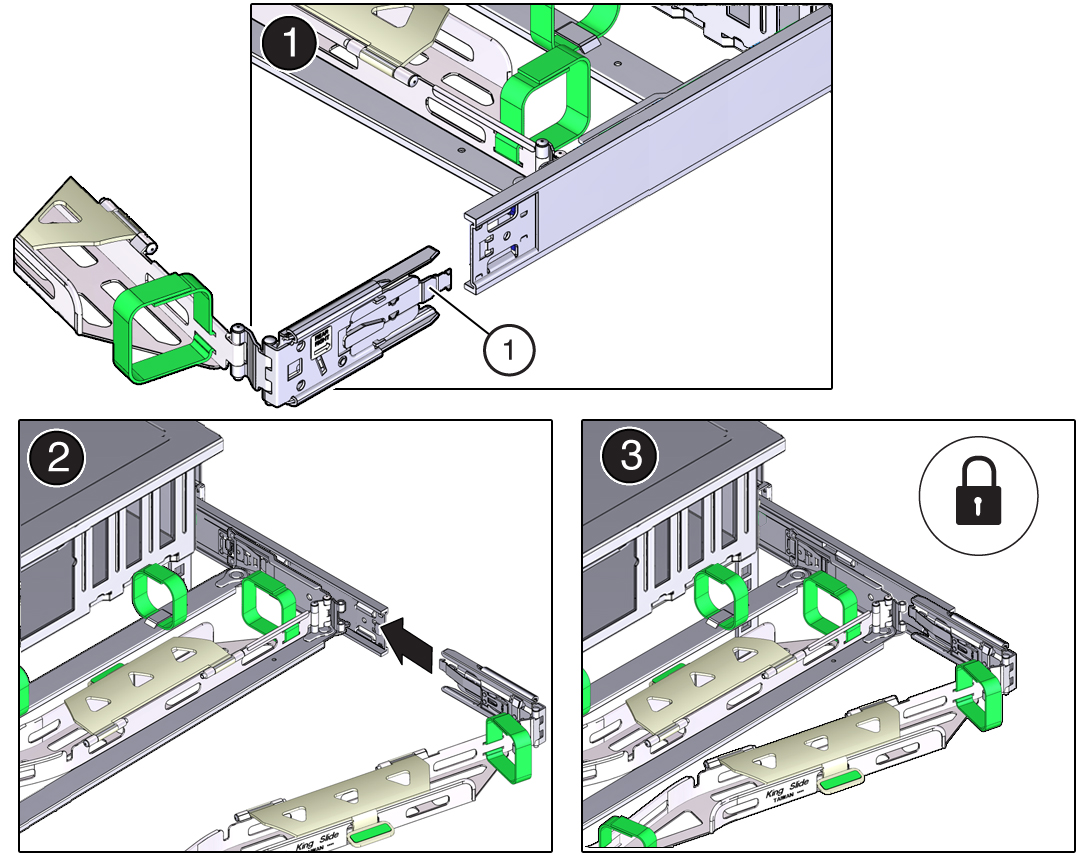 No.Description1Connector C locking spring
 - Insert connector C into the right slide rail until it locks into place with an audible click (panels 2 and 3).
- Gently tug on the right side of the CMA's rear slide bar to verify that connector C is properly seated.
-
Align connector C with the slide rail so that the locking spring (callout 1) is positioned
inside (server side) of the right slide rail (panel 1).
-
Prepare the CMA's connector D for installation.
Remove the tape that secures the slide rail latching bracket to connector D and ensure that the latching bracket is properly aligned with connector D (panels 1 and 2).
Note - The CMA is shipped with the slide rail latching bracket taped to connector D. You must remove the tape before you install this connector.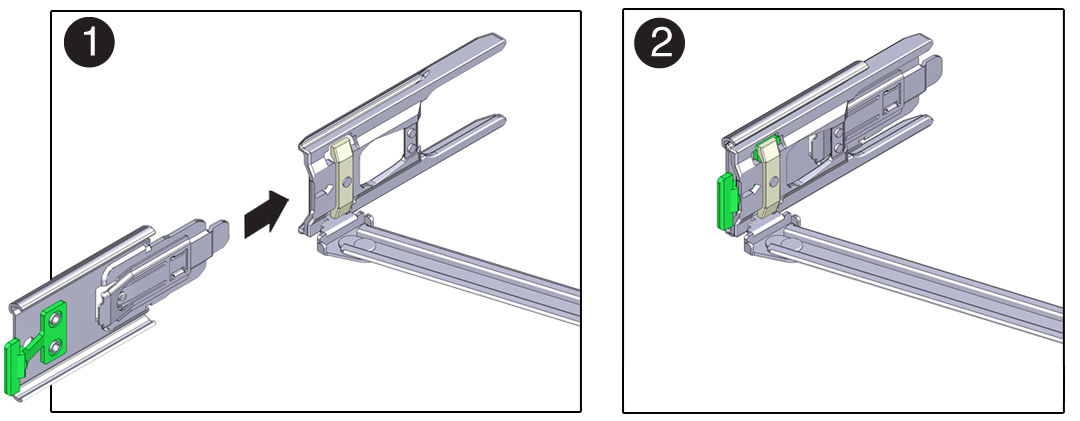
-
Install the CMA's connector D into the left slide rail.
-
While holding the slide rail latching bracket in place, insert connector D and its associated
slide rail latching bracket into the left slide rail until connector D locks into place with an
audible click (panels 1 and 2).
Note - When inserting connector D into the slide rail, the preferred and easier method is to install connector D and the latching bracket as one assembly into the slide rail. -
Gently tug on the left side of the CMA's slide bar to verify that connector D is properly
seated.
Note - The slide rail latching bracket has a green release tab. This tab is used to release and remove the latching bracket so that you can remove connector D.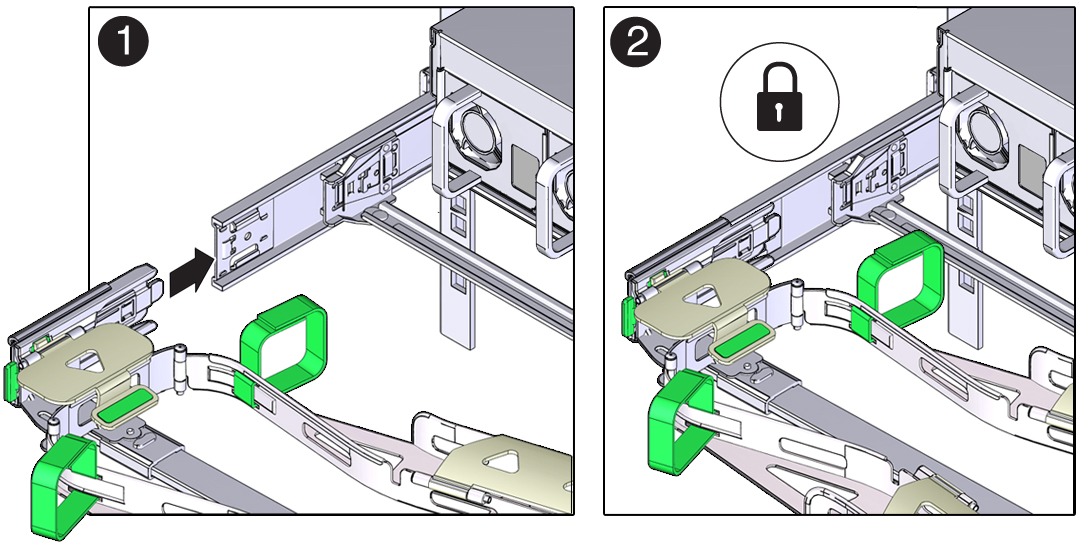
-
While holding the slide rail latching bracket in place, insert connector D and its associated
slide rail latching bracket into the left slide rail until connector D locks into place with an
audible click (panels 1 and 2).
-
Gently tug on the left side of the CMA's slide bar to verify that connector D is properly
seated.
Note - The slide rail latching bracket has a green release tab. This tab is used to release and remove the latching bracket so that you can remove connector D. - Gently tug on the four CMA connection points to ensure that the CMA connectors are fully seated before you allow the CMA to hang by its own weight.
- Verify that the slide rails and CMA operate properly.