Adding, Removing, or Reordering Report Columns

The Report Builder lets you add, remove, or reorder report columns.

Add, remove, or reorder report columns in the Report Builder.

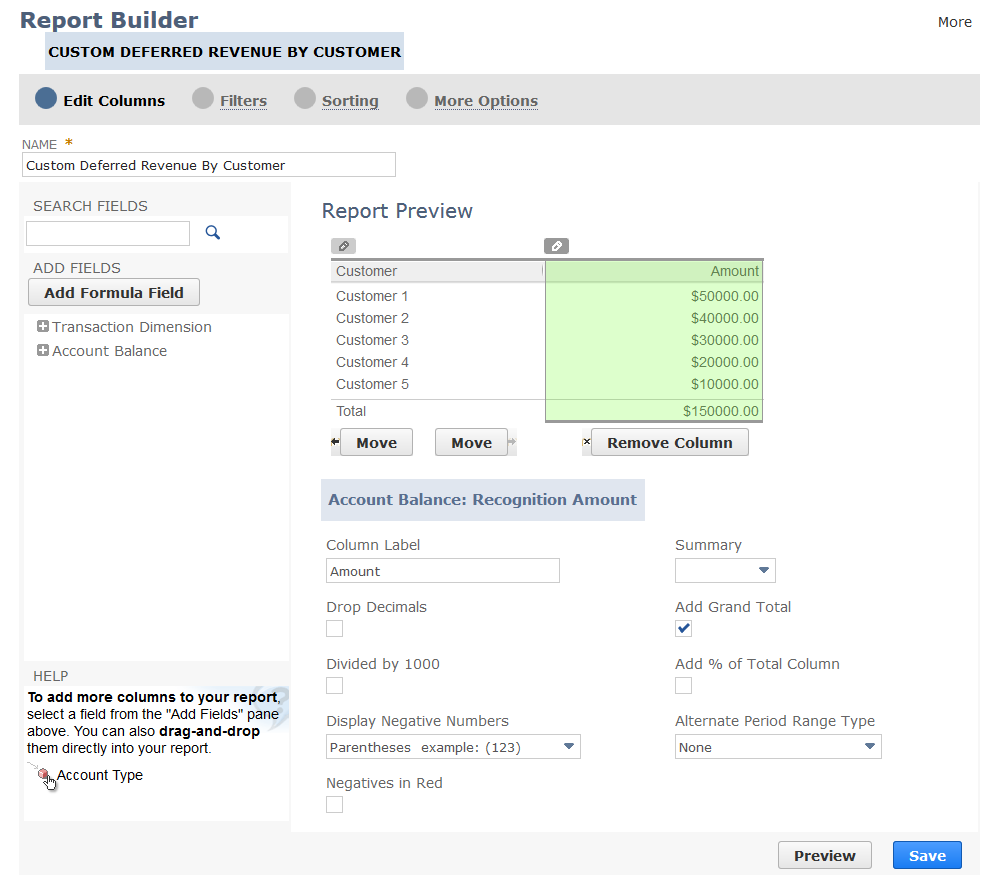
Click Edit Columns on the Report Builder (or Financial Report Builder) page to view the Report Preview pane. The preview includes representations of each column on the report. You can select the column in the preview pane. When it is selected, you can move or remove the column or select column options to apply to the column. You can also change the column heading.

Note:

For financial statements, use the Financial Report Builder to edit columns. See Financial Report Builder Edit Columns Page.

Click one of the links below to view step-by-step instructions:

Adding Report Columns

Before you add a new column to a report, ensure that you understand the type of information the new column will provide. Columns with similar descriptive headings provide different values. For example, the Est. Gross Profit (transaction) column provides results that are different from the Est. Gross Profit (Line) column. The Est. Gross Profit (transaction) column searches lines that satisfy the criteria and then sums the transaction level gross profit for each line, whereas the Est. Gross Profit (Line) column searches lines that satisfy the criteria and then sums the line level gross profit for each line.

To add columns to your report :

  1. Click Customize in the footer of the report.

  2. On the Report Builder (or Financial Report Builder) page, click Edit Columns.

  3. In the Add fields pane, select the field that represents the column you want to add to your report. The list of fields provided is organized by report component.

    You can click the name of the field to add it as the last column of your report or you can click and drag the name from the Add Fields pane and drop it in the order you want in the Report Preview pane.

  4. In the Report Preview pane, enter a new heading for your column or leave the default heading.

  5. Choose from the following optional column options:

    • add a Grand Total, Running Balance, Percent of Total, Dollar Variance or Percent Variance column to the right of the column you are adding to the report.

    • choose a Units of Measure which lets you display your data in Base Units, Stock Units, Purchase Units, or Sales Units.

    • select from Summary options that enable you to display the minimum or maximum, provide a count, present the average, and sum any set of amounts. Summary options are not available on Detail reports. For more information about summary options, see Arranging Data on Summary Reports.

    • select an Alternate Date Range to apply to this column only. All other columns will reflect amounts for the range selected in the footer of the report.

    The column options available depend on the field you selected in step 3.

  6. Repeat steps 3-5 to add more columns to your report.

  7. Click Save.

    New columns are always added as the last columns on the report.

Warning:

For performance reasons, a report cannot include more than 30 data columns. If you try to add a 31st column on the Edit Columns page, you will receive an error. It is okay for report results to include more than 30 columns resulting from matrix columns added in run time. See Adding Matrix Columns to Reports.

For more information about adding specific types of columns, see the following topics:

Adding a Name or Name (Group) Column

For reports that include the Customer/Project component, a Name or Name (Group) field is available to be added as a report column. A distinction exists between the full name and name of the company. The full name of a company is the parent of the company and the location. For example, the full name of the company could be NetSuite San Mateo, whereas, the name of the company is San Mateo. The Name is the full name of the company, whereas, the Name (Group) creates hierarchy in a report. You can use the Group box to create hierarchy by company.

Adding an Amount (US Style) Column

For reports that include the Account Balance component (Revenue reports) an Amount (US Style) field is available to be added as a report column instead of the Amount field. The Amount (US Style) field is useful for reports being run in non-US editions of NetSuite or for non-US subsidiary contexts in OneWorld accounts. When this field is used, the sign of the value matches the sign for the Amount field in the US edition. If the Amount field is used, the signs of these values may be inverted.

Removing Report Columns

To remove columns from your report :

  1. Click Customize in the footer of the report.

  2. On the Report Builder (or Financial Report Builder) page, click Edit Columns.

  3. In the Report Preview pane, select the column you want to remove.

    You can select the column by clicking anywhere within the column or by clicking the edit icon.

    Edit columns icon
  4. When the column is selected, click Remove Column.

  5. Click Save.

The column is now removed from your report. You can click Customize in the footer at anytime to remove more columns from your report.

Reordering Report Columns

To reorder columns on your report :

  1. Click Customize in the footer of the report.

  2. On the Report Builder (or Financial Report Builder) page, click Edit Columns.

  3. In the Report Preview pane, select the column you want to move.

  4. Use the Move buttons to move the column to the left or right.

  5. Repeat steps 3 and 4 to reorder more columns on your report.

  6. Click Save.

In the Report Preview pane, you also can use drag to change the order of columns.

Columns in the Report Preview pane.

Use the cursor to click and hold any area within the column or the edit icon. An icon with double arrows will appear indicating that you can move that column to a new position in the preview.

Related Topics

Report Customization
Report Builder Interface
Report Customization Permission
Formatting Numbers on Reports
Filtering Data on Reports
Sorting Data on Reports
Setting Additional Options for Custom Reports
Arranging Data on Summary Reports
Setting Up Cash Basis Reporting
Sharing Custom Reports with Other Users
Exporting a Saved Report as an Excel Web Query
Example Report Format Changes
Saving a Custom Report
Deleting a Custom Report

General Notices