Install NVMe Cables
-
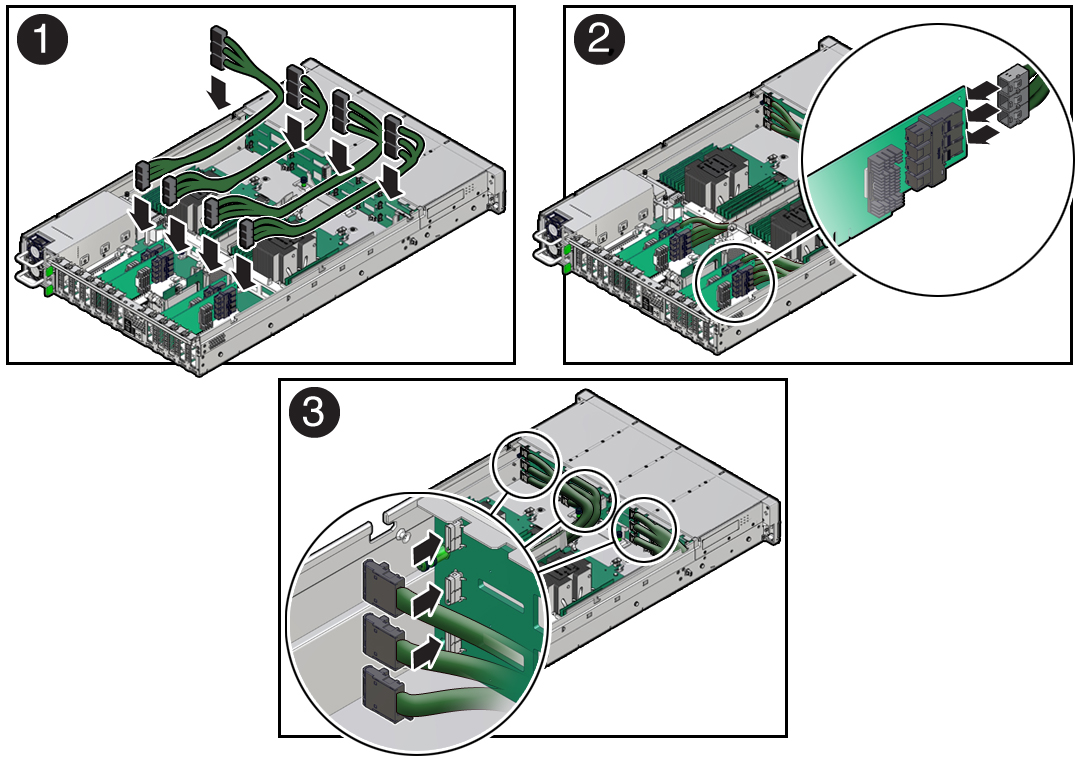
Install the NVMe cables between the disk backplane and rear PCIe
slots [1].
Route the NVMe cable bundle for Oracle PCIe NVMe switch cards 3 and 4 through the cable trough in the middle of the chassis. Route the NVMe cable bundle for Oracle PCIe NVMe switch cards 8 and 9 through the cable trough along the left side of the chassis.

-
Reconnect the NVMe cables to the Oracle PCIe NVMe switch cards in PCIe slots
3, 4, 8, and 9 [2].
Plug each cable into its connector until you hear an audible click. To ensure proper NVMe cable connections, see the NVMe cable connections table in Step 3. See also Install a PCIe Card.
-
Reconnect the NVMe cables to the disk backplane [3].
Plug each cable into its NVMe connector until you hear an audible click.
Use the following table to ensure proper NVMe cable connections.
Oracle PCIe NVMe Slot Location and Cable Part NumberHBA ConnectorDisk Backplane ConnectorPhysical Storage Drive Slots3 (7345518)1D22E63F104 (7345517)1A32B73C118 (7345517)1A12B53C99 (7345518)1D02E43F8 -
Return the server to operation.
-
Install the fan tray.
See Install the Fan Tray.
-
Install the fan modules.
See Install a Fan Module.
- Install the air baffle.
- Install the server top cover.
- Return the server to the normal rack position.
-
Reconnect the power cords to the power supplies, and power on the
server.
See Reconnect Power and Data Cables and Power On the Server.
- Verify that the power supply AC OK LED is lit.
-
Install the fan tray.
- Verify that NVMe cable connections are correct.