Identify and Remove an M.2 Flash SSD
In the standard Oracle Server X7-2L configuration, the flash riser board contains an M.2 flash SSD in socket SSD0. In the Oracle Cloud At Customer (OCC) configuration, the flash riser board contains an M.2 flash SSD in sockets SSD0 and SSD1.
-
Prepare the server for service.
- Extend the server into maintenance position.
- Attach an antistatic wrist strap to your wrist, and then to a metal area on the chassis.
- Remove the server top cover.
-
Identify and note the location of the failed M.2 flash SSD by pressing the
Fault Remind button on the motherboard.
See Using the Server Fault Remind Button.
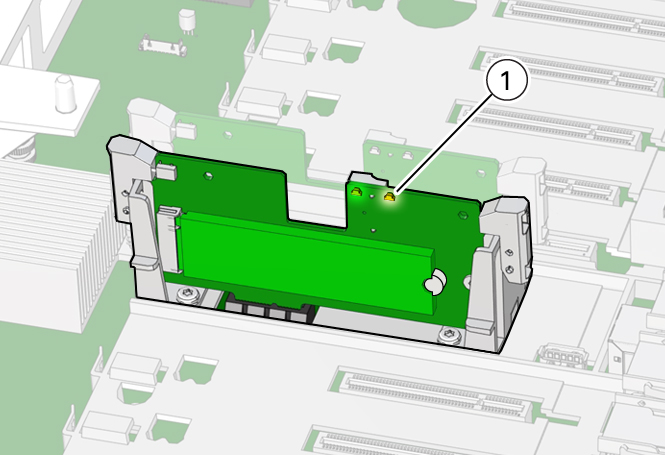
Failed SSDs are identified with a corresponding amber LED that is lit on the flash riser board.
-
If the SSD fault LED is off, then the SSD is operating properly.
-
If the SSD fault LED is on (amber), then the SSD is failed and should be replaced [1].
Note - The green Power LED indicator is illuminated when power is being applied to the system. The green Power LED indicator is extinguished when you open the riser board socket levers.
-
-
Perform Step 2 in Remove a Flash Riser Board to remove the flash riser board from the server.
Place the riser board on an antistatic mat.
-
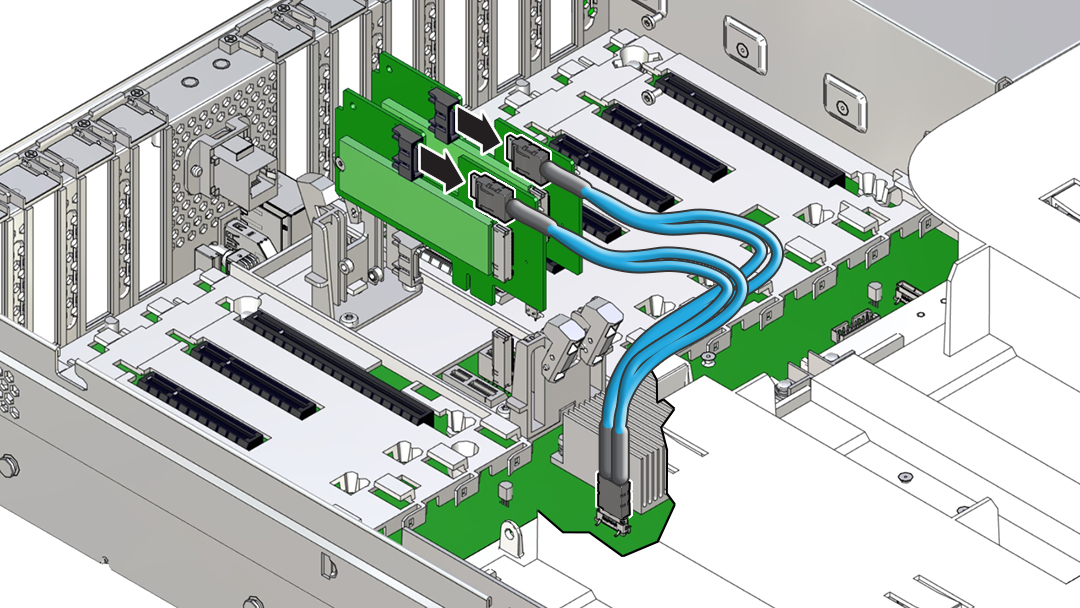
(For OCC configurations only) Disconnect the OCC SATA data cable from the
flash riser board.
Press the latch on the SATA connector, and then pull out the cable to disengage it from the riser board SATA connector.

-
Remove the M.2 flash SSD in socket SSD0 from the riser board.
-
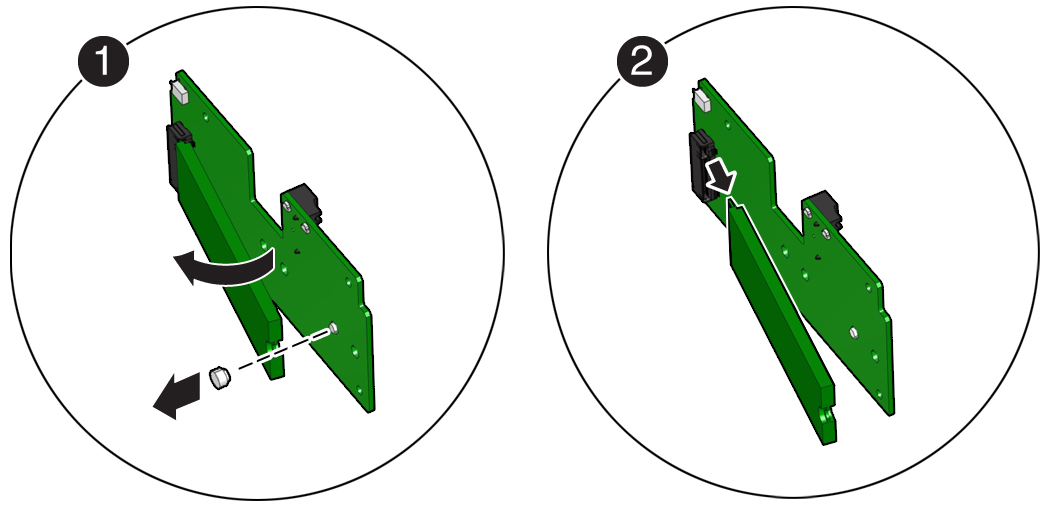
Using your fingers, push the plastic retainer clip through the flash
riser board to release the M.2 flash SSD from the riser board
[1].

- Remove the plastic retainer clip from the M.2 flash SSD [1].
- Lift up on the end of the M.2 flash SSD where the plastic retainer clip was removed by one-half to one inch [2].
-
Gently slide the M.2 flash SSD card back and out of the connector to
disengage the SSD contacts from the riser board socket [2].
Place the M.2 flash SSD on an antistatic mat.
-
Using your fingers, push the plastic retainer clip through the flash
riser board to release the M.2 flash SSD from the riser board
[1].
- (For OCC configurations only) Repeat Step 5 to remove the M.2 flash SSD in socket SSD1 from the riser board.