Install an M.2 Flash SSD
In the standard Oracle Server X7-2L configuration, the flash riser board contains an M.2 flash SSD in socket SSD0. In the Oracle Cloud At Customer (OCC) configuration, the flash riser board contains an M.2 flash SSD in sockets SSD0 and SSD1.
- Unpack the replacement M.2 flash SSD and place it on an antistatic mat.
-
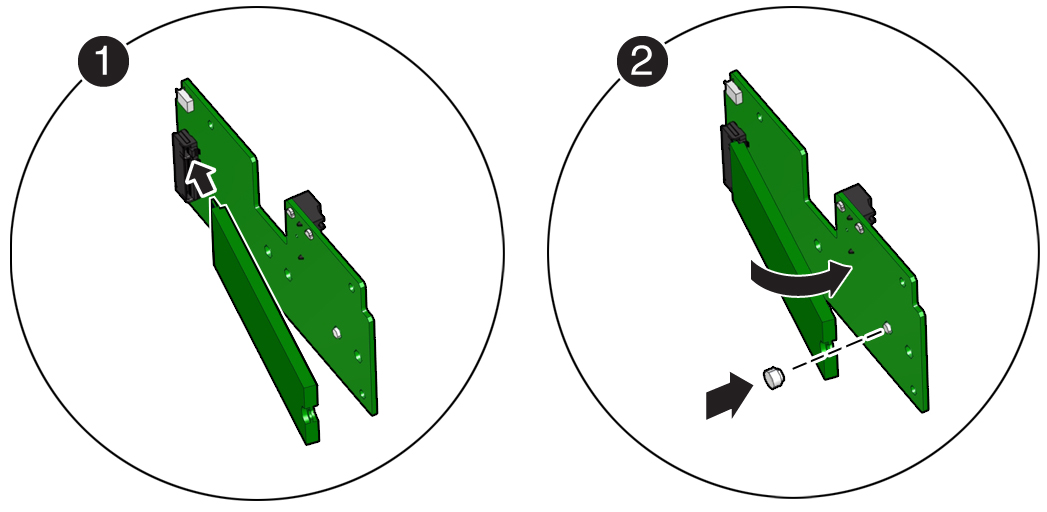
Install the M.2 flash SSD into socket SSD0 on the flash riser board.
- Align and then insert the plastic retainer clip into the slot on the M.2 flash SSD [1].
-
Hold the M.2 flash SSD so that the end of the card containing the
plastic retainer clip is approximately one-half to one inch above the
riser board and the other end is adjacent to the riser SSD socket
[1].

- Gently slide the M.2 flash SSD forward and into the connector to engage the flash SSD contacts with the riser board socket [2].
-
Using your fingers, push down on the end of the card containing the
plastic retainer clip until the M.2 flash SSD snaps into place on the
riser board [2].
You will hear an audible click when the M.2 flash SSD is secured to the flash riser board.
- (For OCC configurations only) Repeat Step 2 to install the M.2 flash SSD into socket SSD1 on the riser board.
-
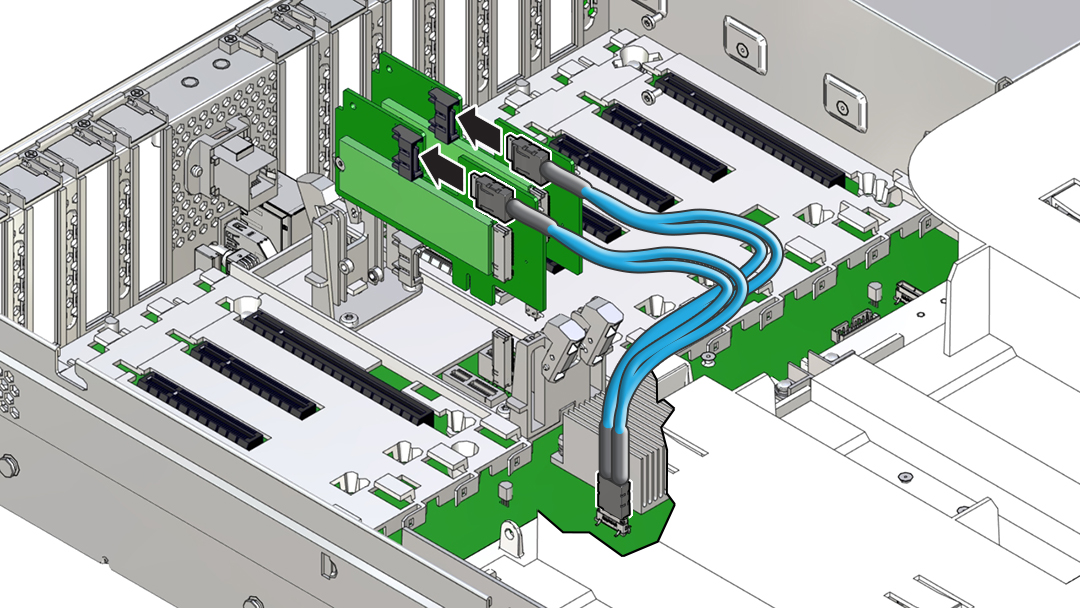
(For OCC configurations only) Reconnect the OCC SATA data cable to the flash
riser board.
Plug the cable into the riser board SATA connector until you hear an audible click.
Note - When reconnecting the OCC SATA data cable, ensure that you match the labels on the SATA data cable (M.2 R0 and M.2 R1) with those of the flash riser boards.
- Perform the steps to install the M.2 flash riser board with the replacement flash SSD into the server.
-
Return the server to operation.
- Install the server top cover.
- Return the server to the normal rack position.