Install the Rackmount Hardware
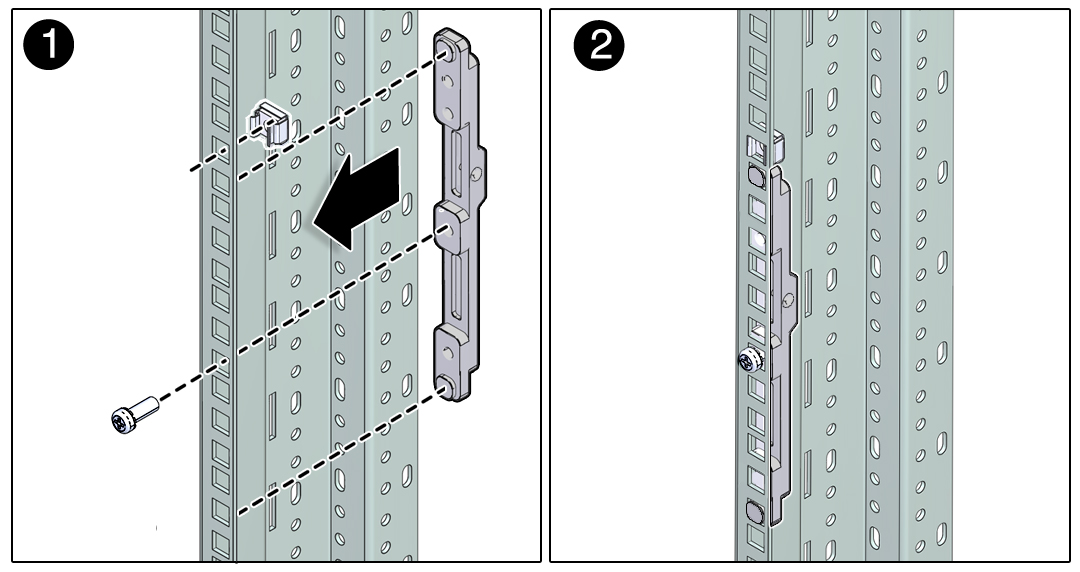
- Repeat the following steps for both the left and right front mounting points:
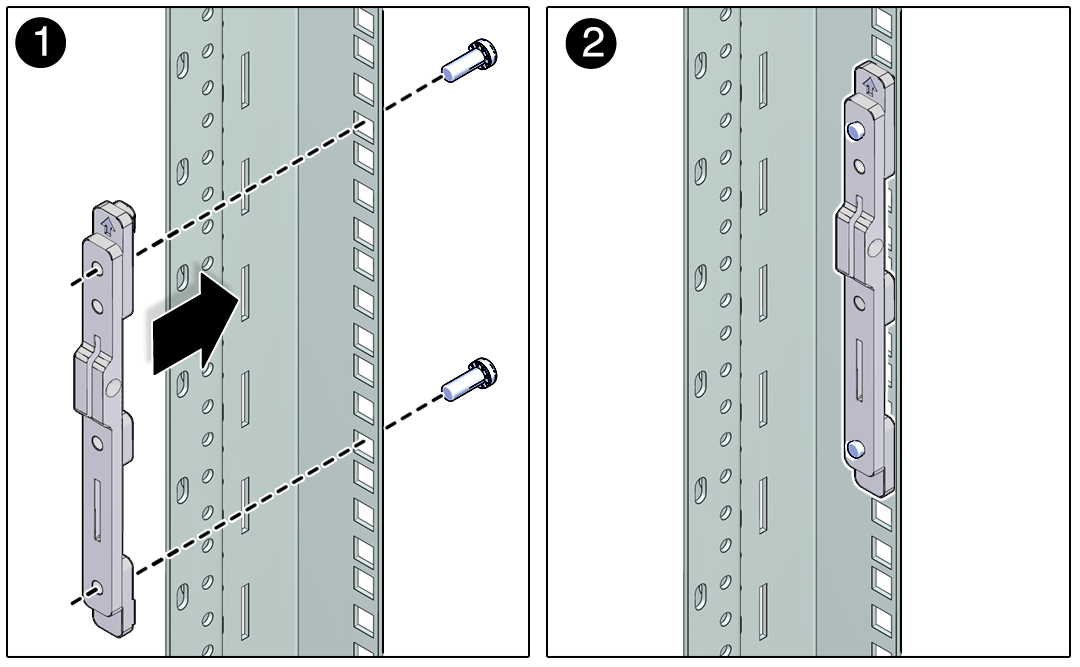
- Repeat the following steps for both the left and right rear mounting points:
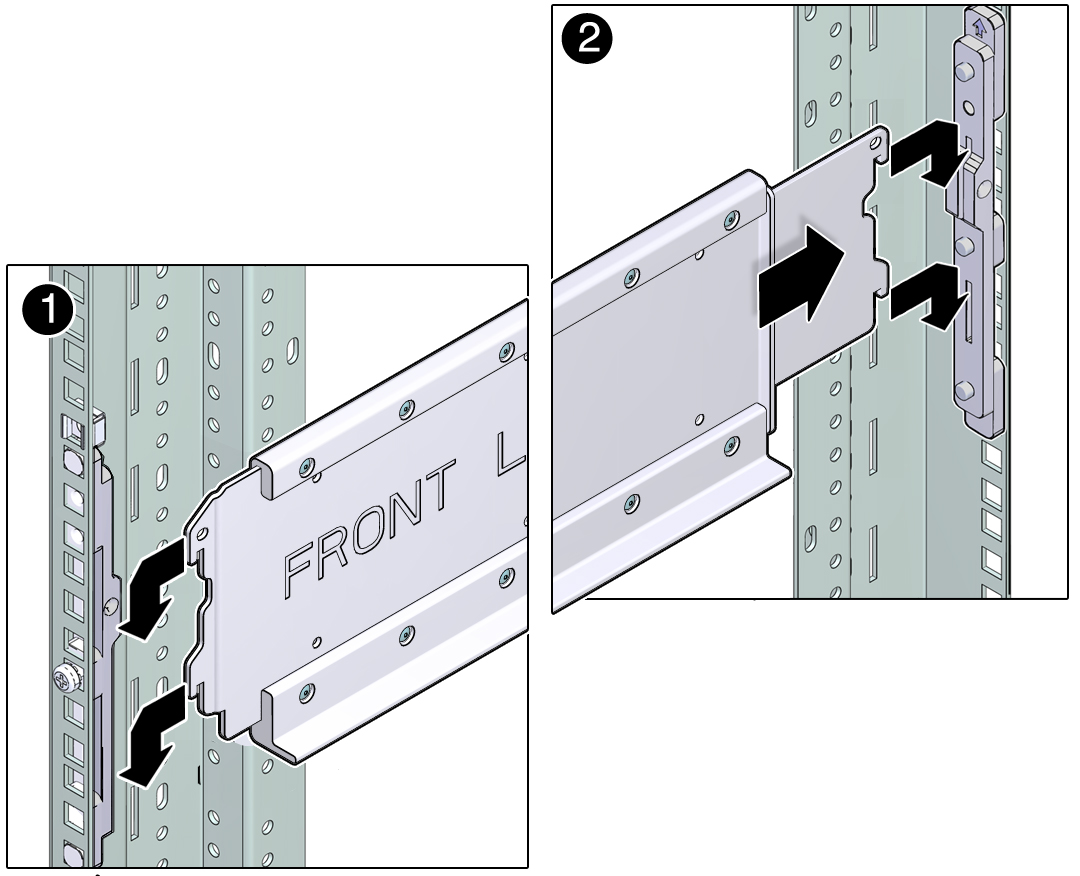
- Install the shelf rails.
Note - The shelf rails are marked “FRONT LEFT” and “FRONT RIGHT” (as viewed from the front of the server).- Position the left shelf
rail between the front and rear rack posts.
The shelf rail slides in and out to fit racks of different depths.
- Extend the shelf rail and insert the rear hooks into the adapter slots.
- Push the shelf rail down to engage the hooks.
- Insert the front hooks into the adapter slots.
- Push the shelf rail down to engage the hooks.
- Repeat steps a - e for the right
shelf rail and confirm all the rail hooks are fully engaged in front
and rear adapters.

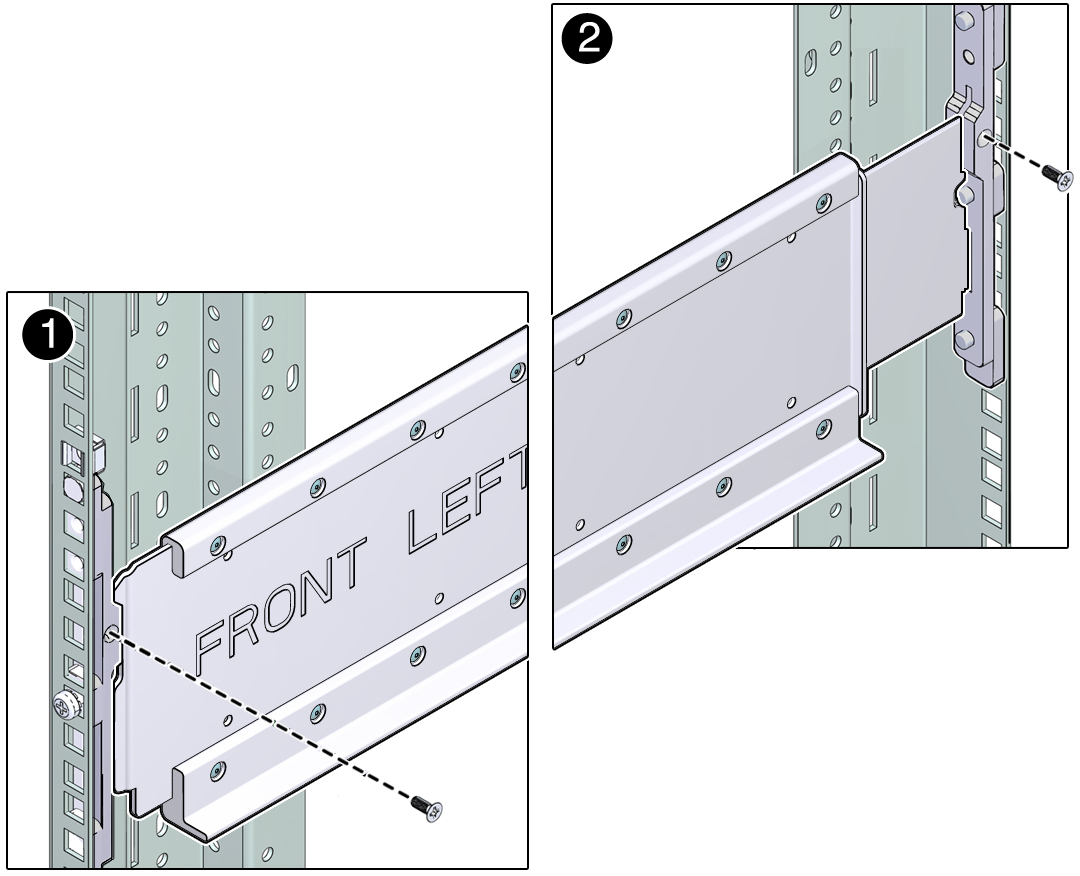
- Secure each shelf rail with two rail
lock screws (one M4 x 10 flat head screw on each adapter bracket).

- Position the left shelf
rail between the front and rear rack posts.
- Consider your next step.
- If you are installing a CMA, see Installing the CMA.
- If you are installing the server into an equipment rack that will be shipped to another location, see Installing the Shipping Brace Assembly.
- If you are installing the server, see Installing the Server.

