Replace a Failed DIMM
This procedure uses the DIMM fault remind test circuit in the CMOD to identify the failed DIMM. The circuit is a charged, time-limited circuit. Once power is removed from the server you have 10 minutes to use the circuit.
Use this procedure to replace or reset a DIMM.
Before You Begin
-
For component serviceability, locations, and designations, see About System Components.
-
Use Oracle ILOM to identify the location of the failed DIMM and obtain CMOD designation information.
-
Prepare the server for warm or cold service.
-
For servers equipped with SW 1.0 and with versions of Oracle ILOM older than 3.2.4.18, use cold service. See Prepare the Server for Cold Service.
-
For servers equipped with SW 1.1 and with Oracle ILOM 3.2.4.18 or newer, use cold service or warm service. For warm service, see Prepare the Server for Warm Service.
-
- Remove the CMOD that contains the failed DIMM. See Remove a CMOD.
-
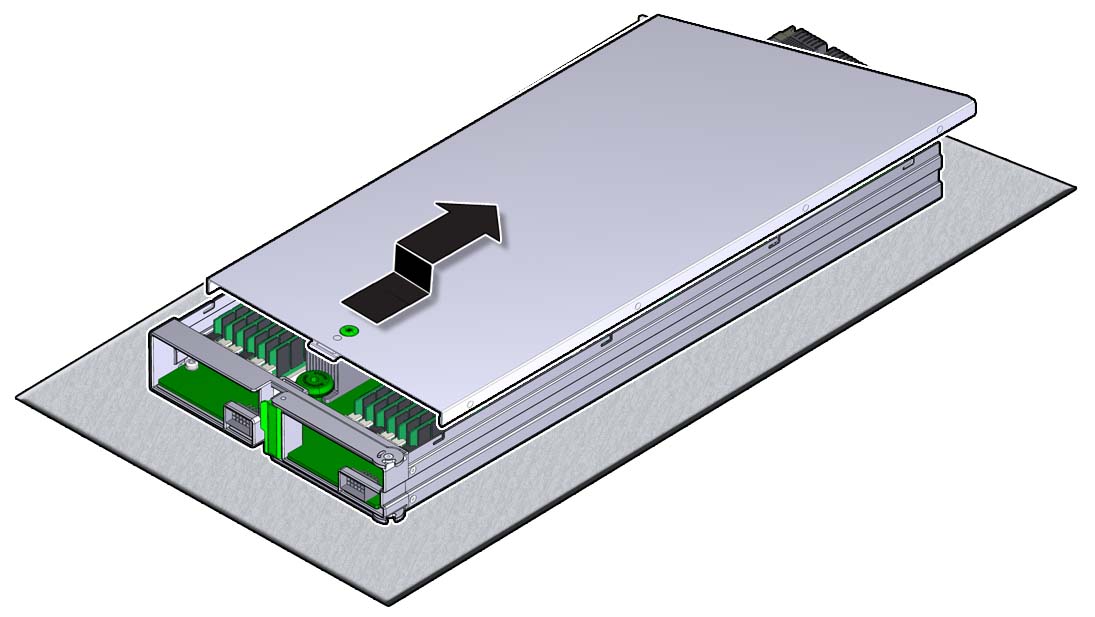
To remove the CMOD top cover, push the release button, slide the cover
away from the front of the CMOD, and lift it off the CMOD.

Caution - Component damage. CMOD components are extremely sensitive to electrostatic discharge. Wear a wrist strap and use an anti-static wrist mat.
See Remove and Install the CMOD Cover.
-
To locate the failed DIMM, press and hold the Fault Remind button.
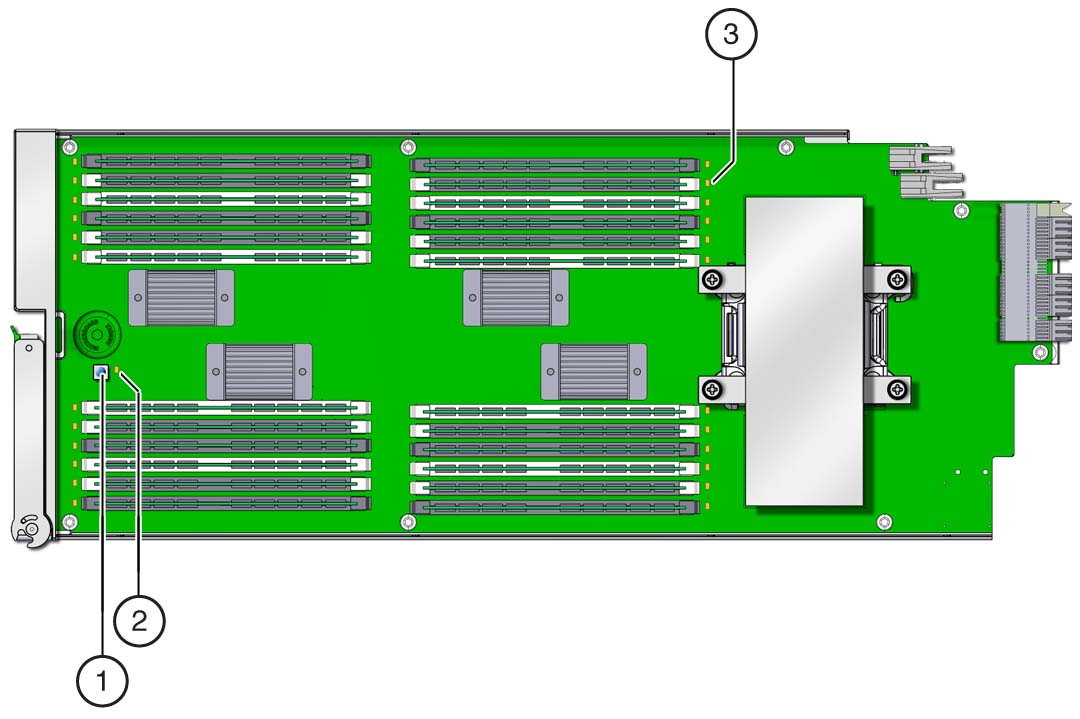 Call OutDescription1Fault Remind button2Power OK indicator3DIMM slot fault indicator (one for each slot)
 -
Verify that the Fault Remind Power indicator is lit.
The green LED lights to indicate that the circuit is operational.
-
With the Fault Remind button pressed, look for a lit DIMM fault
indicator.
The indicators are located next to the DIMM slot.
-
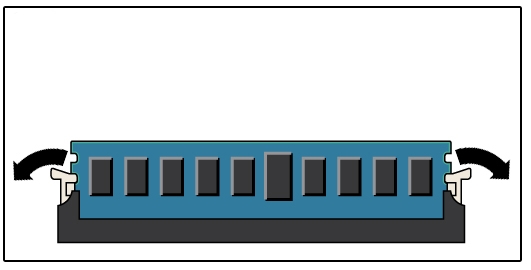
To remove the failed DIMM from its slot, simultaneously rotate the two
DIMM slot levers outward to their fully open position.
This action extracts the DIMM from its connector.
-
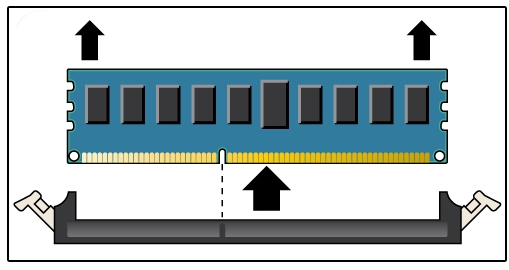
Remove the DIMM from the CMOD.
-
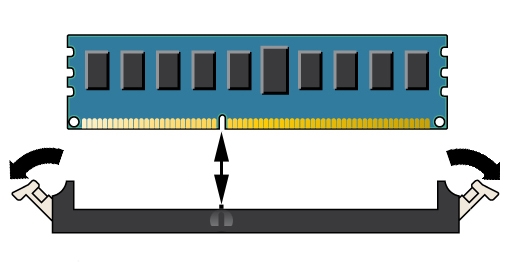
To align the replacement DIMM in the slot, ensure that the notch on the
DIMM connector edge lines up with the key in the DIMM slot.
-
To install the DIMM in the slot, simultaneously press down on both edges
of the DIMM, so the DIMM enters the slot evenly.
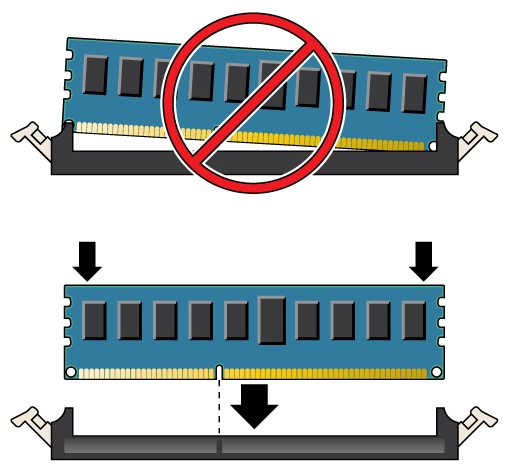
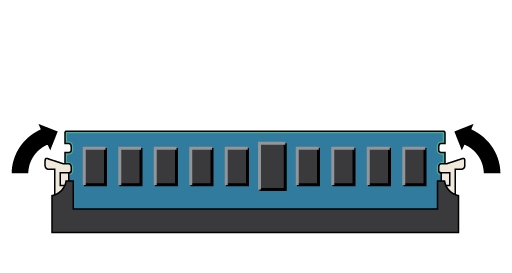
This action forces the DIMM into the slot and causes the two slot levers to rise and lock the DIMM in the slot.
-
Verify that the DIMM sits evenly in the slot and is locked.
Both levers should be in their fully closed and vertical position. In this position, the levers lock the DIMM in the slot.
- To align the CMOD cover, position it over the CMOD with the lip end of the cover toward the front of the CMOD.
-
Set the cover on the CMOD so that the edges of the cover encapsulate the
edges of the CMOD.
When correctly seated, the cover extends slightly over the back end of the CMOD.
-
To lock the cover, slide it toward the front of the CMOD until it locks
into place.
This action is accompanied by an audible click.
Next Steps